Archive for the ‘The Garage’ Category

So! Are you ready for some more sewing adventures? Yes? Good – It’s great to have you on board!

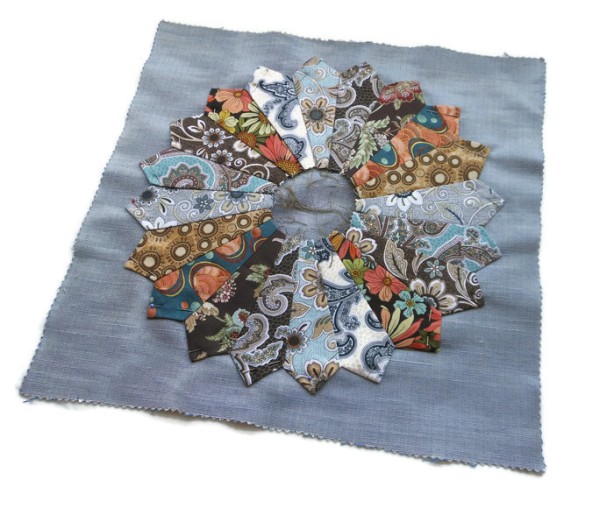
If you followed my last post carefully you should have ended up with something that looks a little bit like this:

DSCN0521

Today we’re going to add the finishing touches and incorporate it into a really simple cushion design.

Ready to start? OK, grab yourself a half metre of a plain, hardwearing fabric and cut a square measuring 35 x 35 cms and two rectangular pieces measuring 35 x 25 cms.

Take your square and fold in half then half again and give it a little press with an iron – This shows you where the centre is.

X marks the spot!

X marks the spot!

Now you’ll need to position your beautifully crafted patchwork using the crease lines to help you. Once you’re happy with it’s position pin everything securely in place.

DSCN0525

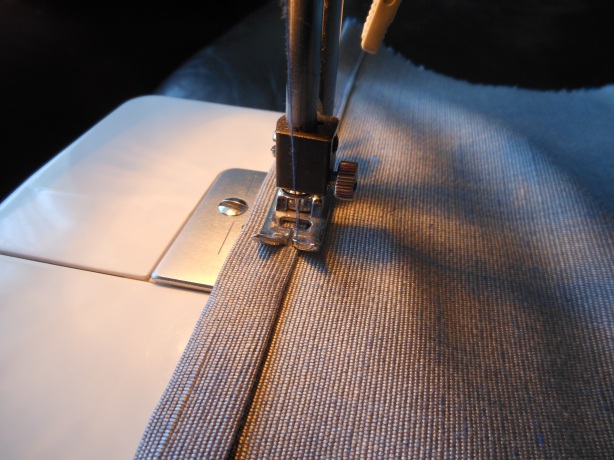
Now for a bit of sewing – Either using a zig-zag or standard straight stitch, carefully sew along the edges of your work, removing the pins as you go.

DSCN0527

This part takes a bit of time and requires a lot of lifting of the sewing foot and re-positioning – Just stick with it; You’re nearly there 🙂

Now you need to find a piece of scrap cardstock which we’ll use to make the central piece of our patchwork. You’ll need to cut a circle of card that’s slightly bigger than that unsightly hole in the middle of your work, then cut an even larger circle of fabric – It doesn’t matter if it’s a bit rough; No-one’s going to see your wonky scissorwork.

DSCN0530

Now take a needle and thread and place a line of running stitches around the edge of your fabric circle, put you card circle in the middle and pull the threads tight so that they gather neatly round it.

DSCN0532

Press with an iron and take care NOT to burn your fingers. Remove the card and Hey Presto! – A perfect fabric circle to add to the centre of your work.

DSCN0535

Now you’ll need to pin it into position…

DSCN0536

And sew it into place.

DSCN0539

This is the stage when it’s probably a good time to do another little happy dance and marvel at your completed patchwork. Do the Instagram, Facebook, Twitter thing too if you have to – It’s good to share your triumphs with others.
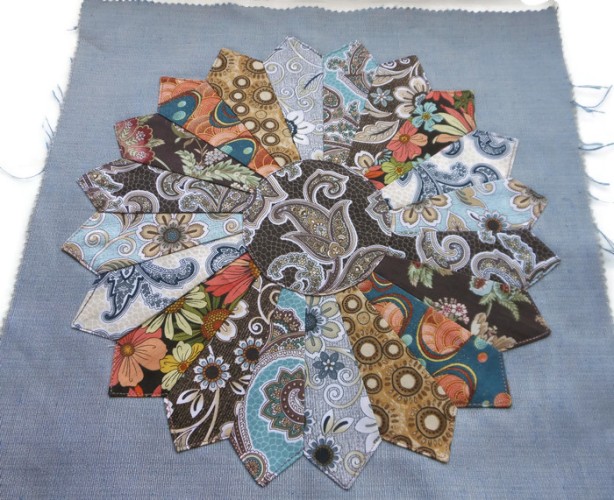
Yay! The front of your cushion cover is complete - Gone forever are those unsightly threads and frayed edges of fabric.

Yay! The front of your cushion cover is complete – Gone forever are those unsightly threads and frayed edges of fabric.

So we’re on the home run – Not much more to do until we’ve made our marvellous cushion cover.

First we need to turn our attentions to the two rectangular pieces of fabric that are going to make up the rear of our cushion. We’re not going to fuss with zips or get into a muddle with buttonholes, we’re just going to make a simple envelope fastening so start by hemming each piece.

DSCN0540

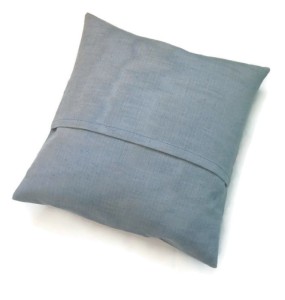
Once your hems are sorted you’ll need to piece all the elements together – Remember! You’re creating an envelope fastening at the back so you need to overlap your two rectangular pieces. Pin everything into place. take a deep breath and get ready to do your last bit of stitching 🙂

Yeah I know! Get me with the snazzy label :)

Yeah I know! Get me with the snazzy label 🙂

Now it’s a simple matter of sewing around all four edges of your cushion cover. I usually make a second pass with a zig-zag stitch as this helps to prevent fraying and also ensures nice strong seams that won’t burst open any time soon. It’s also a good idea to snip the corners off to reduce fabric bulk and make it easier to turn your work.

DSCN0548

And, speaking of turning your work, that’s the next thing you’ll need to do. It’s time for the big reveal! Are you as excited as I am?

Well? How does it look?

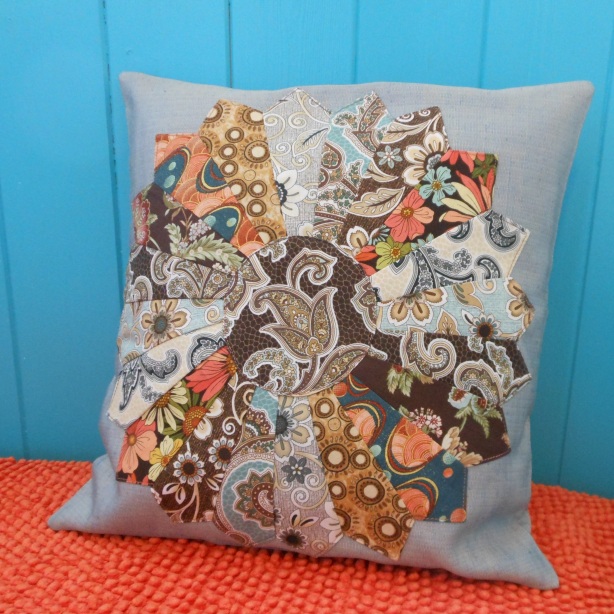
Time for a final press with the iron and then we’ll pop a cushion inner into our marvellous make. If you’ve followed this tutorial closely you’ll have made a cushion cover that’s just the right size to take a ‘Krakris’ cushion which you can buy at Ikea for the princely sum of £1 – Total Bargain!

DSCN0566

Ultimately though, you’ve made something that looks like a million dollars; You should be dead proud of yourself 🙂

And now you know how to do it, what’s stopping you? Go on! Make a few more and give your home a little makeover – You’ve got no excuse not to 🙂

Happy Stitching Folks!

DSCN0552DSCN0555

Plump up a cushion and come and join me for a chat…

You may well need to be sat down for this - Feel free to plump away ;)

You may well need to be sat down for this – Feel free to plump away 😉

After a lengthy hiatus I have returned with not one, but two, back-to-back tutorials which will hopefully see you making your very own soft furnishings just like the example pictured above.

What’s that you say? You don’t think you’ll ever be able to make such a thing? Don’t be daft – It’s easy! Let me show you how…

By the end of this tutorial you'll hopefully be looking at something that looks a bit like this...

By the end of this tutorial you’ll have created something that looks a bit like this…

Here’s the deal; By following this first tutorial you’ll have created the bulk of your first ever piece of Dresden Plate patchwork. You’ll also no doubt have had to stop a few times along the way to do a little happy dance as you see how incredibly easy it really is. You might even have to pause to post pictures on Instagram, Facebook and beyond. Either way, I guarantee that you will be bursting to share what you’ve made with your friends – Just you wait and see!

DSCN0498

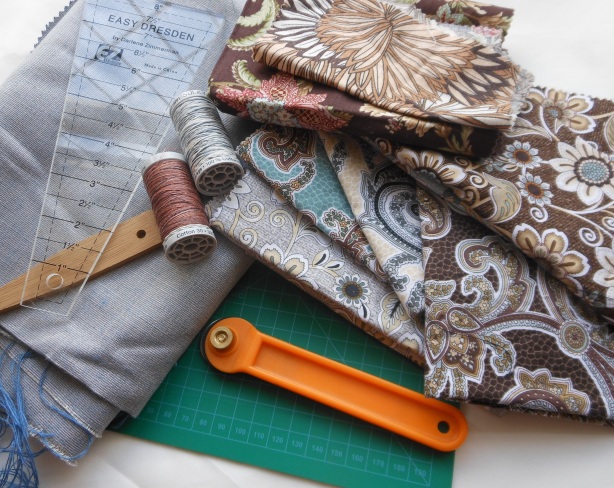
First of all, you’ll need to gather together your crafting arsenal – It’s a lengthy list to tick off…

You will need roughly half a metre of a plain, hardwearing fabric (This is more important in our next session so don’t worry if you haven’t got anything to hand straight away).

You’ll also need plenty of fabric scraps that measure at least 5 inches long by about 3 inches wide; You’re going to need twenty separate pieces to make up the circular part of your patchwork, plus one extra piece that we’ll be using to make the centre. For my design I chose ten different fabric prints but ultimately it’s up to you how many you use; One, two, twenty… you decide.

Coordinating thread, a sewing machine, pins, scissors etc

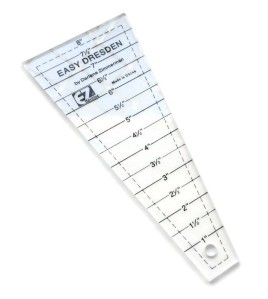
A dresden plate ruler, rotary cutter and mat. Scissors and a card template work just as well but it’ll take three times as long to get everything ready.

A Dresden Plate ruler - Handy if you've got one but not essential to the task.

A Dresden Plate ruler – Handy if you’ve got one but not essential to the task.

Don’t forget to find something blunt to help turn any corners inside out – It’s tempting to use scissors but really annoying when you push too hard and burst through the fabric!

Right! I think that’s about it; Let’s make a start.

First things first you need to cut out twenty separate pieces of fabric that are all five inches in length. You’ll see that they resemble a wedge shape with a wide top that tapers to a much narrower bottom; From now on we’ll refer to these as ‘blades’. Once you have all your blades, start laying them out in a circle and have a little play around at mixing your different fabric designs and colours until you’re happy with the way they look.

Don't be too worried about changing your mind at this stage - Nothing is set in stone until we start stitching...

Don’t be too worried about changing your mind at this stage – Nothing is set in stone until we start stitching…

Gather your blades together into a neat little pile and now we’re going to start sewing…

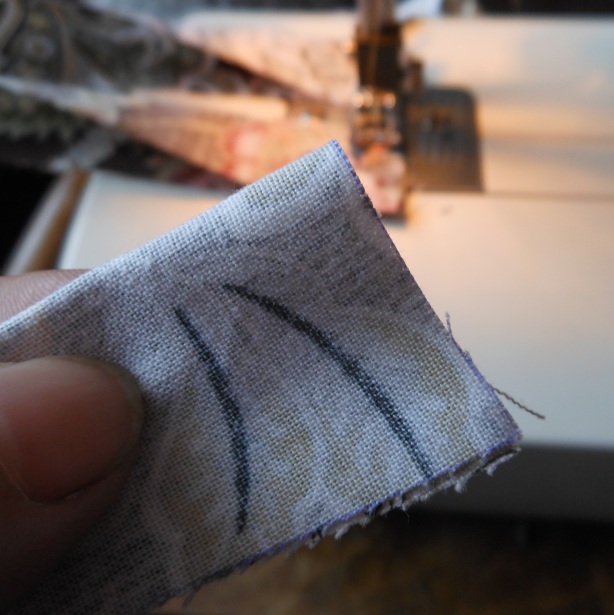
Take your first blade and fold the widest end in half with the printed design on the inside.

Make suret hat the fabric design is kept to the inside...

Make sure that the fabric design is kept to the inside…

Sew down the folded edge but don’t break your thread – Let the machine sew a few blank stitches and then sew your next blade…

Just keep sewing - No need to break your thread after each blade.

Just keep sewing – No need to break your thread after each blade.

Keep on sewing until you’re left with a little ‘blade bunting’ – That way everything’s kept in order ready for the next stage.

DSCN0504

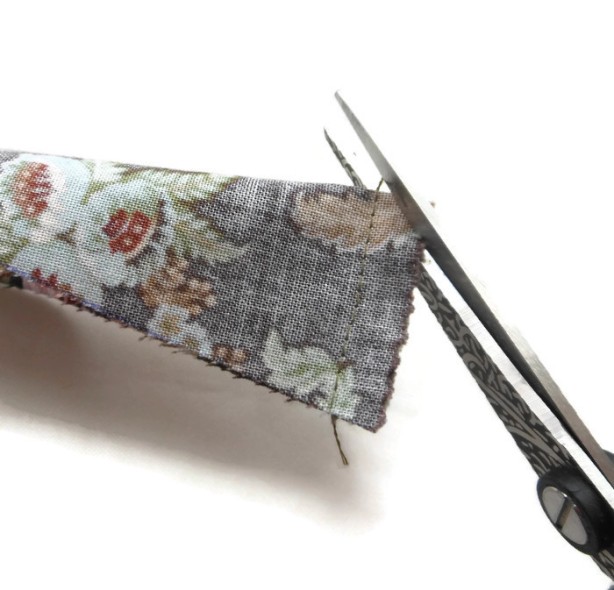
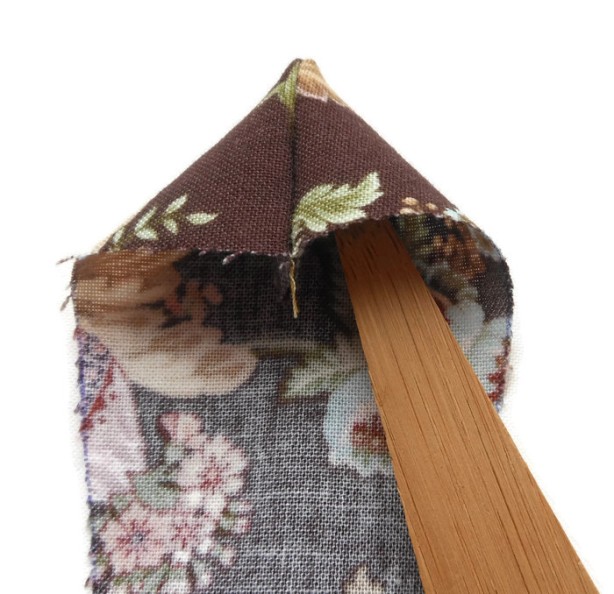
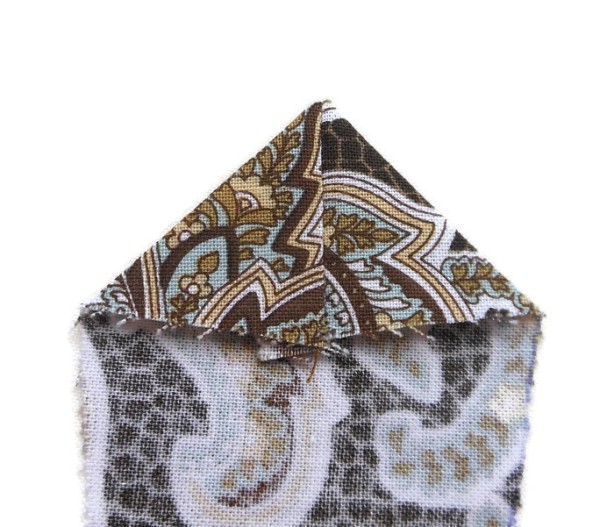
Use your scissors to remove the first blade. By stitching down the wide end we’ve effectively created a corner which we’ll neaten up by first snipping off any excess fabric and then turn to reveal the point…

Snip any excess fabric away which could create bulk in the corner - Don't go too close to your stitching!

Snip any excess fabric away which could create bulk in the corner – Don’t go too close to your stitching!

Turn your corner inside out...

Turn your corner inside out…

Use something blunt to achieve a neater finish...

Use something blunt to achieve a neater finish…

Press each blade with an iron for crisp, clean corners.

Press each blade with an iron for crisp, clean corners.

Still with me? By now you should have twenty stitched and pressed blades arranged in some kind of order that works well for you – If you still need to play around then now’s the time to do it; In a moment we’re going to start sewing everything together so you can’t change your mind!

DSCN0513

OK – Now it get’s really exciting.

Take your first two blades and place them so that their right sides (the printed bits) are facing each other. Match the sloping edge of each corner point and the side pieces together and stitch…

It's important to make sure that the sloping edges of each corner and the long side of each blade match up accurately...

It’s important to make sure that the sloping edges of each corner and the long side of each blade match up accurately…

Keep working 'in the round' stitching each blade together until you run out..... then stitch the two ends together and do a little happy dance!

Keep working ‘in the round’ stitching each blade together until you run out….. then stitch the two ends together and do a little happy dance!

It’s at this point when you might find yourself breaking off every few minutes in order to admire your handiwork. Just keep joining each blade and enjoy taking a sneaky peek at how it’s all beginning to come together. Heck! Put that sewing down and have a little happy dance – You’re making something that looks awesome – Way to go, you!

Have you sewn everything together? Have you joined the end pieces together to make a circle? Aren’t you just the happiest little bunny on the block? Give yourself a pat on the back and do your first reveal to the world…

Whooo Hoo! I made a circle thingy with lots of thread sticking out all over the place...... Is it supposed to look like this?

Whooo Hoo! I made a circle thingy with lots of thread sticking out all over the place…… Is it supposed to look like this?

Your final task for today is to give everything a little press with the iron. First, you’ll need to place your work face down and pull any excess threads down and into the centre… we don’t need to trim anything off – It’s all going to be hidden away in our next session…

Now press your work so that all the seams are facing in the same direction…

DSCN0520

Time to make yourself a cup of coffee and celebrate all your hard work with a round of biscuits. Most of the fiddly stuff has been done; In the next tutorial I’ll show you how to complete your patchwork by incorporating it into a simple, but effective cushion cover design…

DSCN0552

Until then, Happy Stitching Folks! It’s great to be back 🙂

Plot 29 - All posh and grown up with it's own blog and EVERYTHING!!!!!!

Plot 29 – All posh and grown up with it’s own blog and EVERYTHING!!!!!!

The last few months have been manic! What with allotment stuff, non-stop making, a rather marvellous holiday with wall to wall sunshine and an extra campervan to look after (my T5 daily driver no less)………. 😉

In truth, I really haven’t had a minute to blog that much about stuff – I just seem to be busy ALL the time!

But today I stopped to draw a breath (albeit after three hours spent at the sewing machine since early this morning) and tried to capture a little bit of summer before I blink and it’s gone…….

So I went up to Plot 29 – My little bit of heaven……….. Now officially the eighth best little bit of heaven in the whole of Leeds and the surrounding areas (I confess that I got a bit competitive over the last few months!). …… I mourned at the fact that the weather may have laid waste to a few things, shrugged my shoulders (See how I don’t get stressed?) and picked some big plump courgettes with a mind to preserving them for days that are drearier….

As a result, here’s a recipe for courgette relish (or, What I did with the rest of my day……):

YOU WILL NEED:

1kg of courgettes – washed, dried and then chopped into little bits;

2 medium sized onions – chopped into little bits;

1 shallot – chopped into little bits;

1 green pepper – chopped into little bits…… what can I say? I find chopping vegetables to be very therapeutic! The smaller; The better.

1 tbsp of salt – Place all your chopped vegetables into a bowl, sprinkle/mix in the salt, cover with a tea-towel and leave to ‘brine’ for at least an hour….. Rinse thoroughly with cold water and drain once this is done;

Try to leave your vegetable mix brining for at least an hour - This will help to remove some of the excess liquid held inside the courgettes and keep them crisp and with 'bite' in the finished relish.

Try to leave your vegetable mix brining for at least an hour – This will help to remove some of the excess liquid held inside the courgettes and keep them crisp and with ‘bite’ in the finished relish.

In a heavy based pan measure out:

250 ml of cider vinegar;

250ml of white wine vinegar;

350 g of granulated sugar;

1 finely chopped green chilli;

1 tsp turmeric;

2 tsp mustard powder;

2 tsp cornflour;

1 tsp dried coriander seeds;

1 tsp fresh coriander seeds (This is optional – If you can’t get fresh seeds just add an extra tsp of dried ones).

Then you just:

Place the pan on a medium heat and keep stirring until the sugar is dissolved.

Add the chopped vegetables and bring to the boil. Make sure you keep giving everything a good stir.

Once boiling, reduce the heat and simmer for 45 minutes, stirring occasionally.

If, after this time,  it has reached the consistency of relish, spoon carefully into sterilised, warmed jars and seal; If it needs a little more time to reduce simply turn up the heat and boil vigorously for a few minutes more.

At this point I usually give the mixture a little stir with a sterilised skewer to remove any air pockets/bubbles.

Seal jars and allow to cool before labelling.

Ideally, this relish needs about six weeks to mature and allow the flavours to fully develop. Once opened it should keep for a further six weeks/two months. Keep refrigerated once opened.

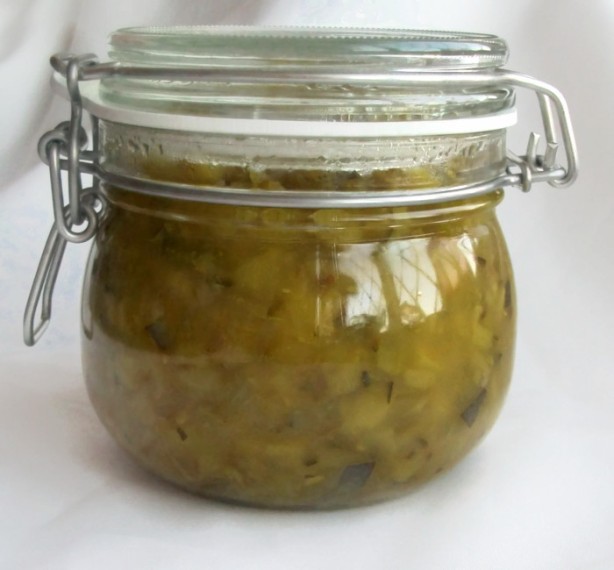
Voila! A little taste of summer, captured in a jar!

Courgette Relish - Using ingredients picked straight from the eighth best plot in Leeds and beyond ;)

Courgette Relish – Using ingredients picked straight from the eighth best plot in Leeds and beyond 😉


Exciting stuff is happening! And there’s the promise of some very busy times ahead at the Bully Bus Manufactory!

Recently, I became a features writer for UK Handmade; It’s kept me working hard for the last month or so and I have to say I’m enjoying the new role and the challenges it brings. I’m writing fortnightly articles for a series called ‘The Road Less Travelled’ (something I’ve been featured in myself many moons ago) which celebrates the stories behind the people who’ve left normal, nine to five careers far behind them to pursue a creative path and build their own businesses. It’s very inspiring; Everyone’s story is different – No journey is ever the same.

You can read the latest interview here or wait until Saturday 29th March, 2014 for the next article to be published.

Then there’s an invitation I recently received to become a participant in the Festival of Thrift’s, ‘School of Thrift’ project…….

John Orchard, Wayne and Gerardine Hemingway - Part of the driving force behind the Festival of Thrift.

John Orchard, Wayne and Gerardine Hemingway – Part of the driving force behind the Festival of Thrift.

The festival itself launched in 2013 over the weekend of 27th/28th September, at Lingfield Point, Darlington and made a big impact both regionally and nationally with 27,000 visitors (17,000 more than expected), pouring through the gates – All eager to see what the UK’s first ever Festival of Thrift was about.

And if you were one of the people that attended you would have seen examples of sewing, dancing, foraging, playing, music-making, hula-hooping, theatre, gardening, upcycling, eating, bargain-hunting, learning, oven-making, quilting, baking, crafting – and plenty of inspiring talks on sustainable topics also taking place.

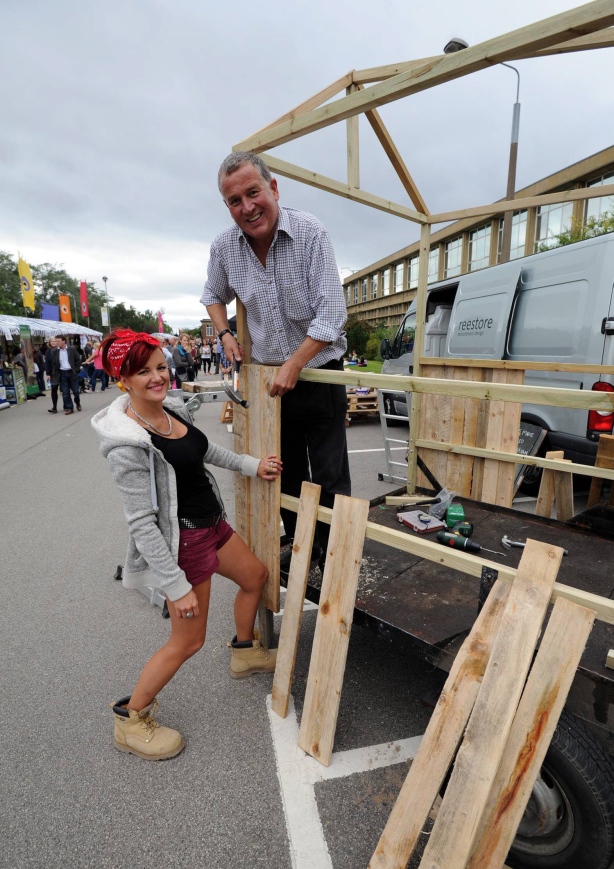
The Festival Of Thrift - Build it and they will come!

The Festival Of Thrift – Build it and they will come!

NNP-THRIFT_FESTIVAL_114

The idea behind the festival was to bring a free cultural celebration to the people of the North East, the UK and beyond, where people could find the fun in learning how to reuse, recycle/upcycle and ultimately save money and benefit the environment.

Wayne Hemingway of Red or Dead.

Wayne Hemingway of Red or Dead.

The fantastic team behind last year’s accomplishment, Co-Curators Wayne and Gerardine Hemingway, Festival Director Stella Hall and John Orchard, a Director of Marchday, the owners of Lingfield Point, are back in full force for 2014 with dates set for the same weekend in September.

Wayne said: “The success of last year proves even further that thrift is not just a flash in the pan but a set of values applied to the way you live your life.

Thrift has become a vital, contemporary movement reflecting traditional values, and it’s evolving each day as our needs and the needs of our planet change.

What we found last year is that thrift provides a community and a reason for people to get together – from families who want a free, fun day out with fantastic entertainment, food and activities to those who are looking to learn new skills whilst saving money and contributing positively to the planet as they’re doing it

The Festival of Thrift is an apt response to the economic climate and can play a positive and uplifting role in helping folk to navigate their way through times of low disposable income. I’m delighted it’s back for a second year and I hope it makes even more of an impact this time round.”

NNP-THRIFT_FESTIVAL_102

And the ‘School of Thrift’ ? What’s that all about?

The School of Thrift is a network of bloggers that support the principles behind the Festival of Thrift. Basically the aim is to create a really fun, thrifty, online community for people to be a part of and go to for advice, tips and tricks and find folks like me ready to share my wonderful wisdom with everyone. (I didn’t come up the ‘wonderful wisdom’ thing btw – Credit must be given to the bods behind the project for that little gem).

So what do I do? What can you expect from me?

Business as usual basically 😉 I’ll occasionally post content written specifically with the School of Thrift in mind – hints, tips, tutorials, recipes etc – The same kind of thing I’ve been doing for the last few years really……..  I’m delighted to say that my blog has been described by the team back at ‘FOT SOT’ base camp as ‘right up their street’ – So there’s no real change planned for the approach to how I work or the kinds of things that I’ll be posting – Business very much as usual 😉

I’m really looking forward to taking part!

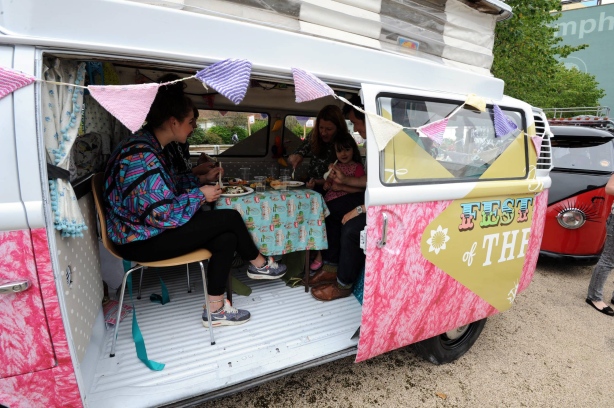
The Fetival of Thrift - Campervan friendly!

The Festival of Thrift – Campervan friendly!

NNP-THRIFT_FESTIVAL_112

For more information on the Festival of Thrift 2014 programme please visit the website at www.festivalofthrift.co.uk and sign up for updates.

More information about the School of Thrift and current participants can be found on Facebook, Twitter, Instagram and Google+

Phew!

And Finally! I’m also going to be a guest designer for Handmade Harbour. MORE exciting stuff! If you’ve not paid a visit to either the website or blog then you’re in for a real treat…… there’s beautiful digital stamps and downloadable papers etc to purchase at very reasonable prices, tutorials, sewing patterns, papercraft challenges, freebies and ooodles more!

And there’s campervans! Lots of reasons to make a visit asap 😉

So this week I purchased a lovely little Handmade Harbour splitty design to use in assorted projects and also took advantage of a brilliant egg cosy tutorial that Josie of ‘Sewforsoul‘ had recently posted……

You can find the full tutorial here. I love Josie’s work – She’s a fellow lover of vintage fabrics and an accomplished freemotion machine embroidery, crafting type person; I suspect we have very similar tastes in many things……….. Maybe she could join the School of Thrift too 😉

And my egg cosy?

101_2454

I think I’m going to make one in every colour of the rainbow – A different coloured cosy for every day of the week. What a brilliant way to start each day 😉


Tied up in knots!

Posted: January 24, 2014 in The Garage
Tags: , , ,

A rather quick post this week, with something equally speedy to make as the main subject……..

I decided to have a go at finding something on the random tutorial generator to inspire me after drawing a blank with much of the Pinterest feed I’ve seen over the last few days – There’s an awful lot of glitter inspired pinspiration around at the moment……. the bullies of the bus would have a field day; I don’t fancy chasing round the house wiping up sparkling pawmarks from every surface possible and the thought of what might happen with a careless swish of their ever wagging tails fills me with dread. They love ‘helping’ just a little too much!

Biff of the Bully Bus - If he can't resist burying his head in a craftbox full of feathers, what hope would there be for me with a pot of glitter?

Biff of the Bully Bus – If he can’t resist burying his head in a craftbox full of feathers, what hope would there be for me with a pot of glitter?

So I hit the button here…….. and then I hit it again a few more times until something caught my eye 😉

My eyes finally came to rest here: http://www.kimmelkids.com/diy-master-category/d-i-y/macrame-key-fobs/

Perfect! I have plenty of beads and waxed cotton cord stashed away – As I’ve kept on with occasional bracelet production since that first tentative dip into making macrame jewellery many moons ago……

https://bigbluebullybus.wordpress.com/2012/02/13/adventures-in-macrame-bracelets/

And I needed a new keyring for the million and one padlocks currently keeping assorted gardening tools safe inside the allotment shed…….

So, a quick dip in the bead box turned up the perfect handful of subtly glowing ‘miracle’ beads – Seven in total, just right to make a little rainbow to carry around in my pocket 😉

Perfect! Just need to find that elusive pot of gold now!

Perfect! Just need to find that elusive pot of gold now!

No glitter was harmed during this week’s make – Good Result! And as well as it being a great little crafting activity to do with kids I am happy to report it can be carried out equally well in the company of slightly crazy English Bull Terriers. Happy Days!

So it’s the second instalment of my weekly dip into all things Pinterest & tutorialwise and this week I fell in love with a batch of heart themed goodies………..

This bunting design won hands down for me!

This bunting design won hands down for me!

There’s oodles of stuff dedicated to Valentine’s Day at the moment but the outright winner for catching my eye and making me want to pick up a crochet hook and get started straight away was this marvellous bunting tutorial from Jam Made Studio – You can find the instructions here: http://jammadestudio.blogspot.com.au/2013/03/crochet_17.html

I’ve decided that I’ve GOT to have some for my shed………. and then maybe a little span in the camper van might look quite nice………… Son 2 mentioned that he might want some to present to his girlfriend as a Valentine’s gift…….. the possibilities for creating string after string may well be endless!

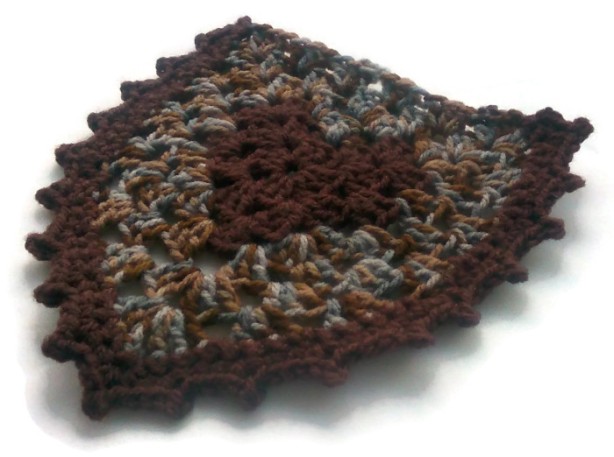
So I’ve made a start; Should keep me quiet for a bit………I’ve chosen shades of brown and grey for the shed and sorted out an appropriate colour palette of yarns to complement the bus interior. Son 2 will be consulted shortly as to what his requirements may be……. Yes! I think I may be very quiet for a day or so 😉

The first pennant for the shed is in the bag - Just another five or six to make and the job's a good 'un!

The first pennant for the shed is in the bag – Just another five or six to make and the job’s a good ‘un!

Oh well! Time to start working on another pennant – Bunting won’t make itself I suppose…….

Happy Crafting Folks!!!!

I’ve resolved to try much harder with blogging this year and set myself a challenge of once again attempting to make something each week using the Internet to aid me in my quest. I thought maybe having a go at my own versions of some of the fabulous ideas I’ve collected through Pinterest, coupled with a snazzy random tutorial generator would be a good place to start……. So here goes……..:)

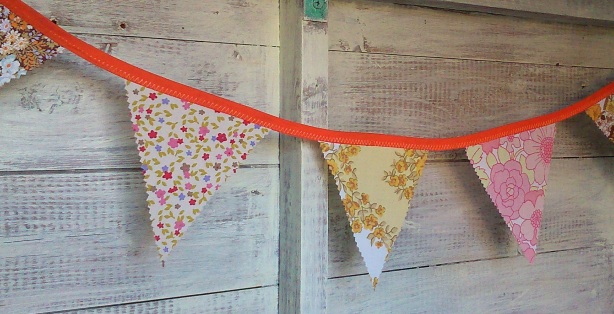
Crochet edged bunting - A must have for the Bully Bus!!!!!!

Crochet edged bunting – A must have for the Bully Bus!!!!!!

For a while now I’ve been collecting vintage handkerchiefs and embroidered linen tablecloths with a view to making some bunting for assorted ‘glamping’ trips planned in the near future. I love the idea of adding a crocheted edging as something a bit different from the norm and there’s loads of photo examples of this popping up on Pinterest all the time – on bunting, pillowcases, tea-towels etc. So today I sat down and decided to have a go for myself after spotting a link to this blog post in my daily pinspired newsfeed.

However, I did decide to adapt the idea a bit and rather than use pierced paper I plumped for working with a stitched heart stuffed full of dried lavender.

Memories of last summer captured in a scented sachet.

Memories of last summer captured in a scented sachet.

I’d fastened it together with a basic blanket stitch ; The perfect base to add some crochet to, and armed with a fine mercerised cotton and a 1mm crochet hook I worked around the edge with a simple scallop design using double crochet.

I really didn't like the look of it at this stage!!!!

I really didn’t like the look of it at this stage!!!!

Although it was a fairly straightforward task to complete I really wasn’t happy with the overall look of the end product – It looked like something you’d pick up in the local Cath Kidston store – And I’m not a fan of mass produced goods that have been made in China at the best of times!!!!!

Still, this was only a practice run in preparation for the bunting that I plan to make in a few weeks time…….. I added beads and then felt a bit happier……

I think I can just about live with it now ;)

I think I can just about live with it now 😉

I’m going to hang this on one of my crochet covered coathangers in the camper van wardrobe – Not my favourite make in the whole world but as a trial run for adding a crocheted edge to something it’s worked out quite well 😉

Maybe I need to hurry up with making the actual bunting itself and then have another go – Plenty of time for further experimenting I guess…………..

Until next week – Happy Crafting Folks!!!!! :0)

New blog.

Posted: January 4, 2014 in The Garage

Well I’ve made a start on my allotment themed blog – It exists and I’ve said hello to everyone at any rate……. 😉

You can find it here.

Now to lots of hours ahead of me fiddling around trying to get it looking acceptable before adding any content. Ho hum! Remind me why I do these things………….. 😉

Well it’s finally 2014! And I hope that everyone had a very merry Yuletide break and managed to remain relatively unscathed by the excesses of alcohol and food that the season brings.

I must admit that it was a fairly quiet and cozy time at Bully Bus HQ spent mainly with Mr Other Half and the bullies of the bus. Plenty of time to eat far too much rich food whilst lazing in front of rubbish TV; A typical Christmas for us in many ways!!!! 😉

The latest jobs to do on Plot 29 were tackled with great gusto though – It’s now sporting a new fence, the shed has been moved and yet more digging is underway……….

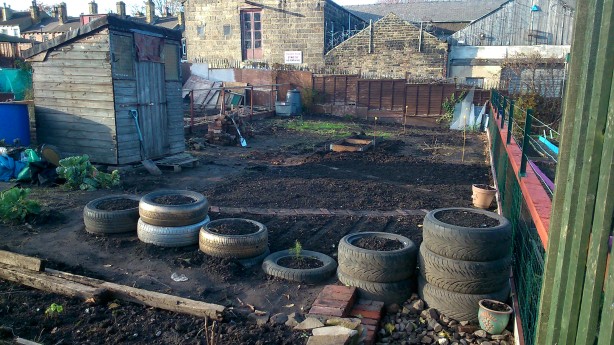
Plot 29 on the final day of 2013.

Plot 29 on the final day of 2013.

But rather than run the risk of this turning into an allotment themed blog every time I decide to add a new post, I’ve resolved to create Plot 29’s very own space in the blogosphere – An online record of how it’s all shaped up since those keys were handed over at the end of October and hopefully an opportunity to share the successes and failures I have no doubt I’ll be coming up against as the growing season commences.

There’ll be no more mention of allotment related stuff here………. well, maybe an occasional hint at what’s going on from time to time……… and definitely a link to the new blog once it’s all up and running, lol, but other than that my lips are sealed :0)

It’s back to a bit of a weekly crafting challenge on here – With the aid of a little Pinspiration and an occasional dip in to a random tutorial generator.

You can view it here: http://random-tutorial.com/. It’s highly addictive!!!!!!

I’m off in to Leeds to brave the sales queues and grab some essential crafting supplies to get me started; Have a great day folks!!!!!!

Four weeks and one and a bit days on from becoming an allotmenteer! And a tad nearer to creating a beautiful growing space 😉

The end of the first month - Plot 29 begins to take shape!

The end of the first month – Plot 29 begins to take shape!

I’ve been snowed under with making things for Christmas for weeks now – my nerves are frazzled, the sewing machine sits red hot for most of the day and the folks at the local Post Office have hinted at the fact that they may well start charging me rent as I spend so much time there! Yet still I’ve managed to steal moments now and then to wander up to Plot 29 to de-stress and generally chill out and take a breather.

Not that the job’s been that easy – I’ve dug, weeded, built a few bonfires to burn some of the rubbish, humped tyres here, there and everywhere before eventually giving them their final resting place, created pathways, dry stone walls and given the inside of the shed a bit of a makeover (that deserves a post all by itself, methinks). I’ve also had an unexpected harvest of potatoes and beetroot and managed to unearth some raspberry canes which I’ve replanted in the hope of them growing on to create a fruit filled hedge next year………. Oooooh! And I’ve planted two different types of onions and two lots of garlic; I have DEFINITELY been one busy, busy bee!!!!!!

Raised beds are starting to go in ready for soft fruit, rhubarb etc - The two canes mark the entrance for a polytunnel that's going to be erected next spring to house, amongst other things, chillis and exotic stuff!

Raised beds are starting to go in ready for soft fruit, rhubarb etc – The two canes mark the entrance for a polytunnel that’s going to be erected next spring to house, amongst other things, chillis and exotic stuff!

How apt! In Hebrew, my name means ‘bee’ – Queen Bee, in fact. Apparently, ‘People with this name have a deep inner desire to create and express themselves, often in public speaking, acting, writing or singing. They also yearn to have beauty around them in their home and work environment. They are competent, practical, and often obtain great power and wealth. They tend to be successful in business and commercial affairs, and are able to achieve great material dreams’. I’ll go along with that! The power and wealth elements need a bit of working on…….. and maybe the success in business and commercial affairs – But definitely the rest of it seems to fit the bill, lol.

Bees like flowers too! Wonder if that's why I have such an obsession with all things floral.....?

Bees like flowers too! Wonder if that’s why I have such an obsession with all things floral…..?

Anywhoo! One completely unexpected outcome of all my hard work has been the fact that I’ve dropped at least a dress size through all the physical labour involved – Lugging around stones and house bricks from one end of the plot to the other might have seemed a bit tedious at times – But the effort has been worth it on so many levels!

It's burned up quite a few calories when creating things such as the grand entrance to Plot 29 - Hadn't considered this until my jeans no longer fit as they've become a whole lot looser and baggier over the last few weeks ;)

It’s burned up quite a few calories when creating things such as the grand entrance to Plot 29 – Hadn’t considered this until my jeans no longer fit as they’ve become a whole lot looser and baggier over the last few weeks 😉

There’s obviously still loads to do – Tons more digging and weeding, lots more pathways and a seating area to create, setting up some raised beds for rhubarb, globe artichokes and soft fruit bushes, planting an ‘orchard’ area, manuring the spot designated for a polytunnel that’s currently blocking the access into one of the garden sheds back at Bully Bus HQ, painting the fence and the shed aka Zen Den and putting up some nesting boxes and bug hotels for the local beasties. And speaking of our furred, feathered and invertebrate friends……….

This tiny little field mouse popped out of the undergrowth to sunbathe and watch the general proceedings at Plot 29 - He was a real cutie!

This tiny little field mouse popped out of the undergrowth to sunbathe and watch the general proceedings at Plot 29 – He was a real cutie!

Red Kites fly overhead, a little mouse has paid a visit to check on my progress so far and apparently there’s an allotment fox that does the rounds when the sun comes out. It’s definitely a nice little haven to get away from it all – No matter how busy I may be when I consider the 101 jobs that still need tackling.

It’s been a great first month as an allotmenteer – Roll on December, the Midwinter Solstice and the next set of challenges !!!!!! I’m ready for ya!!!! 😉