Posts Tagged ‘Wulli Bulli’

So! Are you ready for some more sewing adventures? Yes? Good – It’s great to have you on board!

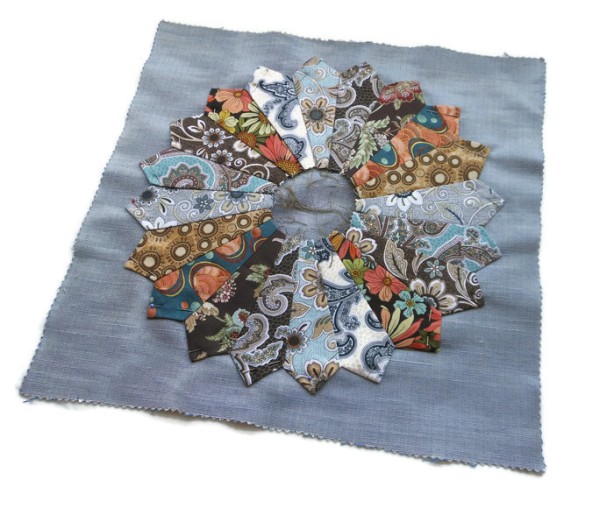
If you followed my last post carefully you should have ended up with something that looks a little bit like this:

DSCN0521

Today we’re going to add the finishing touches and incorporate it into a really simple cushion design.

Ready to start? OK, grab yourself a half metre of a plain, hardwearing fabric and cut a square measuring 35 x 35 cms and two rectangular pieces measuring 35 x 25 cms.

Take your square and fold in half then half again and give it a little press with an iron – This shows you where the centre is.

X marks the spot!

X marks the spot!

Now you’ll need to position your beautifully crafted patchwork using the crease lines to help you. Once you’re happy with it’s position pin everything securely in place.

DSCN0525

Now for a bit of sewing – Either using a zig-zag or standard straight stitch, carefully sew along the edges of your work, removing the pins as you go.

DSCN0527

This part takes a bit of time and requires a lot of lifting of the sewing foot and re-positioning – Just stick with it; You’re nearly there 🙂

Now you need to find a piece of scrap cardstock which we’ll use to make the central piece of our patchwork. You’ll need to cut a circle of card that’s slightly bigger than that unsightly hole in the middle of your work, then cut an even larger circle of fabric – It doesn’t matter if it’s a bit rough; No-one’s going to see your wonky scissorwork.

DSCN0530

Now take a needle and thread and place a line of running stitches around the edge of your fabric circle, put you card circle in the middle and pull the threads tight so that they gather neatly round it.

DSCN0532

Press with an iron and take care NOT to burn your fingers. Remove the card and Hey Presto! – A perfect fabric circle to add to the centre of your work.

DSCN0535

Now you’ll need to pin it into position…

DSCN0536

And sew it into place.

DSCN0539

This is the stage when it’s probably a good time to do another little happy dance and marvel at your completed patchwork. Do the Instagram, Facebook, Twitter thing too if you have to – It’s good to share your triumphs with others.
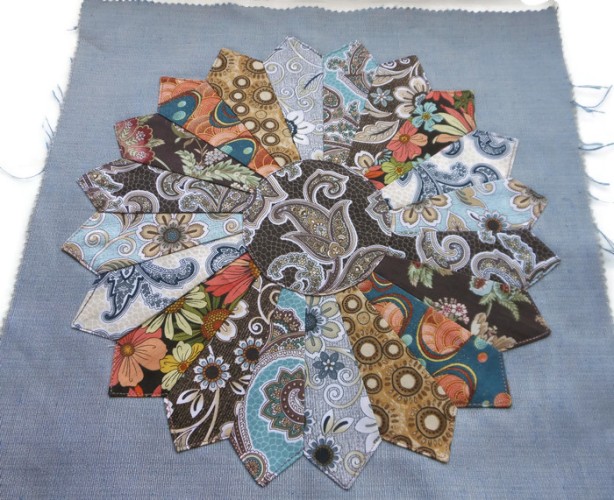
Yay! The front of your cushion cover is complete - Gone forever are those unsightly threads and frayed edges of fabric.

Yay! The front of your cushion cover is complete – Gone forever are those unsightly threads and frayed edges of fabric.

So we’re on the home run – Not much more to do until we’ve made our marvellous cushion cover.

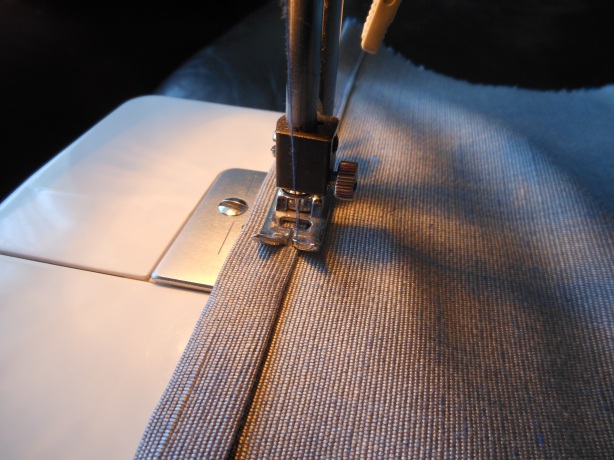
First we need to turn our attentions to the two rectangular pieces of fabric that are going to make up the rear of our cushion. We’re not going to fuss with zips or get into a muddle with buttonholes, we’re just going to make a simple envelope fastening so start by hemming each piece.

DSCN0540

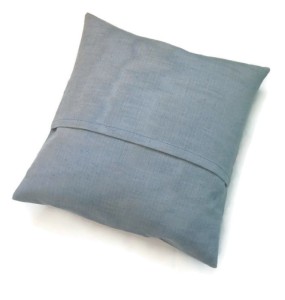
Once your hems are sorted you’ll need to piece all the elements together – Remember! You’re creating an envelope fastening at the back so you need to overlap your two rectangular pieces. Pin everything into place. take a deep breath and get ready to do your last bit of stitching 🙂

Yeah I know! Get me with the snazzy label :)

Yeah I know! Get me with the snazzy label 🙂

Now it’s a simple matter of sewing around all four edges of your cushion cover. I usually make a second pass with a zig-zag stitch as this helps to prevent fraying and also ensures nice strong seams that won’t burst open any time soon. It’s also a good idea to snip the corners off to reduce fabric bulk and make it easier to turn your work.

DSCN0548

And, speaking of turning your work, that’s the next thing you’ll need to do. It’s time for the big reveal! Are you as excited as I am?

Well? How does it look?

Time for a final press with the iron and then we’ll pop a cushion inner into our marvellous make. If you’ve followed this tutorial closely you’ll have made a cushion cover that’s just the right size to take a ‘Krakris’ cushion which you can buy at Ikea for the princely sum of £1 – Total Bargain!

DSCN0566

Ultimately though, you’ve made something that looks like a million dollars; You should be dead proud of yourself 🙂

And now you know how to do it, what’s stopping you? Go on! Make a few more and give your home a little makeover – You’ve got no excuse not to 🙂

Happy Stitching Folks!

DSCN0552DSCN0555

Plump up a cushion and come and join me for a chat…

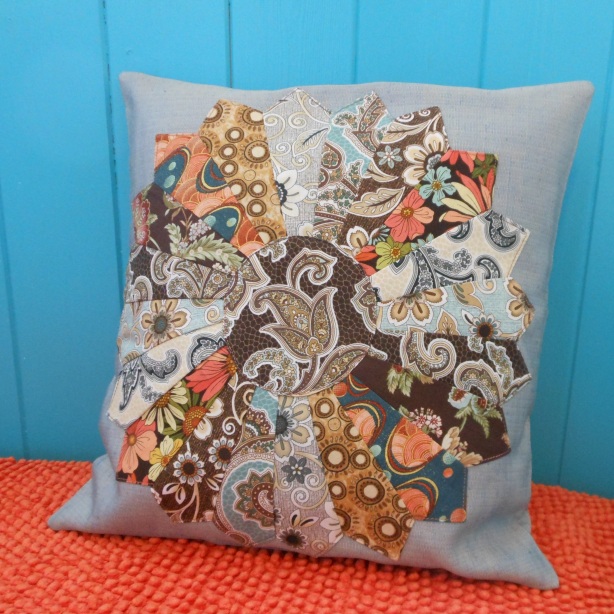
You may well need to be sat down for this - Feel free to plump away ;)

You may well need to be sat down for this – Feel free to plump away 😉

After a lengthy hiatus I have returned with not one, but two, back-to-back tutorials which will hopefully see you making your very own soft furnishings just like the example pictured above.

What’s that you say? You don’t think you’ll ever be able to make such a thing? Don’t be daft – It’s easy! Let me show you how…

By the end of this tutorial you'll hopefully be looking at something that looks a bit like this...

By the end of this tutorial you’ll have created something that looks a bit like this…

Here’s the deal; By following this first tutorial you’ll have created the bulk of your first ever piece of Dresden Plate patchwork. You’ll also no doubt have had to stop a few times along the way to do a little happy dance as you see how incredibly easy it really is. You might even have to pause to post pictures on Instagram, Facebook and beyond. Either way, I guarantee that you will be bursting to share what you’ve made with your friends – Just you wait and see!

DSCN0498

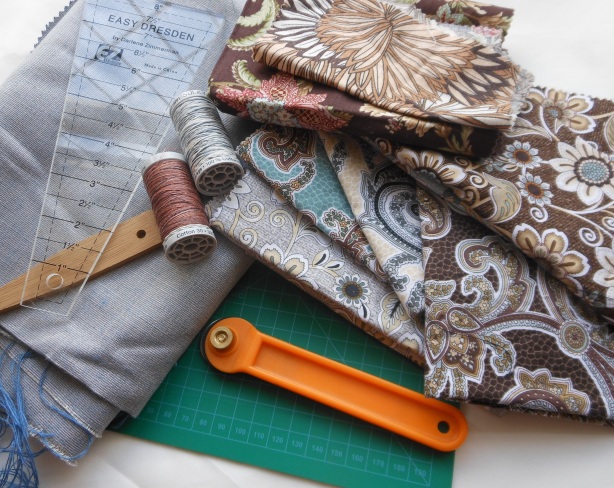
First of all, you’ll need to gather together your crafting arsenal – It’s a lengthy list to tick off…

You will need roughly half a metre of a plain, hardwearing fabric (This is more important in our next session so don’t worry if you haven’t got anything to hand straight away).

You’ll also need plenty of fabric scraps that measure at least 5 inches long by about 3 inches wide; You’re going to need twenty separate pieces to make up the circular part of your patchwork, plus one extra piece that we’ll be using to make the centre. For my design I chose ten different fabric prints but ultimately it’s up to you how many you use; One, two, twenty… you decide.

Coordinating thread, a sewing machine, pins, scissors etc

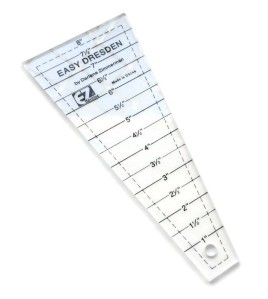
A dresden plate ruler, rotary cutter and mat. Scissors and a card template work just as well but it’ll take three times as long to get everything ready.

A Dresden Plate ruler - Handy if you've got one but not essential to the task.

A Dresden Plate ruler – Handy if you’ve got one but not essential to the task.

Don’t forget to find something blunt to help turn any corners inside out – It’s tempting to use scissors but really annoying when you push too hard and burst through the fabric!

Right! I think that’s about it; Let’s make a start.

First things first you need to cut out twenty separate pieces of fabric that are all five inches in length. You’ll see that they resemble a wedge shape with a wide top that tapers to a much narrower bottom; From now on we’ll refer to these as ‘blades’. Once you have all your blades, start laying them out in a circle and have a little play around at mixing your different fabric designs and colours until you’re happy with the way they look.

Don't be too worried about changing your mind at this stage - Nothing is set in stone until we start stitching...

Don’t be too worried about changing your mind at this stage – Nothing is set in stone until we start stitching…

Gather your blades together into a neat little pile and now we’re going to start sewing…

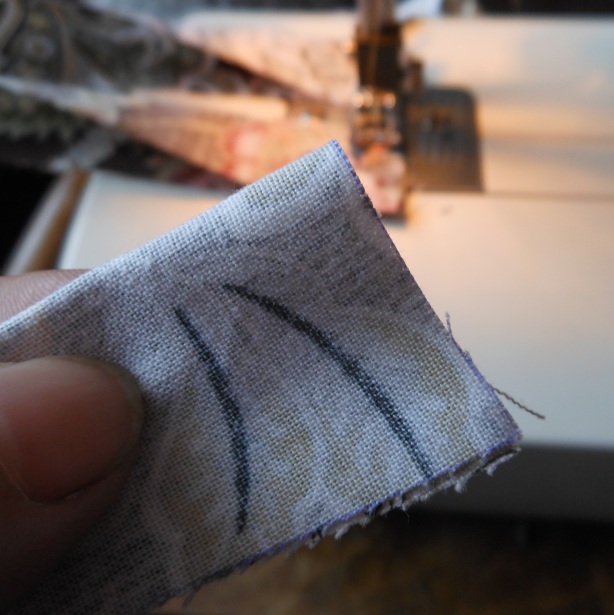
Take your first blade and fold the widest end in half with the printed design on the inside.

Make suret hat the fabric design is kept to the inside...

Make sure that the fabric design is kept to the inside…

Sew down the folded edge but don’t break your thread – Let the machine sew a few blank stitches and then sew your next blade…

Just keep sewing - No need to break your thread after each blade.

Just keep sewing – No need to break your thread after each blade.

Keep on sewing until you’re left with a little ‘blade bunting’ – That way everything’s kept in order ready for the next stage.

DSCN0504

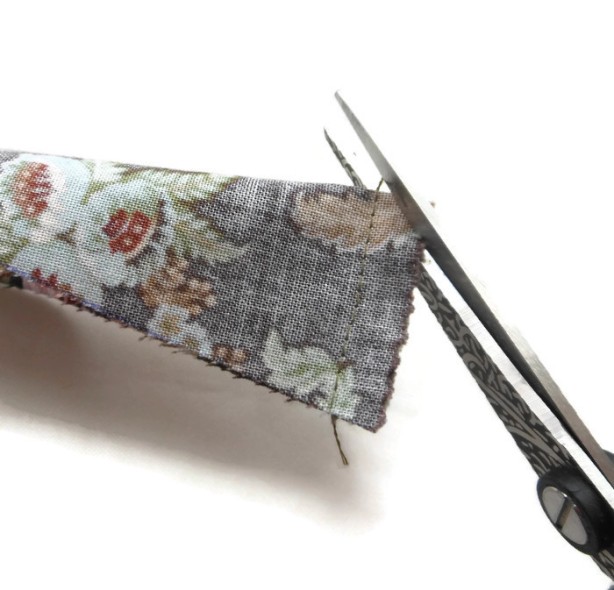
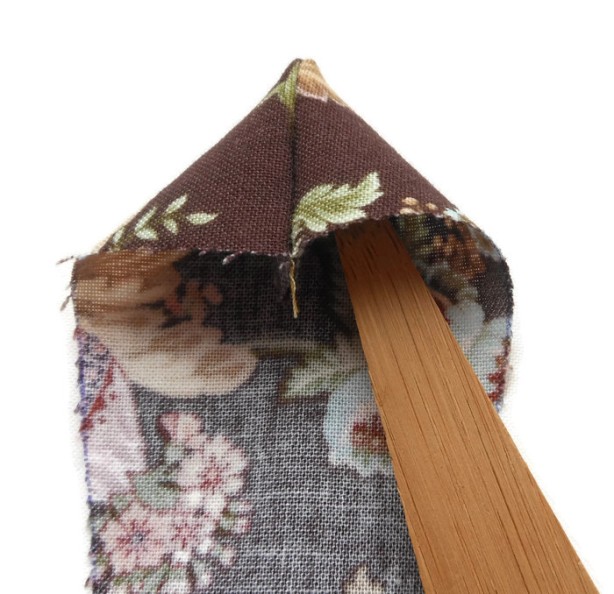
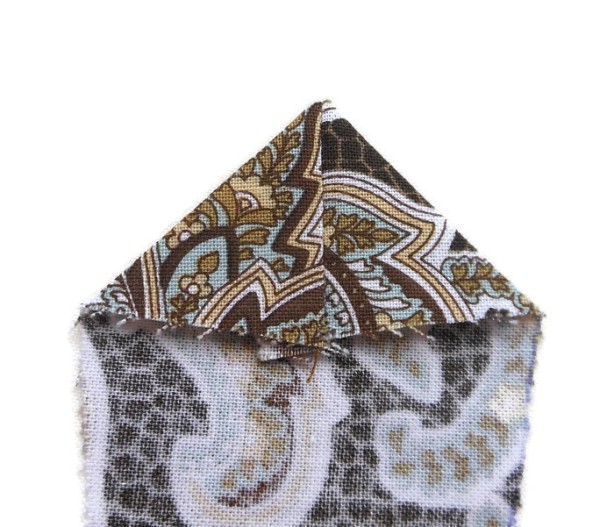
Use your scissors to remove the first blade. By stitching down the wide end we’ve effectively created a corner which we’ll neaten up by first snipping off any excess fabric and then turn to reveal the point…

Snip any excess fabric away which could create bulk in the corner - Don't go too close to your stitching!

Snip any excess fabric away which could create bulk in the corner – Don’t go too close to your stitching!

Turn your corner inside out...

Turn your corner inside out…

Use something blunt to achieve a neater finish...

Use something blunt to achieve a neater finish…

Press each blade with an iron for crisp, clean corners.

Press each blade with an iron for crisp, clean corners.

Still with me? By now you should have twenty stitched and pressed blades arranged in some kind of order that works well for you – If you still need to play around then now’s the time to do it; In a moment we’re going to start sewing everything together so you can’t change your mind!

DSCN0513

OK – Now it get’s really exciting.

Take your first two blades and place them so that their right sides (the printed bits) are facing each other. Match the sloping edge of each corner point and the side pieces together and stitch…

It's important to make sure that the sloping edges of each corner and the long side of each blade match up accurately...

It’s important to make sure that the sloping edges of each corner and the long side of each blade match up accurately…

Keep working 'in the round' stitching each blade together until you run out..... then stitch the two ends together and do a little happy dance!

Keep working ‘in the round’ stitching each blade together until you run out….. then stitch the two ends together and do a little happy dance!

It’s at this point when you might find yourself breaking off every few minutes in order to admire your handiwork. Just keep joining each blade and enjoy taking a sneaky peek at how it’s all beginning to come together. Heck! Put that sewing down and have a little happy dance – You’re making something that looks awesome – Way to go, you!

Have you sewn everything together? Have you joined the end pieces together to make a circle? Aren’t you just the happiest little bunny on the block? Give yourself a pat on the back and do your first reveal to the world…

Whooo Hoo! I made a circle thingy with lots of thread sticking out all over the place...... Is it supposed to look like this?

Whooo Hoo! I made a circle thingy with lots of thread sticking out all over the place…… Is it supposed to look like this?

Your final task for today is to give everything a little press with the iron. First, you’ll need to place your work face down and pull any excess threads down and into the centre… we don’t need to trim anything off – It’s all going to be hidden away in our next session…

Now press your work so that all the seams are facing in the same direction…

DSCN0520

Time to make yourself a cup of coffee and celebrate all your hard work with a round of biscuits. Most of the fiddly stuff has been done; In the next tutorial I’ll show you how to complete your patchwork by incorporating it into a simple, but effective cushion cover design…

DSCN0552

Until then, Happy Stitching Folks! It’s great to be back 🙂

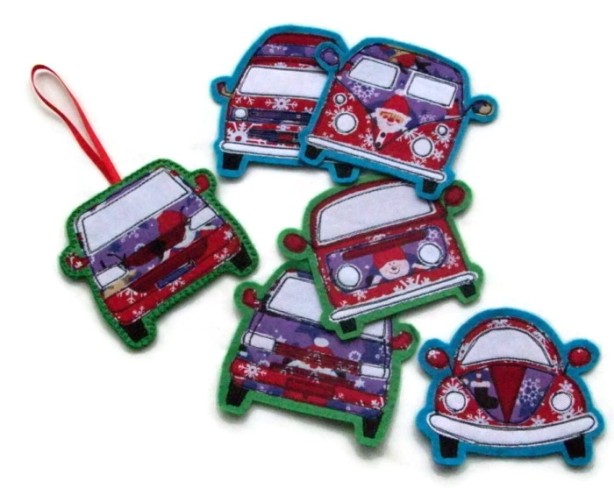
Oooh! The Bully Bus Manufactory is packed to the rafters with festive fabrics, ribbons, trimmings, sequins and tiny little jingle bells. It can mean only one thing; This year’s batch of Christmas decorations is FINALLY underway………….. and they’re more gorgeous than ever before!!!!!

We're all been given away completely FREE!!!!!!

We’re all been given away completely FREE!!!!!!

And the good news is that this set of six of the holiday season’s finest, once sewn up and each given a little ribbon loop for hanging, are going to be given away absolutely FREE to one very lucky person!!!!

So what do you have to do to be in with a chance of seeing them gracing your gorgeous tree come Christmas Day? Simple really! Just visit my website and add your name to the mailing list. That’s it; That is all!

I know, I know! I said a few years back that I’d given up on my website in favour of all things in the Blogosphere but so many people have asked me over the last few months if I’m online that I’ve finally caved in to the mounting pressure and opened the website back up – Albeit clearing everything out and starting again from scratch!

It’s far from finished. Since July I’ve made it my mission to add at least one new item each day – whether it’s to create a page, add a photo or set up a shop listing and slowly, but surely, things have begun to take shape until I’ve reached a point where I feel happy to share it with the whole wide world!!!!

So that’s where you come in 😉

Please feel free to share the link with family, friends etc : http://www.bigbluebullybus.co.uk/

On the home page there’s an option to join the mailing list – Anyone that adds their name to this from 16th October – 31st October 2013 will automatically be entered into a prize draw where one name will be picked out at random on November 1st to win the luvverly tree decs!!!

And what happens once the draw is over? That’s simple too – Your contact details stay with me; They won’t ever be shared with a third party. From time to time you’ll receive an email in your inbox in the form of a little newsletter highlighting new products, events and further freebies or discount offers. But definitely no spam; No inbox full of inane drivel from a slightly loopy lass in a camper van (I’ll save that for this blog, lol)  and no hard selling!!!! 😉

So? What are you waiting for?

Happy Wednesday Folks!!!!!!! And Good Luck!!!!!

It’s a new month and a new theme; September is all about ‘Embroidery’.

So I’ve been sat thinking about the 101 things I want to attempt over the coming weeks and how I can tie this month’s theme in with my general list of things to do…….. it’s to the designing table I’ve been………. and here’s this week’s offering……. 😉

It says in Wikipedia that, amongst other things,  ‘Embroidery is the art or handicraft of decorating fabric or other materials with needle and thread or yarn. Embroidery may also incorporate other materials such as metal strips, pearls, beads, quills, and sequins.

A characteristic of embroidery is that the basic techniques or stitches of the earliest work — chain stitch, buttonhole or blanket stitch, running stitch, satin stitch, cross stitch — remain the fundamental techniques of hand embroidery today.’

Cool ! I like stitching – Cross stitch is my perennial favourite but I’ve recently been dabbling in freeform machine embroidery after a break of nearly 16 years. I’ve learned to love my sewing machine again; I think that’s a story that’s best saved for another week though……

This week I started out by digging through a box of unfinished projects in a bid to find something to blog about. And I actually turned up a tapestry that I’d started at least 10+ years ago as a soft furnishing idea I’d had for the last house we lived in!

Tapestry work that hasn’t seen the light of day for over ten years!

First things first, I sat down and finished it – There wasn’t that much left to do……… I can’t think why I’d discarded it in the first place. Now I’ve just got to find the time to source some coordinating fabric so that I can make it in to the cushion cover I had originally intended it to be used for (possibly another ten years for that to finally see completion then!) 😉

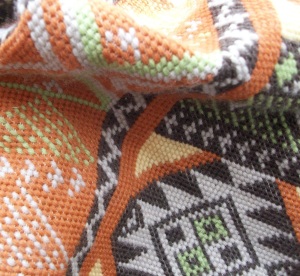
Detail of part of my old tapestry cushion project – A bit of blocking and pressing might be required to get it looking its best methinks!

Sitting down and finishing the piece actually got me thinking some more……. It’s been ages since I’ve done any tapestry; I kind of forgot how nice it is to sit and quietly stitch my way through a larger, more time consuming project. It’s very satisfying to see a design gradually spring to life over a period of days, rather than quick-fix crafting that’s done and dusted in a few hours. With this in mind I decided to plan out something that’d keep me quiet for a week or so…… An on-trend, mandala inspired tapestry cushion.

This was my initial starting point – a tried and trusted design originally intended for use in cross stitch projects.

One of my ACID protected designs – I use it constantly in cross stitch projects but decided to apply it to tapestry work this week for a bit of a change 🙂

All my designs start out on the computer – actually plotting something out from scratch can be a bit laborious to begin with but once the initial idea is complete it becomes very easy to manipulate it, change colours etc in a matter of moments. So I started with a conjectural view of the original design as it would look when worked as part of a tapestry rather than cross stitch………

The initial design looks just as good when worked as a tapestry rather than cross stitch.

Then I started playing around with it a little bit by adding a background colour and repeating, rotating and flipping the basic motif……

Looking good!

And also added a few more design elements to create something which could be used as a tile for further repeats…….

Looking gooderer! As Keith Lemon would point out 😉

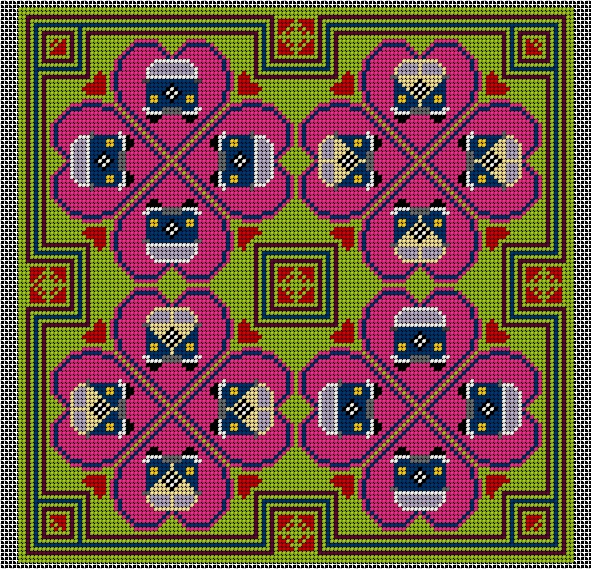
I went through exactly the same process with a bay design before alternately placing each element together to create a larger block of four tiles in total. And finally altered the outside edging to make the whole design look like a more cohesive, finished end product.

Hey Presto!

I can’t wait to get stitching this design!

I’m really pleased with the finished result – Albeit only as a computer generated image at the moment. I think it’ll look great if I actually manage to complete it. I said I wanted to design something which would take me a week or so to create but I’m guessing that if I’ve got it done by Christmas 2012 I’ll deserve a rather large pat on the back for all my efforts…..

At any rate, I’m off in to Leeds tomorrow to gather supplies ready for the task in hand. Wish me luck!!!!!

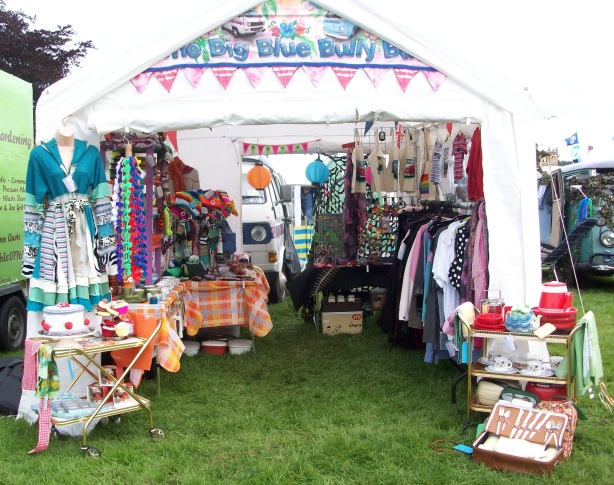
Although many people that I spoke to said that there didn’t seem to be quite so many stands selling handmade wares as last year, I thought that there were a fair few crafty types at LVWF 2012 when I had a look round for myself. The overall judgement did seem to be that people were tired of seeing the same old stuff been rolled out at most shows, week after week though, so it was really flattering to hear that the Big Blue Bully Bus Stand was seen as a breath of fresh air to most folk passing through and I had some great feedback over the four days that we were there; There definitely seemed to be a real buzz of excitement in the tent for the entire duration of the show with people billing and cooing over each new treasure they spotted 🙂

To view piccies of the stand you’ll need to check out the board I’ve set up on Pinterest – http://pinterest.com/bigbluebullybus/the-big-blue-bully-bus-wulli-bulli/

Edited highlights of some of the goodies available at this year’s Leeds VW Festival.

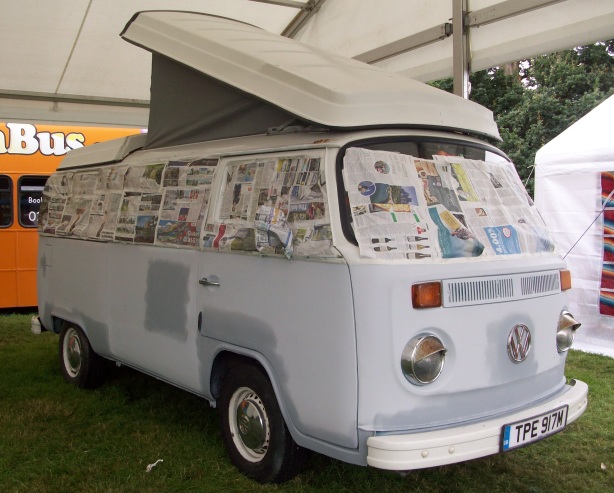
But my favourite art and crafty bit had to be the graffitti stand where assorted rides were given a new lease of life with a quick lick of paint…..

A nice little line-up of vehicles that have already undergone a transformation.

Hibiscus flowers – Great choice!!!!!

‘I’m just going to let them do what they want’, said the owner of this late bay……..

Sadly, I was too busy to get back and find out how the above bus turned out; I bet it was a stunner if the other examples were anything to go by….. Can’t wait to see the pictures of it that’ll no doubt be posted up on the official LVWF website over the next few days 😉

Phew! We’re back in one piece but in desperate need of a nice hot bath after four days of hard core camping.

A quick set up of the tent on Thursday…

The trade tent; Bursting at the seams with fabulous goodies as usual 😉

Followed by a nice relaxing walk around the grounds of Harewood House the following morning to look at the birds and admire the gardens…

The Courtyard at Harewood House; A great place to grab a cup of coffee and a nice slice of cake.

All finished off by a bite to eat in the Courtyard…

Lemon drizzle cake for me; Coffee & Walnut for Mr Other Half 🙂

It was a great weekend with lots of new faces and a fair few familiar ones stopping by to say ‘Hello!’ ; A fantastic bunch of folks as usual 😉

Now that bath of mine is just about ready……… more piccies to follow tomorrow 😉

It’s the time of year I kind of like the most…….. the annual VW show that’s right on our doorstep; Leeds VW Festival at Harewood House – just six miles away from home.

Billy the Bulli and Vince Bully Bus have both been prepped; Ale has been purchased in sinful amounts and nibbles are ready to be consumed by the countless friends that pop by to say, ‘HELLO!’ Come what may, we’ll be setting up camp tomorrow afternoon and hopefully updating the blog over the weekend at regular intervals……. fingers crossed……

The weather forecast says that there might be rain over the weekend – it’s been kind of a tradition with LVW Fest over the last seven years…… But this is the first time it’s scheduled to run as a full weekend event though. I hope there’s no mud! Regardless, I think it’ll be a good weekend at Camp Big Blue whether the sun shines or not……. 😉

Will there be evidence of fibre related goodies? You bet yer life there will! Lots of hand knitted and crocheted daftness, plus some rather gorgeous vintage glamping essentials and a few tea trolleys added in for good measure……. and that’s just in our tent 😉

A sneaky peek?

Festival Owl Hat: Pattern courtesy of the very talented mamachee on Etsy 😉

Owls are a bit of a Leeds thing; They’re also set to be the uber cool theme in accessories (Again!!!!!) this Autumn.

You know what they say………. Get ahead; Get a hat!

And I know of a nice little trade tent in the heart of Yorkshire where they’ll sort you out just right…. 😉

Check out the website: http://www.vwfestival.co.uk/

or come and say ‘Hello’ at Camp Big Blue ; You’ll be very welcome 😉

A very quick post this week again I’m afraid……….

This month’s theme is sewing; my machine has gone into overdrive recently with assorted strings of bunting, cushions, bags, patchwork etc flying out at a rate of knots. It’s been manic!

Here’s a few of my favourite makes of the moment…….

Felt Union Jack Cushion

Floral Micro Bunting – Perfect for decorating your favourite ride….

Patchwork Bags – Tanglewood Style

I love this! It’s called the ‘Tanglewood’ bag and the pattern and full making up instructions are available to purchase from here – http://rosylittlethings.com/tanglewoodpattern.html

‘It’s a little bit hippie, a little bit preppy. It’s a little bit country and a little bit Liberty. It’s embroidered yokes and dangly earrings. It’s blackberry crumble, balmy nights, and piccolo solos. It’s picnic quilts spread out, corner-to-corner on the concert lawn. Bring on starlight: You’ve got the perfect bag for it now, honeygirl.’  Alicia Paulson – Posie, Rosy Little Things Blog.

Machine patchwork – Cool!

Tanglewood Bag Detail

Phew! I said it’d be a quick post didn’t I? It’s back to the sewing machine for me I’m afraid – no rest for the wicked! I’m destined to end up like this young man if I’m not careful….. I certainly know the feeling!

Banksy’s ‘comment’ on the use of child sweatshop labour currently being exploited in the name of the Golden Jubilee and Olympic celebrations – something a lot of us handmade in the UK crowd have been pointing out for the last few months……

My first appearance in ‘Craftseller’ magazine 🙂

I’ve been celebrating having a few more moments of fame over the last few weeks…….. as I’ve had a quick mention in ‘Craftseller’ magazine; Blink and you’ll miss it though!

Anywhoo, back to Earth and another quick make for this week’s post – Fabric Flower Hair Barrettes.

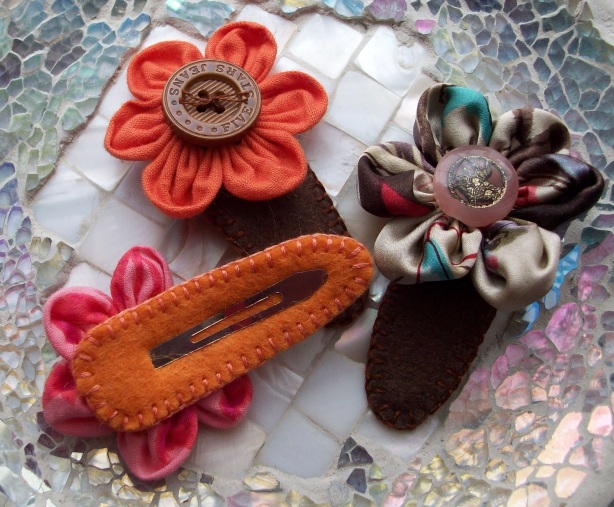
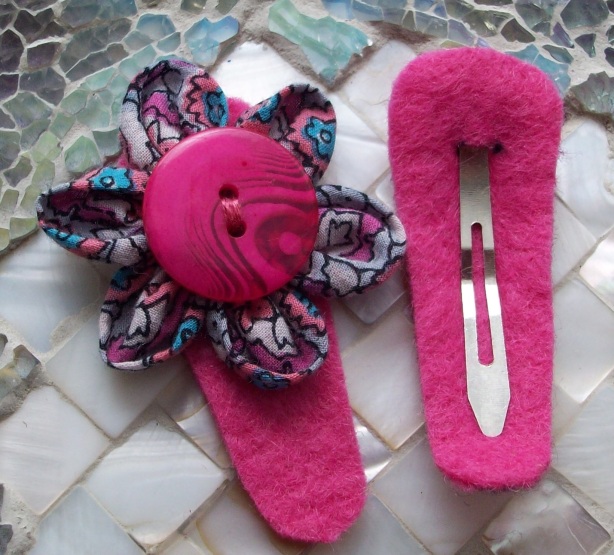
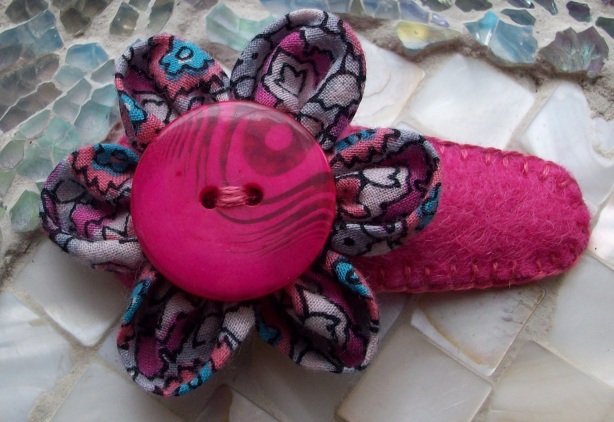
Felt clad flower barrettes by Wulli Bulli (aka The Big Blue Bully Bus).

This is another one of those projects that doesn’t take too long to complete and is great for using up any scraps of fabric and felt that you may have lying around. You will need: a needle and thread, scraps of wool felt, a vintage button, a blank snap fastening hair barrette, 6 small circles of lightweight fabric, sharp scissors and a marker pen.

It’s time to use the Sizzix machine again and blow the dust off that ‘Circles’ die 😉

Start by making your flower; Fold a fabric circle in half and place a running stitch close to the outside edge.

When you pull the thread the fabric will gather in gentle folds to form a petal shape.

Repeat this step another five times in total before gently pulling the thread tight to form each of the flower petals. Secure in a ring with a few stitches.

A few stitches at the end will form the ring centre of your fabric flower.

Now we’re going to make the felt cladding……. start by tracing an outline around the blank barrette – make this larger so that you have space to stitch around the outer edge.

Don’t worry about the pen marks – they’ll be hidden on the inside of your work.

Cut out two identical pieces of wool felt; make a little slit in one piece to feed the snap mechanism through.

Mark where to make the hole for the snap mechanism with two little dots – use sharp scissors to make a little slit and then feed the snap through.

Attach your fabric flower to the other piece of felt using a few concealed stitches. Sew a button in the centre to hide away any raw edges.

Nearly there!

Now all that needs to be done is to sew the two halves together; I use a blanket stitch but, like last week, it’s up to you as to which stitch you ultimately decide to use. Just remember to work all the way around so that the barrette is safely clad in its little felt overcoat. Finish off with a knot hidden under one of the petals.

In just a few hours you can make a garden full of these!

These barrettes are great to use on even the finest hair as the felt cladding offers extra protection from the hard metal edges; And they’re brilliant for babies too!

Happy Crafting Folks! 😉

It’s been a better week; No more bad news at any rate!

Recent events mean that I’ve been put back a little bit with projects that I’ve been working on, so over the last couple of days I’ve had to get my head down and do some serious catching up.

And with the weather continuing to be fairly vile I’ve also decided that it’s probably not a good idea to take myself off somewhere in the camper van. So, for the moment, I’ve put my gastronomic travel plans on hold until the torrential rain decides to stop – apparently the weather forecast predicts at least another week before the sun puts in an appearance and we finally start to dry out! What a pain 😦

I have still been busy cooking up my own little storm though – so I thought I’d share some of my recent makes for this week’s blog….

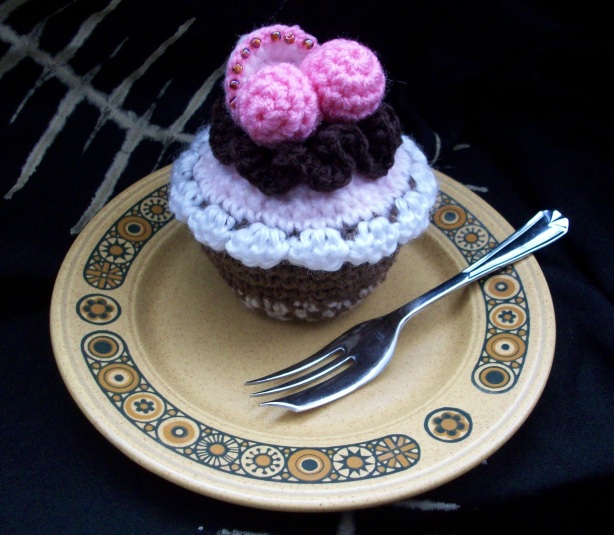
Cute, crocheted, calorie-free cupcakes.

I’ve been making these delightful little treats for a while now – They’re very easy to make if you can crochet, and I like the fact that you can let your imagination run riot when it comes to the myriad ways of ‘decorating’ them.

Easier than it looks!

Here’s a very basic pattern to get you started (please note that it does not include details for creating the toppings, fluted edging etc):

Round 1: Use the magic ring method to form a loop, working 6 dc into the centre of the ring (6 sts). Join with a sl st to the first dc. Make 1 ch.

Round 2: 2 dc in every stitch (12 sts), join, 1 ch.

Round 3: (1 dc, 2dc in next st) six times (18 sts), join, 1 ch.

Round 4: (1 dc, 1 dc, 2 dc in next st) six times (24 sts), join, 1 ch.

Round 5: (1 dc, 1 dc, 1 dc, 2 dc in next st six times (30 sts), join, 1 ch.

Rounds 6-7: 1 dc in every st (30 sts), join, 1 c.

Round 8: (1 dc, 1 dc, 1 dc, 1 dc, 2 dc in next st) six times (36 sts), join, 1 ch.

Rounds 9-11: 1 dc in every st (36 sts), join with a sl st to first dc, 1 ch.

Round 12: (1 dc, 1 dc, 1 dc, 1 dc, dc2tog) six times (30 sts), join, 1 ch.

Round 13: 1 dc in every st (30 sts), join, 1 ch.

Round 14: (1 dc, 1 dc, 1 dc, dc2tog) six times (24 sts), join, 1 ch.

Round 15-18: 1 dc in every st (24 sts), join, 1 ch.

Round 19: Work in back loops only – (1 dc, 1 dc, dc2tog) six times (18 sts), join, 1 ch.

Before continuing, trim off and tie in any loose ends. Stuff with a BS standard toy filling.

Round 20: (1 dc, dc2tog) six times (12 sts), join, 1 ch.

Round 21: (dc 2tog) six times (6 sts), join, 1 ch.

Cut the yarn leaving a 15 cm tail and pull the end through the stitch on the hook. Pull tight to fasten off. Thread the yarn end through a darning needle and gather up the final six stitches to close up the hole. Weave in loose ends.

Add toppings, beads sequins etc as desired…….

The finished item looking good enough to eat – Perfect to offer to the Vicar when he next comes for tea 😉

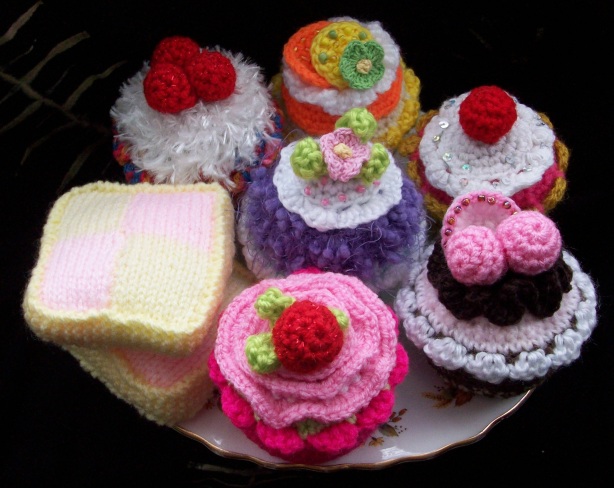
They look great when arranged together on a vintage cake plate!
Crocheted cupcakes and knitted Battenburg – Yummy!

Next week sees the start of another month and a new theme – Sewing! I’ll be starting off with a simple, hand sewn item that you can use as either a keyring or bag charm. Until then, Happy Crafting!