Posts Tagged ‘big blue bully bus’

Plump up a cushion and come and join me for a chat…

You may well need to be sat down for this - Feel free to plump away ;)

You may well need to be sat down for this – Feel free to plump away 😉

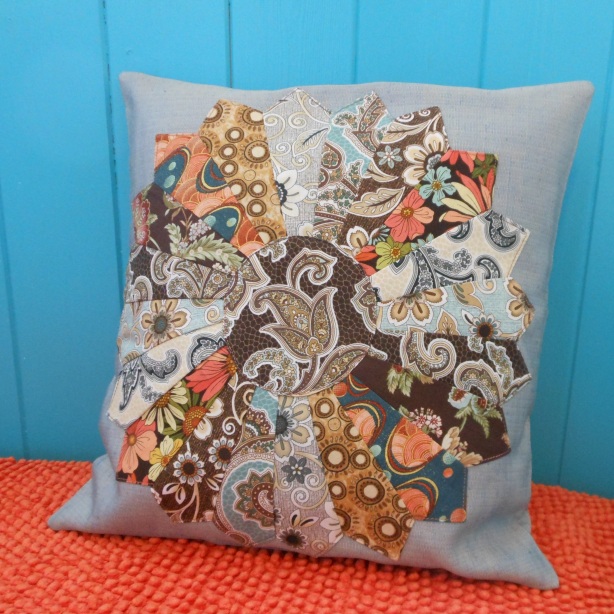
After a lengthy hiatus I have returned with not one, but two, back-to-back tutorials which will hopefully see you making your very own soft furnishings just like the example pictured above.

What’s that you say? You don’t think you’ll ever be able to make such a thing? Don’t be daft – It’s easy! Let me show you how…

By the end of this tutorial you'll hopefully be looking at something that looks a bit like this...

By the end of this tutorial you’ll have created something that looks a bit like this…

Here’s the deal; By following this first tutorial you’ll have created the bulk of your first ever piece of Dresden Plate patchwork. You’ll also no doubt have had to stop a few times along the way to do a little happy dance as you see how incredibly easy it really is. You might even have to pause to post pictures on Instagram, Facebook and beyond. Either way, I guarantee that you will be bursting to share what you’ve made with your friends – Just you wait and see!

DSCN0498

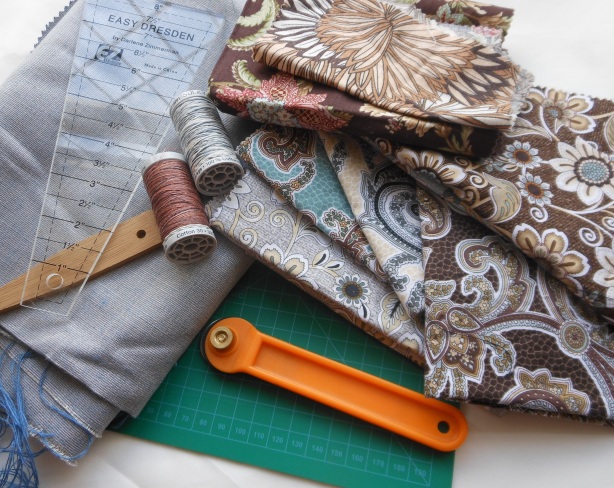
First of all, you’ll need to gather together your crafting arsenal – It’s a lengthy list to tick off…

You will need roughly half a metre of a plain, hardwearing fabric (This is more important in our next session so don’t worry if you haven’t got anything to hand straight away).

You’ll also need plenty of fabric scraps that measure at least 5 inches long by about 3 inches wide; You’re going to need twenty separate pieces to make up the circular part of your patchwork, plus one extra piece that we’ll be using to make the centre. For my design I chose ten different fabric prints but ultimately it’s up to you how many you use; One, two, twenty… you decide.

Coordinating thread, a sewing machine, pins, scissors etc

A dresden plate ruler, rotary cutter and mat. Scissors and a card template work just as well but it’ll take three times as long to get everything ready.

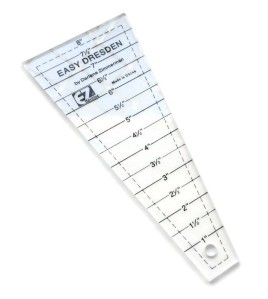
A Dresden Plate ruler - Handy if you've got one but not essential to the task.

A Dresden Plate ruler – Handy if you’ve got one but not essential to the task.

Don’t forget to find something blunt to help turn any corners inside out – It’s tempting to use scissors but really annoying when you push too hard and burst through the fabric!

Right! I think that’s about it; Let’s make a start.

First things first you need to cut out twenty separate pieces of fabric that are all five inches in length. You’ll see that they resemble a wedge shape with a wide top that tapers to a much narrower bottom; From now on we’ll refer to these as ‘blades’. Once you have all your blades, start laying them out in a circle and have a little play around at mixing your different fabric designs and colours until you’re happy with the way they look.

Don't be too worried about changing your mind at this stage - Nothing is set in stone until we start stitching...

Don’t be too worried about changing your mind at this stage – Nothing is set in stone until we start stitching…

Gather your blades together into a neat little pile and now we’re going to start sewing…

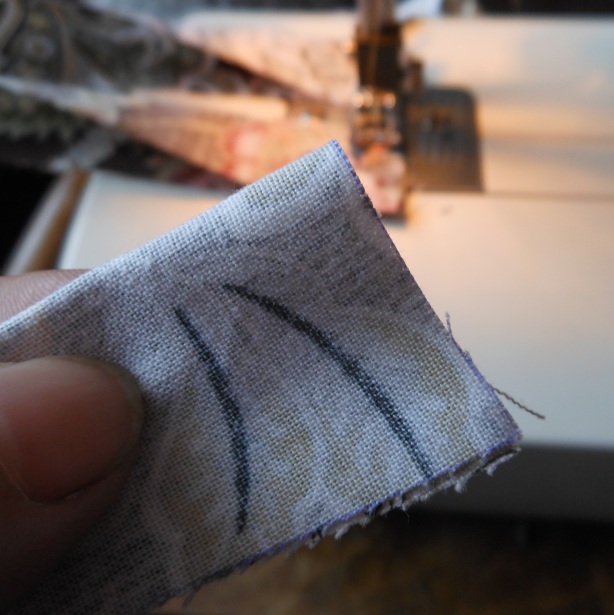
Take your first blade and fold the widest end in half with the printed design on the inside.

Make suret hat the fabric design is kept to the inside...

Make sure that the fabric design is kept to the inside…

Sew down the folded edge but don’t break your thread – Let the machine sew a few blank stitches and then sew your next blade…

Just keep sewing - No need to break your thread after each blade.

Just keep sewing – No need to break your thread after each blade.

Keep on sewing until you’re left with a little ‘blade bunting’ – That way everything’s kept in order ready for the next stage.

DSCN0504

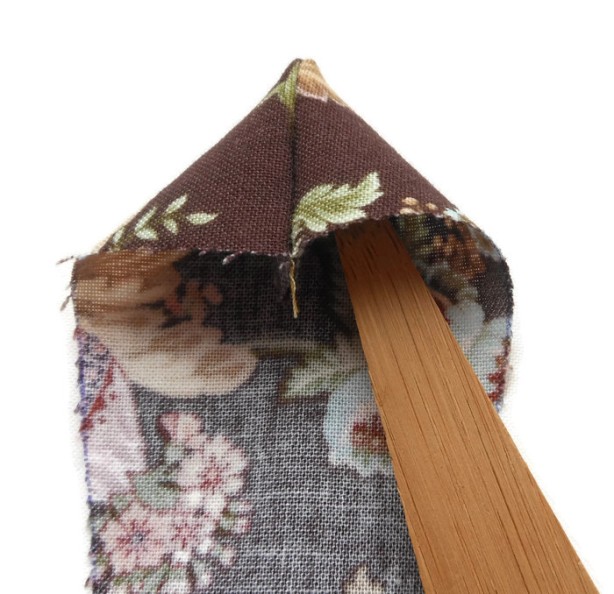
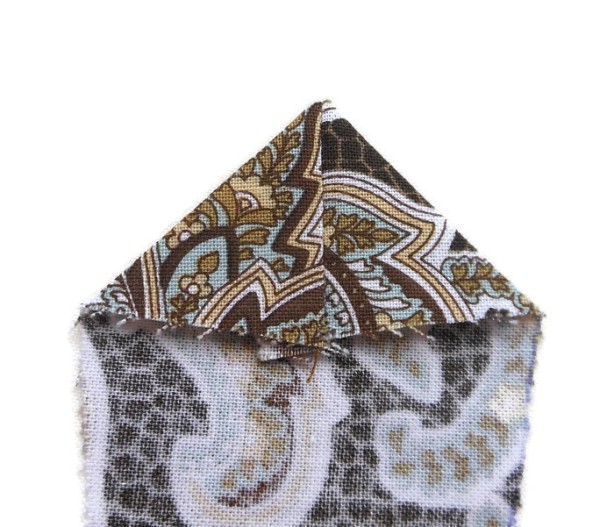
Use your scissors to remove the first blade. By stitching down the wide end we’ve effectively created a corner which we’ll neaten up by first snipping off any excess fabric and then turn to reveal the point…
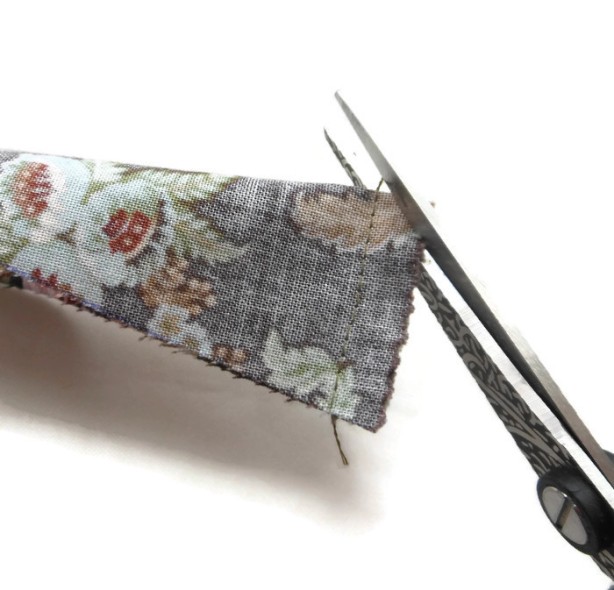
Snip any excess fabric away which could create bulk in the corner - Don't go too close to your stitching!

Snip any excess fabric away which could create bulk in the corner – Don’t go too close to your stitching!

Turn your corner inside out...

Turn your corner inside out…

Use something blunt to achieve a neater finish...

Use something blunt to achieve a neater finish…

Press each blade with an iron for crisp, clean corners.

Press each blade with an iron for crisp, clean corners.

Still with me? By now you should have twenty stitched and pressed blades arranged in some kind of order that works well for you – If you still need to play around then now’s the time to do it; In a moment we’re going to start sewing everything together so you can’t change your mind!

DSCN0513

OK – Now it get’s really exciting.

Take your first two blades and place them so that their right sides (the printed bits) are facing each other. Match the sloping edge of each corner point and the side pieces together and stitch…

It's important to make sure that the sloping edges of each corner and the long side of each blade match up accurately...

It’s important to make sure that the sloping edges of each corner and the long side of each blade match up accurately…

Keep working 'in the round' stitching each blade together until you run out..... then stitch the two ends together and do a little happy dance!

Keep working ‘in the round’ stitching each blade together until you run out….. then stitch the two ends together and do a little happy dance!

It’s at this point when you might find yourself breaking off every few minutes in order to admire your handiwork. Just keep joining each blade and enjoy taking a sneaky peek at how it’s all beginning to come together. Heck! Put that sewing down and have a little happy dance – You’re making something that looks awesome – Way to go, you!

Have you sewn everything together? Have you joined the end pieces together to make a circle? Aren’t you just the happiest little bunny on the block? Give yourself a pat on the back and do your first reveal to the world…

Whooo Hoo! I made a circle thingy with lots of thread sticking out all over the place...... Is it supposed to look like this?

Whooo Hoo! I made a circle thingy with lots of thread sticking out all over the place…… Is it supposed to look like this?

Your final task for today is to give everything a little press with the iron. First, you’ll need to place your work face down and pull any excess threads down and into the centre… we don’t need to trim anything off – It’s all going to be hidden away in our next session…

Now press your work so that all the seams are facing in the same direction…

DSCN0520

Time to make yourself a cup of coffee and celebrate all your hard work with a round of biscuits. Most of the fiddly stuff has been done; In the next tutorial I’ll show you how to complete your patchwork by incorporating it into a simple, but effective cushion cover design…

DSCN0552

Until then, Happy Stitching Folks! It’s great to be back 🙂

Well! The silly season is definitely upon us and preparations are well underway with decking the halls at Bully Bus HQ.

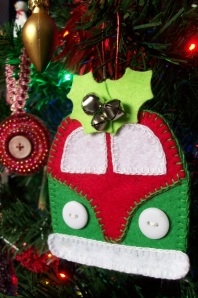
The final theme for this year is ‘Christmas’ and this week I’ve been making some tree decorations – VW themed of course 😉

Want to have a go too? Here’s how to make your own splitscreen bus decoration out of scraps of wool felt …….

101_1401First you’ll need to create a few templates for the main body of the bus, the top, bumper and windows. I drew mine on to pieces of card and then traced round each shape on to the reverse of the felt before cutting. I also wanted to add a holly and jingle bell berries embellishment – but luckily I’ve got a sizzix die that makes light work of that bit of cutting out!

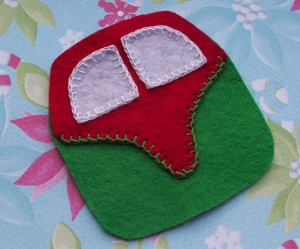
101_1409Now to start piecing everything together; The first job is to sew the windows in place.

101_1411Now add the splitscreen top to the main body of the bus and sew.

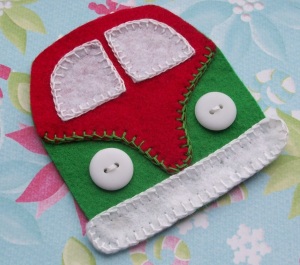
101_1413Attach the bumper.

101_1415Add button headlights.

101_1416Make two little loops out of black satin ribbon for the wheels, add a loop for hanging and then sandwich the front and back pieces together before stitching all the way round to finish. Secure the holly ‘berries in place with a few stitches and ‘Hey Presto!’ You’ve got yourself a cute VW themed decoration to hang on the tree……

Looks lovely dun't it?

Looks lovely dun’t it?

These are really easy to make and don’t take too long to stitch together; Why not have a go for yourself and trim your tree with the classiest decorations around?

Happy Stitching Folks!!!!

I keep lists for EVERYTHING – And this week my ‘To Do’ selection is possibly rivalling a fat, beardy bloke living slightly further to the north of me with a penchant for reindeers, gift wrapped fripperies and the odd bit of ‘Ho. Ho. ho-ing!’!

Sadly, I have no elves to help me in my quest – So I’m working hard and keeping my head down in an effort to tick off the multiple things to be done…….

This month’s theme is embroidery; This week’s offering is a free cross stitch chart designed by me…….. In truth, I created it this time last year but I’m really up against it atm so apologies in advance if you’ve seen it before…….

You know the score – Please feel free to use this design but acknowledge it’s origins when you sell stuff you’ve made…..blah blah!

Use it as a motif; sell stuff with it, but don’t claim to have come up with the original idea. It’s ACID protected – So please don’t try to sell it as your own design – You’ll get put on the fat beardy man’s naughty list straight away….. then there’s the wrath of ME to contend with………. and British Copyright Law!

Until next week……. Happy crafting and watch yer backs!

I’ve not been very good at keeping up to my weekly blog posts recently; in fact I’ve been quite bad 😦

Many apologies for my recent lengthy absence – I’ve been sat mooning around, banned from attempting any type of crafting due to chronic carpal tunnel syndrome and a strapped up wrist. I’m going stir crazy!

Hopefully a visit to the doctors later this week should reveal if I’m fit enough to take up the creative baton once more. Fingers crossed that all goes well…… 😉

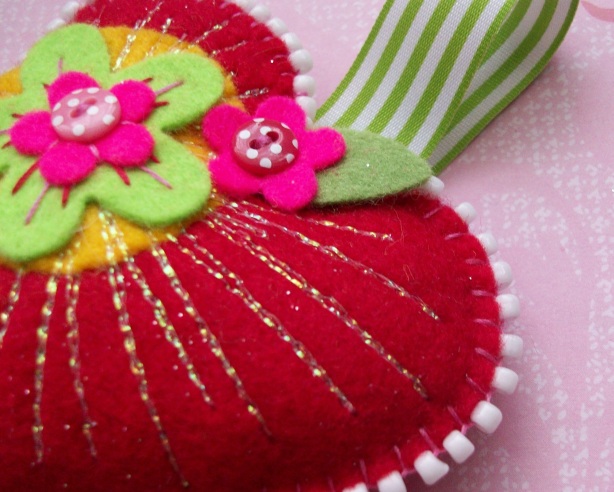
Stitched and beaded floral plush heart detail – Fingers crossed that I can get back to making little treasures like this VERY, VERY soon!

My first appearance in ‘Craftseller’ magazine 🙂

I’ve been celebrating having a few more moments of fame over the last few weeks…….. as I’ve had a quick mention in ‘Craftseller’ magazine; Blink and you’ll miss it though!

Anywhoo, back to Earth and another quick make for this week’s post – Fabric Flower Hair Barrettes.

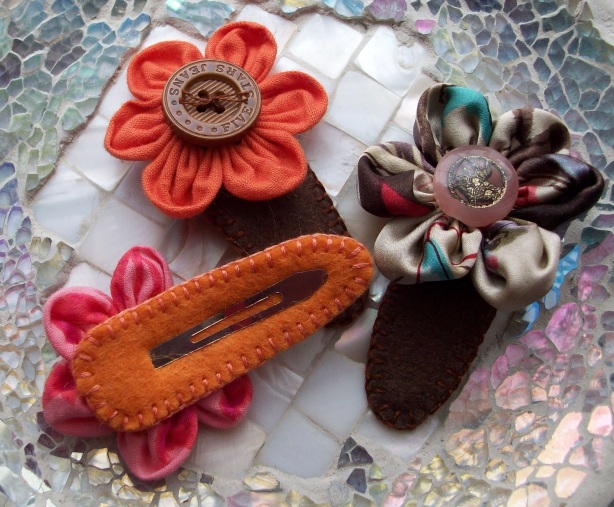
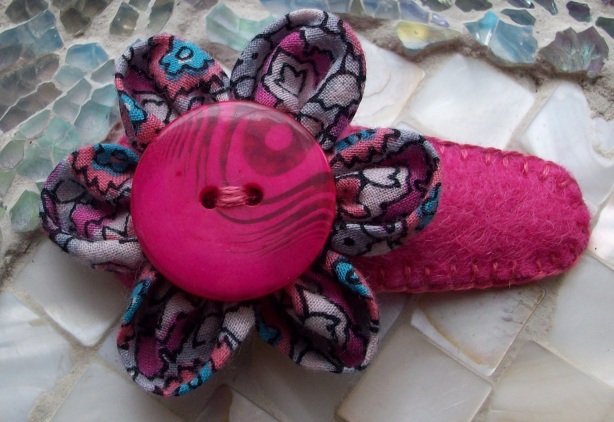
Felt clad flower barrettes by Wulli Bulli (aka The Big Blue Bully Bus).

This is another one of those projects that doesn’t take too long to complete and is great for using up any scraps of fabric and felt that you may have lying around. You will need: a needle and thread, scraps of wool felt, a vintage button, a blank snap fastening hair barrette, 6 small circles of lightweight fabric, sharp scissors and a marker pen.

It’s time to use the Sizzix machine again and blow the dust off that ‘Circles’ die 😉

Start by making your flower; Fold a fabric circle in half and place a running stitch close to the outside edge.

When you pull the thread the fabric will gather in gentle folds to form a petal shape.

Repeat this step another five times in total before gently pulling the thread tight to form each of the flower petals. Secure in a ring with a few stitches.

A few stitches at the end will form the ring centre of your fabric flower.

Now we’re going to make the felt cladding……. start by tracing an outline around the blank barrette – make this larger so that you have space to stitch around the outer edge.

Don’t worry about the pen marks – they’ll be hidden on the inside of your work.

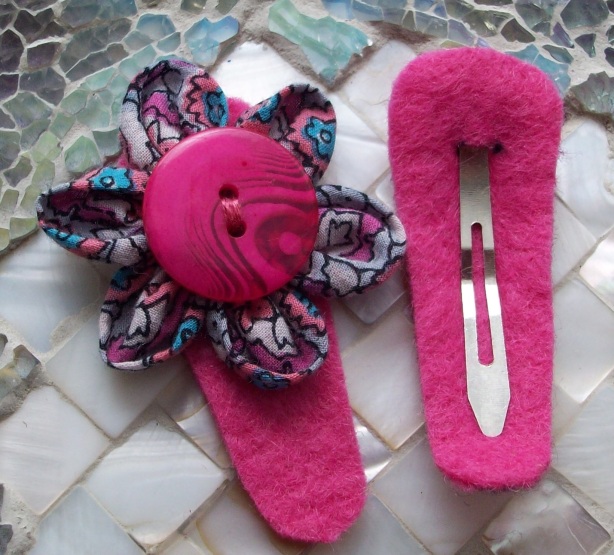
Cut out two identical pieces of wool felt; make a little slit in one piece to feed the snap mechanism through.

Mark where to make the hole for the snap mechanism with two little dots – use sharp scissors to make a little slit and then feed the snap through.

Attach your fabric flower to the other piece of felt using a few concealed stitches. Sew a button in the centre to hide away any raw edges.

Nearly there!

Now all that needs to be done is to sew the two halves together; I use a blanket stitch but, like last week, it’s up to you as to which stitch you ultimately decide to use. Just remember to work all the way around so that the barrette is safely clad in its little felt overcoat. Finish off with a knot hidden under one of the petals.

In just a few hours you can make a garden full of these!

These barrettes are great to use on even the finest hair as the felt cladding offers extra protection from the hard metal edges; And they’re brilliant for babies too!

Happy Crafting Folks! 😉

Quite a few of my jewellery designs feature Fimo beads.

I’ve been making jewellery since I was at high school; To be fair that’s quite a while!

Quite a few of my designs feature millefiori Fimo beads, so this week I set myself a challenge of having a go at making some of my own. Here’s what I got up to in my adventures…….

…… But first we’ll do the explanation bit!

Millefiori is a term that’s more traditionally used to describe a particular technique used in glassmaking. It’s derived from the Italian words ‘mille’ (thousand) and ‘fiori’ (flowers) and it’s a brilliant way of adding decoration and colour. Glass millefiori beads are absolutely stunning – I use a lot of those too.

Millefiori Glass Beads available to purchase from beautifulstuff.com

To make polymer clay (Fimo) millefiori beads you first need something referred to as a ‘cane’. Now as I’m an ex teacher I suspected that all of this ‘cane’ business was going to be fairly easy. But I didn’t think to factor in that I had decided to try this challenge out on the day that I celebrated my 21st birthday (Yes, AGAIN !!!!!) and was already slightly the worse for wear after starting celebrations a tad too early. I tried my best regardless……

Making a cane seems to use pretty much the same technique as putting letters in sticks of rock; Possibly a strange comparison to make, but I’m from Lytham, a stone’s throw away from a rather famous Lancashire seaside resort where I was born in the Royal Victoria Hospital (21 years ago, like I said), and as about 99.9% of all the sticks of rock sold all over the UK are actually made in the aforesaid town with a tower, I figured that surely there must be something in the blood that would deem me a natural with such things.

I found a video tutorial to aid me in my quest; It’s brilliant!

http://www.youtube.com/watch?v=Qj9Snv3OXRE

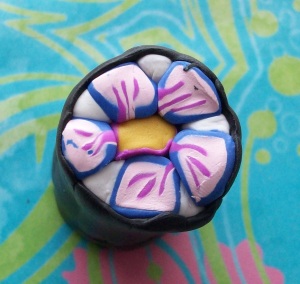
Here’s the one that I made:

My first attempt at a flower cane - all ready to roll out.

Take a good look at it because disaster struck shortly afterwards……. I think possibly because I took a while to find my camera……… and then stopped for a short wine and snacks interlude…….. the fimo wasn’t as pliable as it had been when I first started working it. So as I returned to the task and began to roll the cane out it started to crumble and broke open. I pieced it back together as best I could but it’s not as flowerlike as it should be 😦

Luckily I’m an optimistic soul. Nothing’s a disaster; It’s never a mistake – just a design element I might not have planned. I’ve learned that you can’t walk away from something that’s only half done if you’re using Fimo – next time I’ll do better 😉

So, I carried on until I’d made my beads – I’m so glad I did. I’ve still got to bake them in the oven and then incorporate them into a finished piece of jewellery. You haven’t seen the last of them though; Watch this space…………!

My very first millefiori beads - I'm delighted with them!

Now where’s that glass of wine and bowl of nibbles? – There’s some celebrating to be done :0)