Archive for January, 2012

Now I’m Pinterested!

Posted: January 28, 2012 in The Garage

Not so long ago I got an invite to join something called ‘Pinterest’. At the time I didn’t really know very much about it apart from the fact it was some sort of site where you could save ideas, inspirations etc. The official bit of blurb in the invite was also as clear as mud and just said that ‘ Pinterest is a Virtual Pinboard. It lets you organize and share all the beautiful things you find in your life. People use pinboards to plan their weddings, decorate their homes, and organize their favorite recipes’.  Not really a convincing selling point when you consider that I aren’t planning a wedding, am as far removed from being a domestic goddess as anyone’s ever likely to be, aren’t interested in cooking but like the eating part, and only ever get houseproud if I’m talking about my camper van. I therefore kind of suspected that the whole notion of organising and sharing beautiful things might not be for me!

All in all, it didn’t look like it might be particularly inspiring so I kind of left it…….and I wasn’t initially impressed after I’d signed up and looked at some of the suggested pinboards to follow – particularly as they didn’t seem to contain anything that I would say was either beautiful OR inspiring! So it seemed like I’d made a good choice.

But this week I’ve heard lots and lots of people saying good things about Pinterest, so I thought I’d go back to it again with fresh eyes and see just what the fuss is all about. And instead of looking at what other people had ‘pinned’ I had a go at pinning my own things instead.

http://pinterest.com/bigbluebullybus/

And guess who’s now well and truly hooked?

If I was to describe Pinterest I’d say it’s a bit like having the power to go window shopping in every creative outlet on the planet whilst trying to fill a never-ending basket to the brim. And if they’d said that in the first place I wouldn’t have dithered for weeks on end before finally taking the plunge !

Pinterest really does let you gather ideas and inspiration together in one place – kind of like creating mood boards on different themes that are personal to you. And I have to say that now I’ve given it a go I’m probably going to find it the most useful online tool I’ve found in a long time; Now I really AM pinterested!

I think in hindsight that this week’s offering should have been entitled, ‘The Dick & Liddy Interlude’ or maybe, ‘When Chalk met Cheese’.

To be fair, this week’s highlighted craft and myself make for a couple of unlikely bedfellows; On the one hand you have the rather delicate, feminine and stunningly beautiful embellishment and decoration of parchment vellum, which is basically what pergamano is ……. and then you have me! And whilst countless people have chosen some rather well placed adjectives to describe my very good self over the years, I can honestly say, with a fair deal of certainty,  that very few would have applied words such as delicate and certainly NEVER feminine! Stunningly beautiful… maybe…. but only ‘coz they’ve wanted a ride in the bus!

Parchment Craft - Pretty much everything I'm not!

So, after pulling my head out of the engine bay and scrubbing my hands with a nail brush and the best part of a tub of Swarfega for half an hour, I resolved to sit down and get to grips with acting ladylike and being sedate…. And I found it was a very hard thing to do!

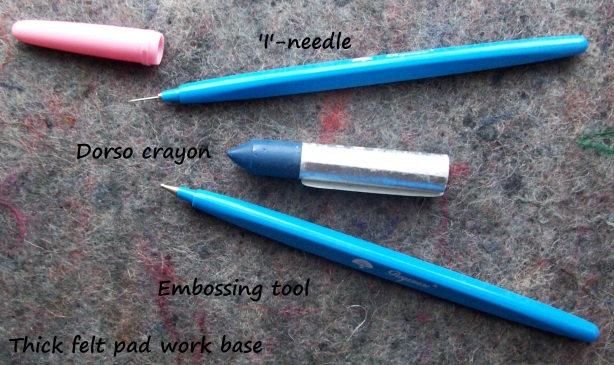
Pergamano is all about using techniques such as embossing, perforating, stippling, cutting and colouring and it comes with it’s own range of tools needed for the task.

The tools for the job - lethal in the wrong hands!

I used just three; the embossing tool, an ‘I’ needle and a Dorso crayon. All work is done in reverse and once you’ve secured your piece of vellum in place with a few paperclips it’s a matter of  ‘tracing’ out the chosen design using the various tools and techniques. It all works by applying pressure which stretches the semi-transparent paper until it becomes opaque and white, which, when turned over, has an embossed effect. Colour can also be added by using special crayons which you smudge and blend with your fingertips.

In fairness, I found it a bit fiddly and probably would have benefited from wearing my glasses as it was quite close work. But I persevered and came up with a vellum overlay for a Valentine’s card.

The fruits of my labour - Valentine's Card by Big Blue Bully Bus

I even managed to add a blush of blue to the heart – which ensued in a further bout of handwashing before I grabbed the camera to record my efforts!

Now that I’ve had a go I must say that I’m glad I’ve tried parchment craft; It is a bit of a faff though and I think if I decide to revisit it at a later date I’ll make sure that I dig out my glasses AND sit in a well lit place to do it – But for the moment it’s another craft I can strike off of my 52 week long list!

Next week sees the changeover to the second theme of the year – Jewellery; And I’m looking forward to the challenges that that will present already 🙂 I’m going to start the proceedings with some bead making so if you want to join in you’ll need to collect some felt scraps, a beading needle, thread, seed beads, a skewer and a pair of scissors.

Happy crafting! xx

The VW show season has officially started with Campermart last weekend! Bit early in the year for me to be bothering, and to be fair I don’t know of a single soul that actually went, but I’m sure it was very lovely for those who did attend 🙂 Fingers crossed that it wasn’t a case of more traders than customers at any rate!

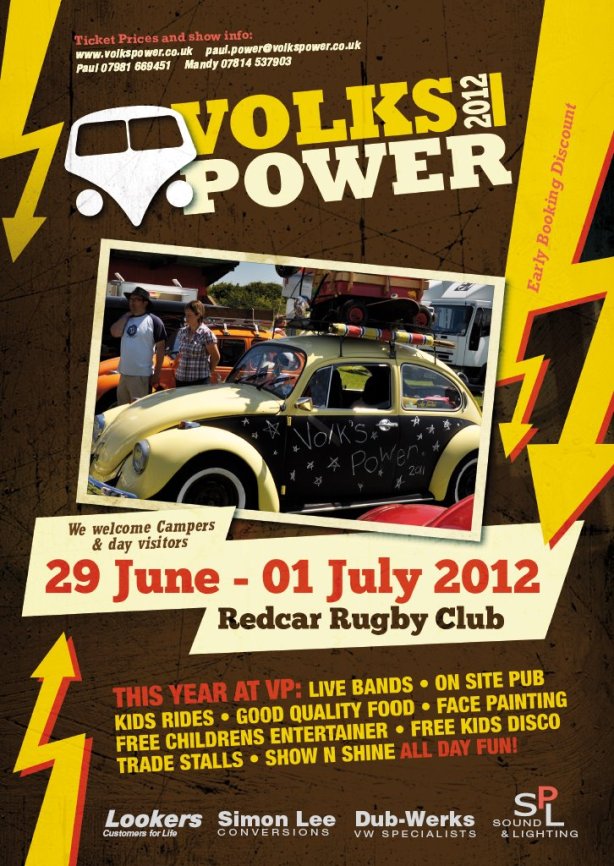
Today I received flyers for my absolute fave show – Volkspower at Redcar. If you haven’t been before – WHY NOT ?????? You can’t possibly imagine what you’re missing. Time to get your diaries out and pencil in the date, set up a little savings tin for petrol money, the bar and some fish and chips and start polishing your dancing shoes for the cracking entertainment on offer – I defy anyone to tell me that there’s better at ANY other show in the UK!

Paul and Mandy, the organisers, work so incredibly hard to bring us an outstanding weekend – And it’s northern and fairly local(ish) which is also an added bonus. Even if it was at the other end of the country I would make the effort to attend though; I’ve been there since day 1 and will forever sing it’s praises 🙂

Volkspower – Be There or Be Fed Up You Missed It!

Ooooooh! And did I mention that it’s by the sea and quite a good surf spot too? Just a five minute walk to the beach with your wetsuit or a quick drive along the coast road to the local Saltburn scene. How cool is that?

I’m off to start shining my dancing shoes NOW! It’s time to come out and PLAY!


It’s the third week of my challenge and this time it’s all about origami.

Skull & Crossbones by Quentin Origami

Deriving from the words ‘ori’, meaning ‘folding’, and ‘kami’ meaning ‘paper’, origami originated at some time during the seventeenth century in Japan. It’s the art of transforming a flat sheet of paper into a three dimensional art form by the use of various folding and sculpting techniques – no glueing or cutting is involved; That would be ‘kirigami’. Then, of course, there’s ‘kokigami’ which I suppose is best described as ‘packaging’ – but more of that later… 😉

Paper Cranes – A Symbol of Peace

In truth, I’m no stranger to the gentle art of paper folding – In the past I’ve folded many a crane in the name of Peace and taught countless classes of Primary school children how to turn a paper square into something amazing. But you don’t really need me to show you how to do this in person as there’s oodles of fantastic websites, books, video tutorials etc out there that’ll take you through everything step-by-step.

This site’s great – video tutorials, lots to make and you can even print your own paper!

http://en.origami-club.com/

Anyway… I chose to have a go at some VW themed origami for this week’s challenge (of course!!!!!) , based on the classic Charles Esseltine VW Beetle design:

Origami VW Beetle Design by Charles Esseltine

Really, it’s not for beginners at all, so if you want to try this one out I’d definitely have a go at getting the more basic stuff under your belt first – There’s a rather lengthy tutorial on YouTube that you can have a go at following if you desperately feel you need to have a go – it’s in two parts so you’ll have to make sure you view both bits):

http://www.youtube.com/watch?v=Mu4mXNNXzWA

The fruits of my labour – a bit rusty as I haven’t indulged in a few years…

Pink VW Beetle by Big Blue Bully Bus

A tad tricky when an over enthusiastic bull terrier wants to help! 🙂

And Kokigami… I said I’d get back to it didn’t I?

First of all – it really does EXIST!!!!! It’s not a spoof. It would probably be wisest to do a Google search on this – or look it up in the Urban Dictionary. I can’t fully explain it without blushing!

Basically (and this is the story I would tell my Mother), many moons ago (the early nineties to be precise), I bought a lovely little book about this particular art form that had the most amazing pre-printed templates and easy to follow instructions, advice on taking accurate measurements and even scripts for role play etc. I believe that even now it’s long since gone out of print, that it’s still available to buy from the likes of Amazon; A tome I’d heartily recommend for your craft reference shelf if nothing else…..

All I can say is…….  if you found any of my links at all useful, and you’ve had a little go at a few folds etc……… and you’ve got access to a little bit of PVA glue, some scissors and a tape measure…… you’ll possibly LOVE this little book and it’s amazing projects; I’ll say no more 😉

The Kokigami Horse – Stuff of Nightmares?

Well maybe a little bit……

The best online reference I can find to the art itself and the particular book in question is here (it’s in Spanish but there’s an optional button to translate – hilarious in itself):

http://www.blogodisea.com/2011/que-es-el-kokigami/preguntas-respuestas/

Have fun! Speak to you next week about something much more sedate, Debby xxx 🙂

Adventures in….. Paper Quilling.

Posted: January 12, 2012 in The Garage

Quilling, sometimes known as paper filigree, seems to have started in around the fifteenth century somewhere in the Mediterranean area, where poorer religious types used it as a means of decorating reliquaries and holy pictures. Basically, strips of paper torn from the edges of bibles were wound round goose quills to form coils of paper, which in turn, were pinched into various shapes and forms and then glued in to place to resemble gold filigree jewellery. As the art progressed, it was also used to decorate walls in place of expensive paintings and coats of arms and examples of decorated tea caddies, furniture and three dimensional work etc can be viewed in the Victoria & Albert Museum in London.

If I’m absolutely honest, I wasn’t really looking forward to attempting this week’s craft. Not that I’ve got anything against it; It’s quite the opposite – I think paper quilling is absolutely stunning! It was just the thought of my ham-fisted self trying to do anything that’s so incredibly intricate and fine. Needless to say, I’ve spent much of the first half of this week acting like the Queen of Prevarication – finding time to complete all those really important household chores like ironing socks and dusting lightbulbs etc, rather than settling to the task in hand…… but today I plucked up the courage to have a go, locked myself away in the dining room for a few hours and finally came up with my second week’s offering.

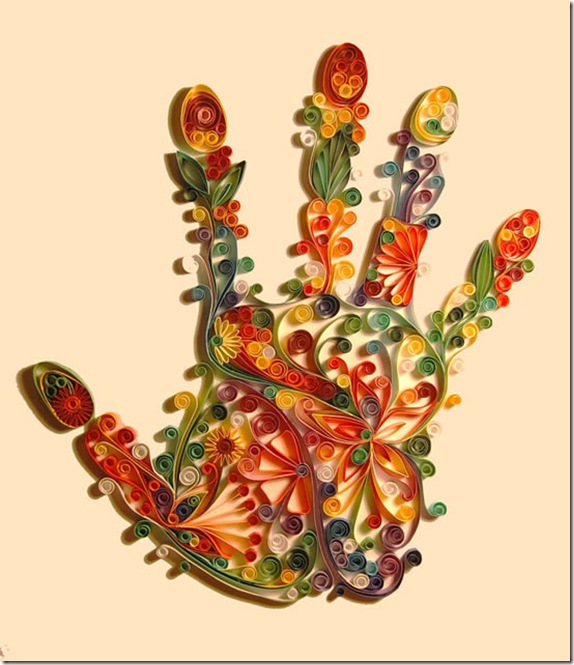
Paper Quilled Hand by Giraffe & Zebra

No! I didn’t do the hand – If only I could; It’s beautiful isn’t it?

My first tentative steps were much more humble and involved admiring the gently curving, rainbow coloured paper strips, that are quite striking in themselves, and then staring in despair at my beginner’s quilling tool.

I’d been looking at  ‘The Craft of Quilling’ (Janet Wilson ISBN: 0 85532 797 9) for my initial inspiration, which said that it’s a good idea to start by making some samples. Eventually, I plucked up the courage to have a go at making a few paper coils and shapes which turned out to be not half as bad as I thought it would be – so then I decided to really go for it…

The basic shapes I made.

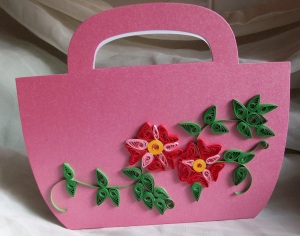
A fist full of quilling strips, some PVA glue and a short while later and I’d produced my first ever completed piece.

My first ever piece of paper quilling.

I’m going to use it as a Mother’s Day card – I’m over the moon with it! And now I can honestly say that the very mention of the word ‘quilling’ no longer fills me with fear OR trepidation; It’s brilliant! I’ve had so many ideas for projects I could use it for in the future; I just need to find some time to sit down after the next 50 weeks before I get the chance to really give it the time it deserves 😉

The glue's still wet but I couldn't wait to take a picture!

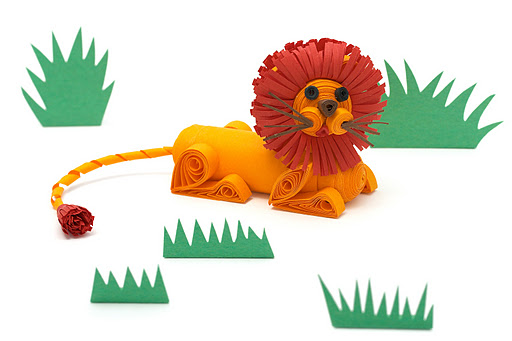
Why not have a go yourself? Or seasoned quillers may like to try an advanced project like this gorgeous 3D Lion.

Three Dimensional Quilling

The full PDF instructions for this project are available to download free at http://increations.blogspot.com/2010/01/lion-3d-quilling-project-with.html

OK. It’s week one of my take on the ’52 crafts in 52 weeks’ project and I’ve chosen to start with something I’m fairly familiar with; albeit a bit rusty at the moment.

This month’s theme is of course ‘Paper’, so I’m setting the ball rolling with a spot of decoupage. For those of you who may never have heard of this before, it’s basically centred around the creative art of cutting out, assembling, pasting and (sometimes) varnishing paper to make decorative objects. With it, you can give furniture a new boost of life, create fabulous greetings cards, 3D pictures etc and generally make all sorts of wonderful stuff for your home .

Fantastic results can be obtained fairly easily and it’s also a great activity to carry out with children when the weather’s vile outside and they’re climbing the walls inside 😉

Here’s a few examples of it in it’s simplest form, but you can make it as complex as you wish.

Bangles courtesy of Becky Decoupage 

Mickey Mouse Side Table by Bombus

In the past, when I’ve had a go at decoupage, I’ve tended to use it to make 3D pictures and greetings cards. This involves using multiple repeat images to build up layers which are then stuck one on top of the other. In each layer, you focus on different elements of the image and cut them out to build up the final piece – Silicone glue, or foam sticky pads also help to give depth to the image and this really helps to make it ‘pop out’ from the page once everything is stuck in place.

Sound difficult? Opt for a technique such as pyramage and it’s simplicity itself!

Here I’ve cut a series of graded rectangular pieces from repeat images of a gorgeous flower powered bug and used sticky pads to hold everything in place and give a raised pyramid effect.

Flower Power Beetle by Big Blue Bully Bus

And here, I’ve used graded squares which gently twist round to create a slightly different effect.

Twisted Pyramage VW Beetle by Big Blue Bully Bus

Here’s an example of a more traditional piece of decoupage that I’ve just created – you can buy ready printed, pre-cut sheets if you want but I prefer to make my own. Only thing is I still need to find time to cut the pieces out and stick it all together!

Email me at bigbluebullybus@yahoo.co.uk and I’ll mail the full PDF to you if you’d like to have a go at making it too 😉

VW Bug PDF by The Big Blue Bully Bus

Phew! Blog post and first craft nearly over – just another 51 to go!!!!

Finally, here’s a little list of things that I’ve copied from Wikipedia that you might find useful if you want to have a go at decoupage for yourself:

  • Something to decoupage onto. Examples include: furniturephotograph albums, plates, ceramics, shelving, frames, mirrors.
  • Pictures to decoupage with. These can come from myriad sources: newspapersmagazinescatalogues, books, printed clip art, wrapping paper, greeting cardsfabrictissue paperlace.
  • Cutting utensil. Scissors, craft knife (X-Acto) or razor blades can be used.
  • Glue. Standard white glue works best if it is diluted with a little water. Specialty glues can be found in most crafting stores.
  • Smoother. Popsicle sticks work well. A brayer is a specialized tool like a miniature rolling pin designed to help remove wrinkles, remove excess glue and smooth pictures.
  • Glue spreader. Many things around the house can be use for this: cotton swabspaint brushes, sponges.
  • Rags, sponges, tissue paper to help wipe up glue and other clean up.
  • Sealer. Glue or other decoupage medium can be used as a sealer. Alternatively, polyurethane, spray acrylic or other lacquers are usually used.

Why not have a go yourself? It’s fairly inexpensive and great fun!

Happy New Year!

Posted: January 1, 2012 in The Garage

Wow! 2012 already – feels like someone snatched last year out from under my feet!!!!!

Neary mind…. I’m hitting the ground running as usual with lots to do and lots planned for the forthcoming year… 😉

Here’s a bit of a sneaky peek at some of the things I’ve been working on recently and a couple of gorgeous VW themed treasures added in for good measure…..

Happy New Year Folks!

Image