Archive for August, 2012

I’m feeling more than a bit perturbed that an entire month has seemingly passed without my noticing! Who stole August? Give it back IMMEDIATELY!!!!!

Inevitably, we’re hurtling towards the silly season (but I’ll try not to use the ‘C’ word just yet); various magazines are beginning to focus on all things festive and I’ve even noticed little packs of cards and wrapping paper appearing in the local shops and supermarkets. It’s not time to panic at the moment but I feel the pressure is now well and truly on to start getting creative 😦

So, on this penultimate day of the month I’m going to take a quick look at some fibre based fun that may inspire you to have a go at making some early presents for that special day in December and also give you a few links to places you might like to visit from the comfort of your own armchair for some essential stocking filler purchases that’ll help you avoid the usual rush of shoppers as the date draws ever near 😉

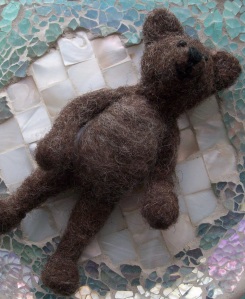
I was thrilled at how my first ever attempt at needle felting in 3D turned out!

Have you tried needle felting? It’s great fun! Although I’ve used it many times as a technique for embellishing flat surfaces in the past, I resolved to have a go at making something in 3D for the first time way back in January; It was surprisingly easy and I was delighted with the finished results considering it was my first ever attempt at it……

Needle felted bear – Such a cutie!

For a little bit of an introduction to the art of needle felting I suggest that you follow this link: http://www.thesilverpenny.com/freeprojectneedlefelting.html

A general search on Google will reveal further resources 😉

But if it’s needle felted goodies with a difference that you’re after I would urge you to pay a visit to my good friend Emma Dolan: http://www.emmadolan.co.uk/

A friend since High School, she cleverly uses techniques such as machine needle felting to recreate classic ceramic designs with a modern twist in her fascinating Harris Tweed creations and has given me a boost on more than one occasion when my confidence has flagged slightly. She also loves camper vans; I can’t praise her highly enough 😉

Seventies Inspired Heaven!

Hornsea Pottery inspired Harris Tweed lampshades – Emma Dolan at Weetwood Studios.

Still on the subject of felting fun…….. How about making felted fabric for yourself?

The humble washing machine can be a great help in this task…….

There were plenty of tears and a huge hissy fit when I accidentally turned my Favourite BODEN sweater in to a piece of felt in a washing machine hiccup 😉

……Just make sure that what you’re doing is intentional – the above plush heart was crafted from felt that I’d inadvertantly made after a bit of an accidental laundry incident. Good job it turned out OK in the end…….

Wash day disasters aside, making felted fabric by placing a knitted item (you need to have used pure wool rather than a man made yarn) in a hot wash is a fascinating form of crafting alchemy I’d heartily recommend you have a go at trying for yourself……

Hand knitted bags which have been felted by placing on a hot wash cycle.

The resulting felted fabric looks fabulous!

Then there’s the more traditional way of wet felting……

My friend Lucy Bowring has made a great little tutorial on how to do this:

http://www.georgeandlilly.co.uk/page_1709211.html

She makes the most gorgeous things – It’s well worth taking a look at the rest of her website if you have a spare moment or don’t fancy trying wet felting for yourself but would love to buy some ready made goodies instead.

Lucy Bowring at The Plum Tree.

Alternatively, you could take a peek here: http://www.corinnelapierre.co.uk/

Another local feltmaker that makes many wonderful things and also produces some fabulous little crafting kits that would make great gifts for your loved ones…..

Corinne Lapierre – At Weetwood Studios, 2011

Plenty of gift ideas for lovely little stocking fillers.

Phew! That lot should keep you busy for a while whilst I get on with a few of my latest projects……..

Hand knitted headband – A great little gift for a newborn now that Summer’s coming to an end but it’s still too warm for a hat.

Hand Crocheted Barefoot Sandals/Foot Thongs – Perfect for beach weddings, dance, yoga, festivals etc…. 😉

Plenty of stuff to keep me busy too. Mmmmmmmnnnnnnn…….. But a note to self – Must probably stop using zombie feet and skulls as photo props and resolve to find something more mainstream and slightly less disturbing instead …… 😉

Oh well! Next week see the start of a new month and a new theme; Until then, Happy Crafting Folks!

This month’s theme is ‘Fibre’ and there’s some brilliant resources and inspiration out there on the internet to help you create a real feast for the eyes, whether you’re an avid knitter, crocheter, needle felter, weaver etc.

Here’s a few links to my absolute favourite make of the moment – the completely mental fish hat:

Crocheted fish hats – Cool Catch of the Day!

A really easy to use crochet pattern for these amazing fish hats can be found at http://www.etsy.com/listing/93935964/fish-hat-pdf-crochet-tutorial-pattern

Angel’s Chest advises that you can use the pattern to make and sell these funky fish locally at craft fairs etc but requests that you refrain from selling them online; A very fair ask for the opportunity to use such a well written and comprehensive set of instructions with pretty much step by step pictures to help you along the way. I love it!!!!!!!!

Crochet fish hat in eye popping neon brights.

In fairness the fish hat has been around for a while though – It’s not really a new idea. The original version appeared on ‘Knitty’, way back in the mists of time (2008 to be precise)… http://www.knitty.com/ISSUEwinter08/PATTfishy.php

And now there’s even a dedicated website complete with further links to assorted patterns and ideas for creating a whole ocean full of different versions, including instructions for folks with knitting machines…

http://www.deadfishhat.com/

It’s another Bank Holiday weekend here in the UK – Obviously it’s going to pour it down for the duration……. If you’re sat twiddling your fingers looking for something to do why not have a go at making a fish hat for yourself ?…………and join in with the festival fun 🙂

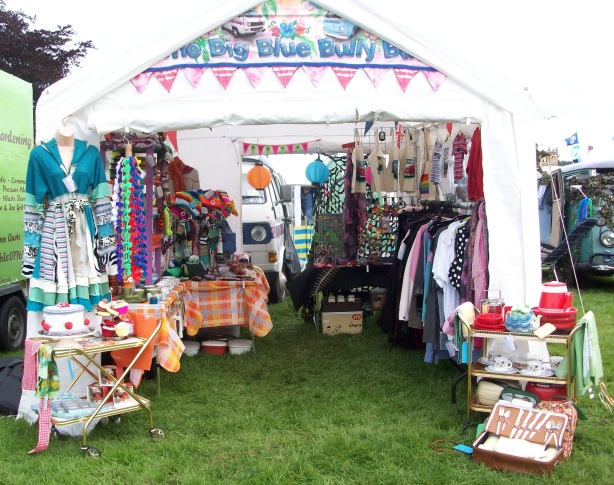
Although many people that I spoke to said that there didn’t seem to be quite so many stands selling handmade wares as last year, I thought that there were a fair few crafty types at LVWF 2012 when I had a look round for myself. The overall judgement did seem to be that people were tired of seeing the same old stuff been rolled out at most shows, week after week though, so it was really flattering to hear that the Big Blue Bully Bus Stand was seen as a breath of fresh air to most folk passing through and I had some great feedback over the four days that we were there; There definitely seemed to be a real buzz of excitement in the tent for the entire duration of the show with people billing and cooing over each new treasure they spotted 🙂

To view piccies of the stand you’ll need to check out the board I’ve set up on Pinterest – http://pinterest.com/bigbluebullybus/the-big-blue-bully-bus-wulli-bulli/

Edited highlights of some of the goodies available at this year’s Leeds VW Festival.

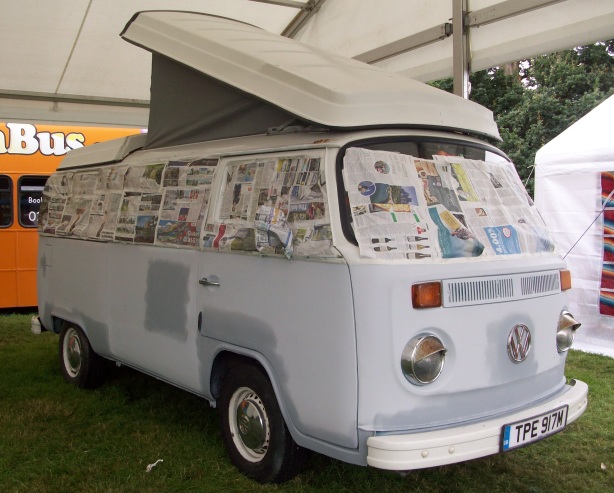
But my favourite art and crafty bit had to be the graffitti stand where assorted rides were given a new lease of life with a quick lick of paint…..

A nice little line-up of vehicles that have already undergone a transformation.

Hibiscus flowers – Great choice!!!!!

‘I’m just going to let them do what they want’, said the owner of this late bay……..

Sadly, I was too busy to get back and find out how the above bus turned out; I bet it was a stunner if the other examples were anything to go by….. Can’t wait to see the pictures of it that’ll no doubt be posted up on the official LVWF website over the next few days 😉

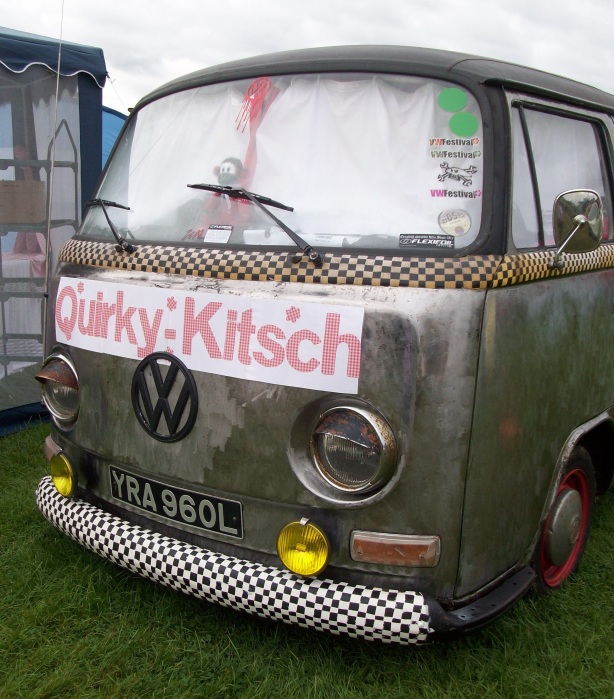
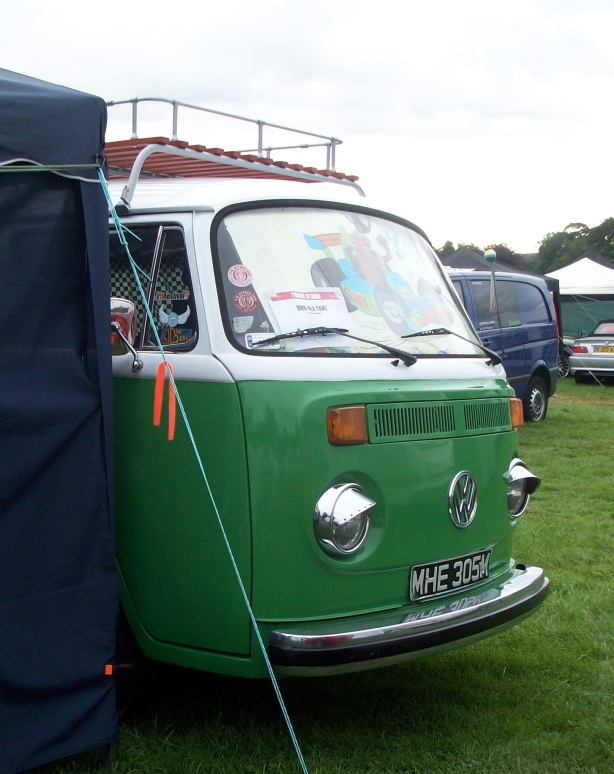
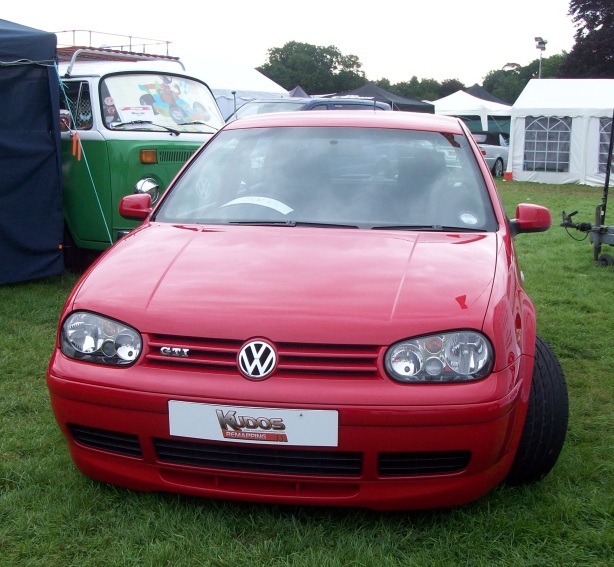
There were some great rides at LVW Fest as usual, with a significant representation from the water cooled community. Lots of old favourites and a few new ones thrown in for good measure.

Here’s a few that caught my eye…….

Pristine paintwork on a gorgeous monochromatic splitty.

Grrrrrrr!

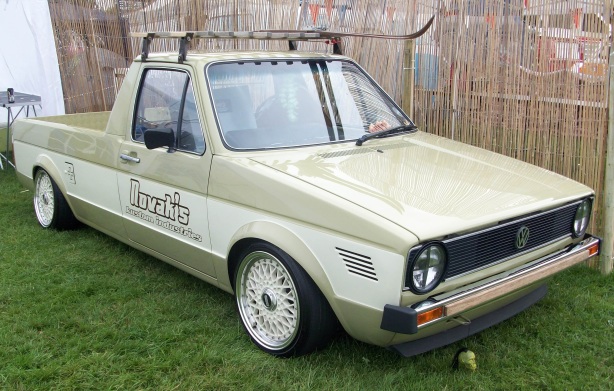
You can’t beat a classic Caddy! And I was drooling over this one 😉

Nice paintwork…

Naff content but I think most of the boy racers would vote it rear of the year (AGAIN!!!!!)

Another drool worthy option…….

This time it was Mr Other Half’s turn to get excited: He misses his souped up Caddy sooooooo much!

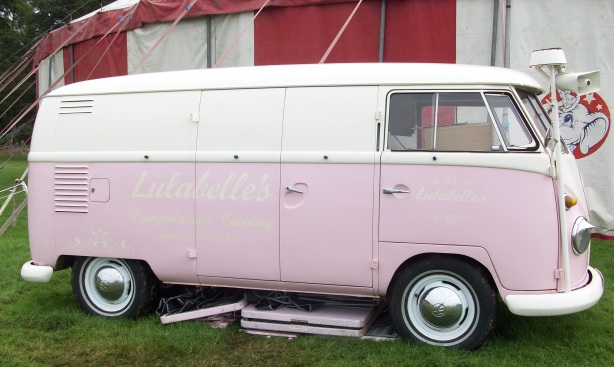
Lulabelle – Compact catering from a classic Splitty 🙂

This one makes me smile because it reminds me of many hours spent handling an angle grinder on my early bay 😉

Ratty Late Bay

Peekaboo!

The water cooled community was very much in evidence at this year’s show.

I love this!!!!

Scoobified Caddy; Yum!

All lined up and looking for new owners……..

Looks familiar! Billy the Bulli sporting the latest hi-tech waterproofing solution – chromework that caught the eye of many a passer by judging by the amount of people who stopped to take a photograph 😉

Phew! We’re back in one piece but in desperate need of a nice hot bath after four days of hard core camping.

A quick set up of the tent on Thursday…

The trade tent; Bursting at the seams with fabulous goodies as usual 😉

Followed by a nice relaxing walk around the grounds of Harewood House the following morning to look at the birds and admire the gardens…

The Courtyard at Harewood House; A great place to grab a cup of coffee and a nice slice of cake.

All finished off by a bite to eat in the Courtyard…

Lemon drizzle cake for me; Coffee & Walnut for Mr Other Half 🙂

It was a great weekend with lots of new faces and a fair few familiar ones stopping by to say ‘Hello!’ ; A fantastic bunch of folks as usual 😉

Now that bath of mine is just about ready……… more piccies to follow tomorrow 😉

It’s the time of year I kind of like the most…….. the annual VW show that’s right on our doorstep; Leeds VW Festival at Harewood House – just six miles away from home.

Billy the Bulli and Vince Bully Bus have both been prepped; Ale has been purchased in sinful amounts and nibbles are ready to be consumed by the countless friends that pop by to say, ‘HELLO!’ Come what may, we’ll be setting up camp tomorrow afternoon and hopefully updating the blog over the weekend at regular intervals……. fingers crossed……

The weather forecast says that there might be rain over the weekend – it’s been kind of a tradition with LVW Fest over the last seven years…… But this is the first time it’s scheduled to run as a full weekend event though. I hope there’s no mud! Regardless, I think it’ll be a good weekend at Camp Big Blue whether the sun shines or not……. 😉

Will there be evidence of fibre related goodies? You bet yer life there will! Lots of hand knitted and crocheted daftness, plus some rather gorgeous vintage glamping essentials and a few tea trolleys added in for good measure……. and that’s just in our tent 😉

A sneaky peek?

Festival Owl Hat: Pattern courtesy of the very talented mamachee on Etsy 😉

Owls are a bit of a Leeds thing; They’re also set to be the uber cool theme in accessories (Again!!!!!) this Autumn.

You know what they say………. Get ahead; Get a hat!

And I know of a nice little trade tent in the heart of Yorkshire where they’ll sort you out just right…. 😉

Check out the website: http://www.vwfestival.co.uk/

or come and say ‘Hello’ at Camp Big Blue ; You’ll be very welcome 😉

If Yorkshire was a country it would be currently ranking seventh in the world for the number of medals gained during the Olympics. Wow!

A golden postbox – right on the doorstep 😉 And it’s not the only one……

We seem to have a little crop of specially painted golden postboxes popping up in and around Leeds and the surrounding area – The one pictured above is right on my doorstep in neighbouring Horsforth and has been transformed to celebrate Alistair Brownlee’s Gold medal win in the Triathlon; The paint is still drying on one outside Leeds Art Gallery to celebrate Nicola Adams’ amazing win for British women’s boxing. I’m welling up with pride at how well they’ve done – and the rest of Team GB 🙂

So this week I’ve decided to make a pretty, gold coloured decoration to brighten up the days once the Olympic celebrations have ended.

It’s crochet time!!!!!!!

Here’s my attempt at creating a little set of instructions for making a cheery flower garland; It’s not a tried and tested pattern as such…….. but it works for me. And hopefully you’ll be able to follow along too without too many problems……. 😉

First of all you’ll need to find yourself a 4mm hook and a small quantity of DK weight yarn. I grabbed some lovely golden acrylic from my yarn stash but it appears to be a little ‘fluffy’ in the accompanying photos – cotton DK might have been a better choice for the sake of clarity.

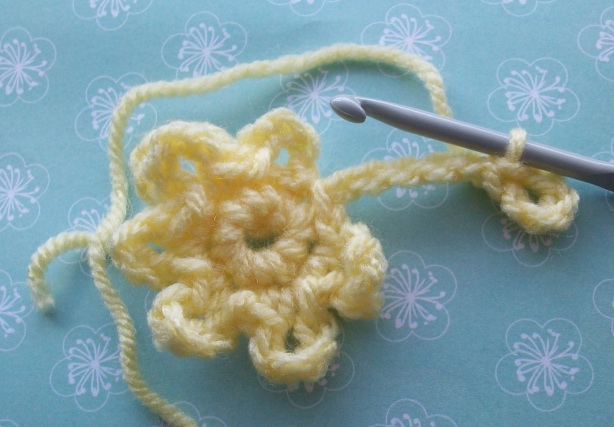
Whatever yarn you choose, you’ll need to start by making a chain 10 stitches long which you then join with a slip stitch to make a loop, as pictured above.

Now chain 4 stitches and make a second loop. Join once more with a slip stitch (So far, so good? If you’ve managed to follow this you should be looking at something rather like a figure of eight).

Chain 1, then single crochet six times round the smaller of the two loops, finishing by joining with a slip stitch. This will be the centre of your first flower.

Now we’re going to chain 4 to make a little loop which we join at the base with a slip stitch.

Single crochet into the next stitch.

Chain 4 to make another loop then join at the base with a slip stitch, single crochet in the next stitch etc until you’ve completed the round and created six ‘petals.

Chain 10 stitches.

Slip stitch in to the fifth stitch away from your hook to make a new loop for your next flower centre.

Chain1. Single crochet around the loop six times and join with a slip stitch……… make six petals as before……….. chain 10……….slip stitch in the fifth stitch away from the hook and so on………..

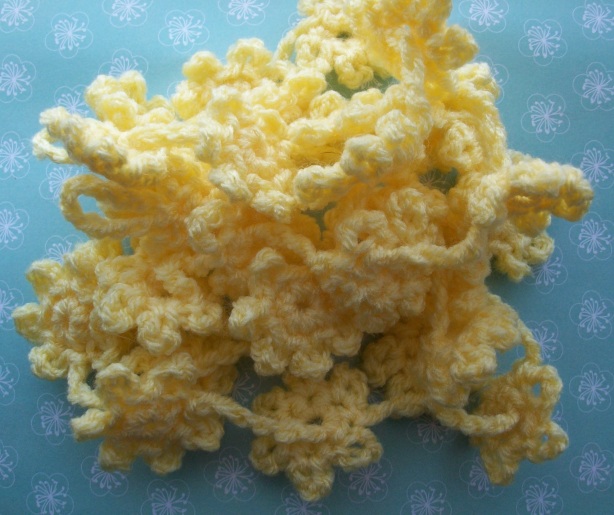
Basically, you just keep repeating the above process until you’ve created a length of garland that you’re happy with. Finish by making a chain 10 stitches long and slip stitch this to make a loop (great for hanging from hooks etc).

I made my garland so that there are exactly thirty separate flowers – it spans across the cab in my camper van quite nicely. It also brightened up Mr Other Half’s bus for about five minutes before he demanded his own garland in a manly blue colourway…….

Good job that I made a few more before writing this week’s blog, eh? 😉

Whilst my wrist and the dreaded carpal tunnel syndrome continues to be a bit of a problem I’m determined to not let it interfere any longer in my ’52 crafts in 52 weeks’ odyssey. I think a rough tally has revealed that I’m about 7 weeks and nearly two themes behind at the moment; Not good, but I’m sure I will catch up eventually……..

So – a little project tutorial to get me back on track this week which addresses the August theme of ‘Fibre’. Have you got your knitting needles at the ready? Let’s begin……

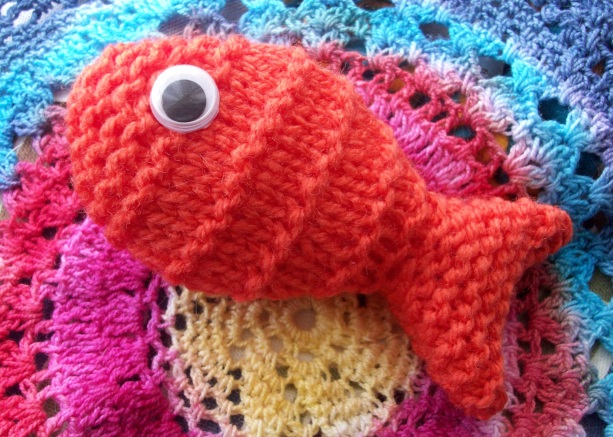
Instructions for making a simple version of my knitted fairground fish – Hurrah!

For this project you’ll need a pair of 4mm needles, some DK weight yarn, a pair of safety google eyes, BS standard toy stuffing and a large darning needle.

Start by casting on 15 stitches and knitting 4 rows of garter stitch (every row is a knit row).

Continuing in garter stitch, decrease at each end of the next and every alternate row until you are left with a total of 7 stitches.

Purl 7 stitches in the next row – from this point we will be continuing in stocking stitch for the main body of the fish (so it’s knit a line, purl a line from here).

Increase at each end of the next, and every alternate row, until you have 15 stitches.

Continue in stocking stitch without any further shaping for the next 9 rows.

Now we’re going to go back to garter stitch – so we’ll be knitting every row from here. Decrease at each end of this, and every alternate row until you have three stitches.

To finish, knit these three stitches together and fasten off. Repeat the whole process again for a second fish shape.

When both pieces are complete, position the safety eyes, sew together inside out, leaving the tail end open ready for turning and stuffing.

Turn the right way round – remember, it can be a bit of a squeeze at the tail as it’s only 7 stitches wide! Stuff lightly – the blunt end of the knitting needle is a great aid in helping to complete this task. Oversew the ends of the tail together and tie off, weaving in any loose ends.

I like to add a little bit of fishing line to the central back of my fish and display them suspended in little plastic bags – just like fairground fish. Ultra cute and very quick and easy to make!

Please feel free to use this tutorial to make your own fairground fish but remember to acknowledge the designer should you choose to do so. My fairground fish design is ACID protected with detailed paperwork and images to support each stage of production – so to avoid legal action please do not attempt to sell the pattern or design as your own 😉