Posts Tagged ‘stitching’

So! Are you ready for some more sewing adventures? Yes? Good – It’s great to have you on board!

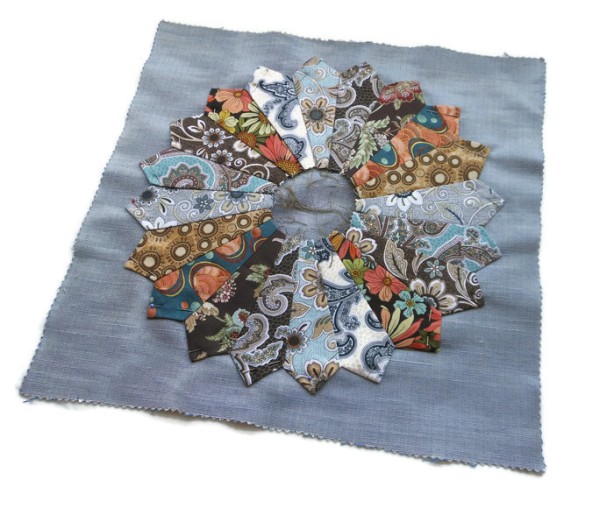
If you followed my last post carefully you should have ended up with something that looks a little bit like this:

DSCN0521

Today we’re going to add the finishing touches and incorporate it into a really simple cushion design.

Ready to start? OK, grab yourself a half metre of a plain, hardwearing fabric and cut a square measuring 35 x 35 cms and two rectangular pieces measuring 35 x 25 cms.

Take your square and fold in half then half again and give it a little press with an iron – This shows you where the centre is.

X marks the spot!

X marks the spot!

Now you’ll need to position your beautifully crafted patchwork using the crease lines to help you. Once you’re happy with it’s position pin everything securely in place.

DSCN0525

Now for a bit of sewing – Either using a zig-zag or standard straight stitch, carefully sew along the edges of your work, removing the pins as you go.

DSCN0527

This part takes a bit of time and requires a lot of lifting of the sewing foot and re-positioning – Just stick with it; You’re nearly there 🙂

Now you need to find a piece of scrap cardstock which we’ll use to make the central piece of our patchwork. You’ll need to cut a circle of card that’s slightly bigger than that unsightly hole in the middle of your work, then cut an even larger circle of fabric – It doesn’t matter if it’s a bit rough; No-one’s going to see your wonky scissorwork.

DSCN0530

Now take a needle and thread and place a line of running stitches around the edge of your fabric circle, put you card circle in the middle and pull the threads tight so that they gather neatly round it.

DSCN0532

Press with an iron and take care NOT to burn your fingers. Remove the card and Hey Presto! – A perfect fabric circle to add to the centre of your work.

DSCN0535

Now you’ll need to pin it into position…

DSCN0536

And sew it into place.

DSCN0539

This is the stage when it’s probably a good time to do another little happy dance and marvel at your completed patchwork. Do the Instagram, Facebook, Twitter thing too if you have to – It’s good to share your triumphs with others.
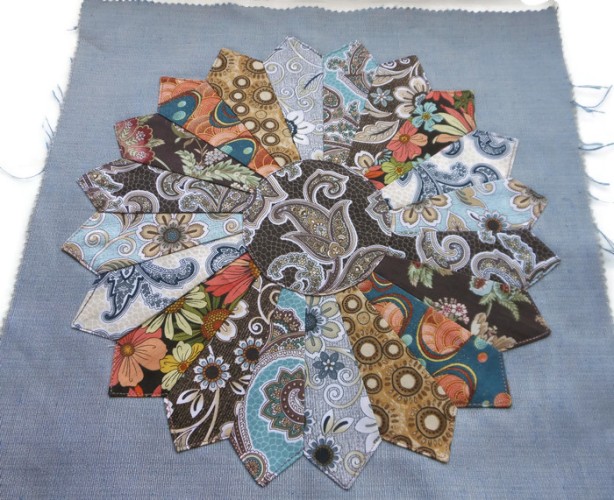
Yay! The front of your cushion cover is complete - Gone forever are those unsightly threads and frayed edges of fabric.

Yay! The front of your cushion cover is complete – Gone forever are those unsightly threads and frayed edges of fabric.

So we’re on the home run – Not much more to do until we’ve made our marvellous cushion cover.

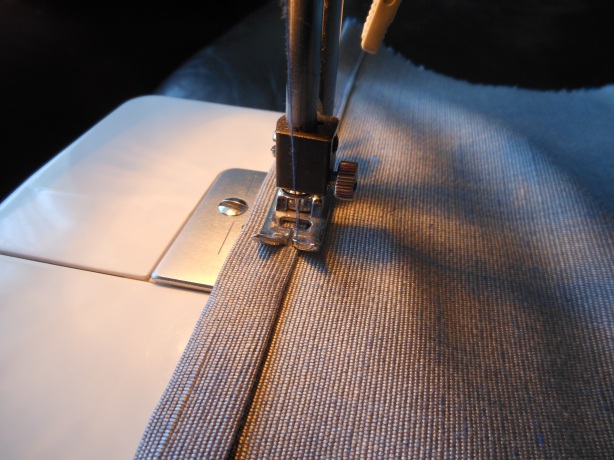
First we need to turn our attentions to the two rectangular pieces of fabric that are going to make up the rear of our cushion. We’re not going to fuss with zips or get into a muddle with buttonholes, we’re just going to make a simple envelope fastening so start by hemming each piece.

DSCN0540

Once your hems are sorted you’ll need to piece all the elements together – Remember! You’re creating an envelope fastening at the back so you need to overlap your two rectangular pieces. Pin everything into place. take a deep breath and get ready to do your last bit of stitching 🙂

Yeah I know! Get me with the snazzy label :)

Yeah I know! Get me with the snazzy label 🙂

Now it’s a simple matter of sewing around all four edges of your cushion cover. I usually make a second pass with a zig-zag stitch as this helps to prevent fraying and also ensures nice strong seams that won’t burst open any time soon. It’s also a good idea to snip the corners off to reduce fabric bulk and make it easier to turn your work.

DSCN0548

And, speaking of turning your work, that’s the next thing you’ll need to do. It’s time for the big reveal! Are you as excited as I am?

Well? How does it look?

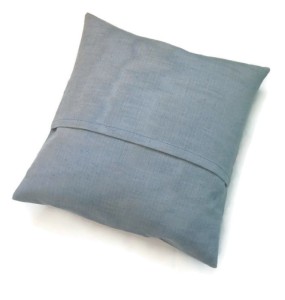
Time for a final press with the iron and then we’ll pop a cushion inner into our marvellous make. If you’ve followed this tutorial closely you’ll have made a cushion cover that’s just the right size to take a ‘Krakris’ cushion which you can buy at Ikea for the princely sum of £1 – Total Bargain!

DSCN0566

Ultimately though, you’ve made something that looks like a million dollars; You should be dead proud of yourself 🙂

And now you know how to do it, what’s stopping you? Go on! Make a few more and give your home a little makeover – You’ve got no excuse not to 🙂

Happy Stitching Folks!

DSCN0552DSCN0555

Last week I said I planned to make something nice to show off the new stitches I’ve been practising – but I’m so completely enamoured with feather stitch that I haven’t had time to attempt anything else!

My aim for this week was to replicate the heart featured in this great tutorial from A Simple Quilter:

http://asimplequilter.blogspot.co.uk/2008/11/christmas-ornament.html

But once I’d sat down and started I decided that I had to make a few changes to my original plan as the very first line of turquoise feather stitch immediately reminded me of Sally in a Nightmare Before Christmas……

Sally Finkelstein – Seamstress extraordinaire.

I think it’s the patchwork that did it. At any rate I decided not to opt for additional stitches or seed bead details but instead plumped for feather stitch to delineate the patchwork sections and blanket stitch to edge the outline of the heart. To finish, I chose to use a die cut pleatherette flower, assorted loops of ribbon and a flower shaped mother of pearl button. I’ve also included a ribbon loop for hanging and filled it with micro aroma beads which I’ve fragranced with ‘Baby Powder’. Here’s the results:

‘Sally’ heart by Big Blue Bully Bus 🙂

So, it’s another week of me feeling very pleased with myself; It’s also been a very productive process as it’s given me lots of inspiration for how I could adapt the idea further to incorporate different fabrics other than felt to create the newest addition to my repetoire – ‘The Sally Heart’.

I think that both her and my Gran would heartily approve of my efforts 😉

Officially, it was a 100 days until Christmas 2012 yesterday – So let the nightmare begin!!!!!

It’s a new month and a new theme; September is all about ‘Embroidery’.

So I’ve been sat thinking about the 101 things I want to attempt over the coming weeks and how I can tie this month’s theme in with my general list of things to do…….. it’s to the designing table I’ve been………. and here’s this week’s offering……. 😉

It says in Wikipedia that, amongst other things,  ‘Embroidery is the art or handicraft of decorating fabric or other materials with needle and thread or yarn. Embroidery may also incorporate other materials such as metal strips, pearls, beads, quills, and sequins.

A characteristic of embroidery is that the basic techniques or stitches of the earliest work — chain stitch, buttonhole or blanket stitch, running stitch, satin stitch, cross stitch — remain the fundamental techniques of hand embroidery today.’

Cool ! I like stitching – Cross stitch is my perennial favourite but I’ve recently been dabbling in freeform machine embroidery after a break of nearly 16 years. I’ve learned to love my sewing machine again; I think that’s a story that’s best saved for another week though……

This week I started out by digging through a box of unfinished projects in a bid to find something to blog about. And I actually turned up a tapestry that I’d started at least 10+ years ago as a soft furnishing idea I’d had for the last house we lived in!

Tapestry work that hasn’t seen the light of day for over ten years!

First things first, I sat down and finished it – There wasn’t that much left to do……… I can’t think why I’d discarded it in the first place. Now I’ve just got to find the time to source some coordinating fabric so that I can make it in to the cushion cover I had originally intended it to be used for (possibly another ten years for that to finally see completion then!) 😉

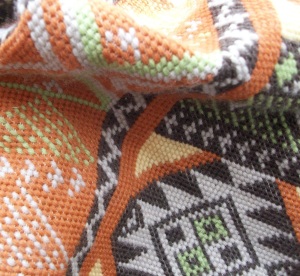
Detail of part of my old tapestry cushion project – A bit of blocking and pressing might be required to get it looking its best methinks!

Sitting down and finishing the piece actually got me thinking some more……. It’s been ages since I’ve done any tapestry; I kind of forgot how nice it is to sit and quietly stitch my way through a larger, more time consuming project. It’s very satisfying to see a design gradually spring to life over a period of days, rather than quick-fix crafting that’s done and dusted in a few hours. With this in mind I decided to plan out something that’d keep me quiet for a week or so…… An on-trend, mandala inspired tapestry cushion.

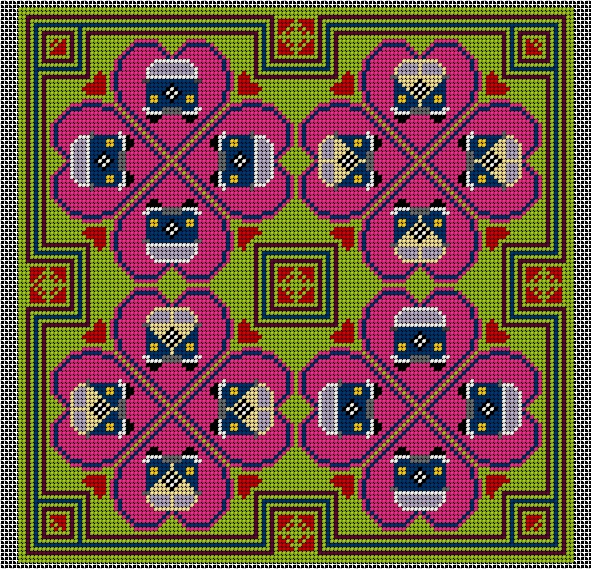
This was my initial starting point – a tried and trusted design originally intended for use in cross stitch projects.

One of my ACID protected designs – I use it constantly in cross stitch projects but decided to apply it to tapestry work this week for a bit of a change 🙂

All my designs start out on the computer – actually plotting something out from scratch can be a bit laborious to begin with but once the initial idea is complete it becomes very easy to manipulate it, change colours etc in a matter of moments. So I started with a conjectural view of the original design as it would look when worked as part of a tapestry rather than cross stitch………

The initial design looks just as good when worked as a tapestry rather than cross stitch.

Then I started playing around with it a little bit by adding a background colour and repeating, rotating and flipping the basic motif……

Looking good!

And also added a few more design elements to create something which could be used as a tile for further repeats…….

Looking gooderer! As Keith Lemon would point out 😉

I went through exactly the same process with a bay design before alternately placing each element together to create a larger block of four tiles in total. And finally altered the outside edging to make the whole design look like a more cohesive, finished end product.

Hey Presto!

I can’t wait to get stitching this design!

I’m really pleased with the finished result – Albeit only as a computer generated image at the moment. I think it’ll look great if I actually manage to complete it. I said I wanted to design something which would take me a week or so to create but I’m guessing that if I’ve got it done by Christmas 2012 I’ll deserve a rather large pat on the back for all my efforts…..

At any rate, I’m off in to Leeds tomorrow to gather supplies ready for the task in hand. Wish me luck!!!!!

Wow! It’s already February and this week see’s the move into the second month’s theme of  ‘Jewellery’. And a very busy start to the month at Bully Bus HQ it has been what with early Spring cleaning and all; I was fearful that at one point I might not be able to squeeze this week’s offering in at all, but here it is – my adventures in beaded felt jewellery….

I love playing with embroidery silks and beads!

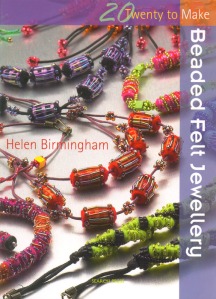
First of all, I have to say that I LOVE making little felt beads! The resulting treasures look great when incorporated into jewellery designs and are always a really big talking point when people spot me wearing them. They’re incredibly easy to make and there’s also a brilliant little book bursting with all the inspiration and instructions you’ll need to get producing them for yourself.

Beaded Felt Jewellery – Helen Birmingham

If  you haven’t got a copy of this inexpensive little book, and you feel after reading this blog that you’d like to include beaded felt jewellery in your own crafting repetoire, I would highly recommend popping along to your local bookshop, craft store or online at Amazon and make sure that you pick one up – ISBN-13: 978-1844483150.

Make sure you gather everything you need!

So…….. How to make some felt beads of your own. Hopefully you’ve gathered together some scraps of felt (the thin crafting type is easier to work with), some embroidery silks (although normal sewing thread is fine), a selection of seed and bugle beads, a sewing needle, some scissors and a bamboo skewer – make sure that you either cut the sharp end off, or cover it with a blob of  Blutack or piece of cork though; From painful experience I can’t tell you the number of times I’ve impaled myself with the air turning blue as a result 😉

Step 1: Cut yourself some strips of felt roughly 2.5 cms wide by about 8 cms long. Select some thread to match the colour of your felt – it doesn’t matter too much if it’s not exact.

Step 2: Take the bamboo skewer and wrap the felt strip tightly around it. Use a few stitches to secure the edges in place. I’ve used a contrasting colour to demonstrate – And don’t worry about being too precious at this stage as you won’t actually see this join when you’ve finished.

Wrap tightly then stitch to secure.

Step 3: This is where the fun begins! Choose some contrasting thread and using your needle, sew into the felt tube at one end to secure in place. Carefully wrap around the tube with the thread, making sure that both ends are tightly bound – otherwise the ends will flare out over time and the beads may look mis-shapen. Finish off with a little knot and bury this, along with the tail of you thread, inside the bead.

Bind well at each end to stop ‘flaring’.

Step 4: Securing fresh thread in your felt tube bead (back to the same colour you used in Step 1) you can now add your embellishments. I tend to start at one end and work randomly, stitching through from one side to the other each time to secure your seed or bugle beads in place. This will add strength to the structure of your bead and ensures maximum life expectancy when incorporated into jewellery pieces that are sure to be worn again, and again, and again….

To make life easy I’ve used size 8/0 beads; Size 11/0 will require more patience as not all will slip over the eye of the needle!

I like to add the beads in a random pattern – but neat freaks may differ in approach 😉

Step 5: Believe it or not that’s pretty much it! Repeat each step until you’ve got yourself a nice little selection of beads which you can then use in your own jewellery making projects. I tend to keep the beads on the skewer until I’m ready to use them and you’ll find that you can easily fit about six or seven beads to a skewer – just the right number to use for a bracelet!

So easy! And gorgeous when incorporated into your own designs 🙂

Yay! The finished product; Very nice – even if I do say so myself 😉

Next week I’m going to be having a go at more bead making – but this time with Polymer Clay. Wish me luck!