Posts Tagged ‘Valentine’s Day’

So it’s the second instalment of my weekly dip into all things Pinterest & tutorialwise and this week I fell in love with a batch of heart themed goodies………..

This bunting design won hands down for me!

This bunting design won hands down for me!

There’s oodles of stuff dedicated to Valentine’s Day at the moment but the outright winner for catching my eye and making me want to pick up a crochet hook and get started straight away was this marvellous bunting tutorial from Jam Made Studio – You can find the instructions here: http://jammadestudio.blogspot.com.au/2013/03/crochet_17.html

I’ve decided that I’ve GOT to have some for my shed………. and then maybe a little span in the camper van might look quite nice………… Son 2 mentioned that he might want some to present to his girlfriend as a Valentine’s gift…….. the possibilities for creating string after string may well be endless!

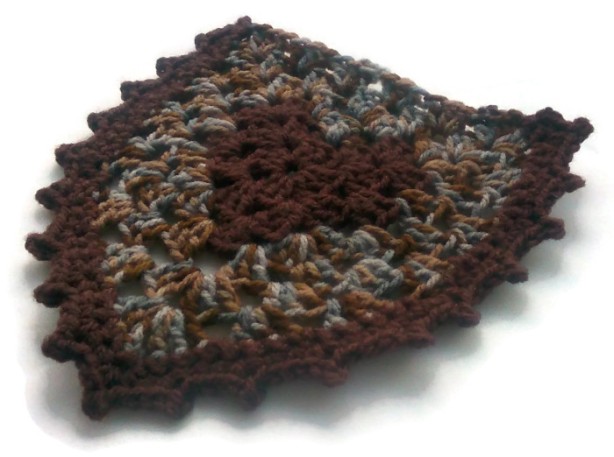
So I’ve made a start; Should keep me quiet for a bit………I’ve chosen shades of brown and grey for the shed and sorted out an appropriate colour palette of yarns to complement the bus interior. Son 2 will be consulted shortly as to what his requirements may be……. Yes! I think I may be very quiet for a day or so ๐Ÿ˜‰

The first pennant for the shed is in the bag - Just another five or six to make and the job's a good 'un!

The first pennant for the shed is in the bag – Just another five or six to make and the job’s a good ‘un!

Oh well! Time to start working on another pennant – Bunting won’t make itself I suppose…….

Happy Crafting Folks!!!!

I’ve resolved to try much harder with blogging this year and set myself a challenge of once again attempting to make something each week using the Internet to aid me in my quest. I thought maybe having a go at my own versions of some of the fabulous ideas I’ve collected through Pinterest, coupled with a snazzy random tutorial generator would be a good place to start……. So here goes……..:)

Crochet edged bunting - A must have for the Bully Bus!!!!!!

Crochet edged bunting – A must have for the Bully Bus!!!!!!

For a while now I’ve been collecting vintage handkerchiefs and embroidered linen tablecloths with a view to making some bunting for assorted ‘glamping’ trips planned in the near future. I love the idea of adding a crocheted edging as something a bit different from the norm and there’s loads of photo examples of this popping up on Pinterest all the time – on bunting, pillowcases, tea-towels etc. So today I sat down and decided to have a go for myself after spotting a link to this blog post in my daily pinspired newsfeed.

However, I did decide to adapt the idea a bit and rather than use pierced paper I plumped for working with a stitched heart stuffed full of dried lavender.

Memories of last summer captured in a scented sachet.

Memories of last summer captured in a scented sachet.

I’d fastened it together with a basic blanket stitch ; The perfect base to add some crochet to, and armed with a fine mercerised cotton and a 1mm crochet hook I worked around the edge with a simple scallop design using double crochet.

I really didn't like the look of it at this stage!!!!

I really didn’t like the look of it at this stage!!!!

Although it was a fairly straightforward task to complete I really wasn’t happy with the overall look of the end product – It looked like something you’d pick up in the local Cath Kidston store – And I’m not a fan of mass produced goods that have been made in China at the best of times!!!!!

Still, this was only a practice run in preparation for the bunting that I plan to make in a few weeks time…….. I added beads and then felt a bit happier……

I think I can just about live with it now ;)

I think I can just about live with it now ๐Ÿ˜‰

I’m going to hang this on one of my crochet covered coathangers in the camper van wardrobe – Not my favourite make in the whole world but as a trial run for adding a crocheted edge to something it’s worked out quite well ๐Ÿ˜‰

Maybe I need to hurry up with making the actual bunting itself and then have another go – Plenty of time for further experimenting I guess…………..

Until next week – Happy Crafting Folks!!!!! :0)

I think in hindsight that this week’s offering should have been entitled, ‘The Dick & Liddy Interlude’ or maybe, ‘When Chalk met Cheese’.

To be fair, this week’s highlighted craft and myself make for a couple of unlikely bedfellows; On the one hand you have the rather delicate, feminine and stunningly beautiful embellishment and decoration of parchment vellum, which is basically what pergamano is ……. and then you have me! And whilst countless people have chosen some rather well placed adjectives to describe my very good self over the years, I can honestly say, with a fair deal of certainty, ย that very few would have applied words such as delicate and certainly NEVER feminine! Stunningly beautiful… maybe…. but only ‘coz they’ve wanted a ride in the bus!

Parchment Craft - Pretty much everything I'm not!

So, after pulling my head out of the engine bay and scrubbing my hands with a nail brush and the best part of a tub of Swarfega for half an hour, I resolved to sit down and get to grips with acting ladylike and being sedate…. And I found it was a very hard thing to do!

Pergamano is all about using techniques such as embossing, perforating, stippling, cutting and colouring and it comes with it’s own range of tools needed for the task.
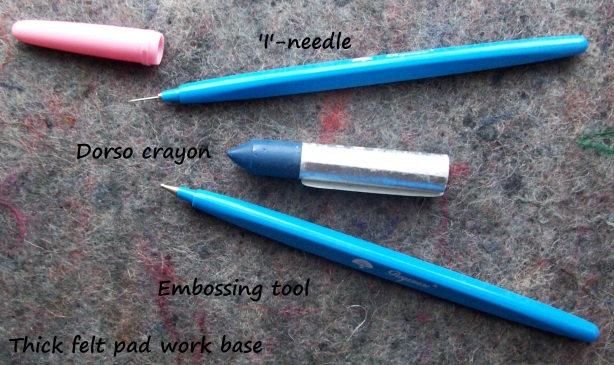
The tools for the job - lethal in the wrong hands!

I used just three; the embossing tool, an ‘I’ needle and a Dorso crayon. All work is done in reverse and once you’ve secured your piece of vellum in place with a few paperclips it’s a matter of ย ‘tracing’ out the chosen design using the various tools and techniques. It all works by applying pressure which stretches the semi-transparent paper until it becomes opaque and white, which, when turned over, has an embossed effect. Colour can also be added by using special crayons which you smudge and blend with your fingertips.

In fairness, I found it a bit fiddly and probably would have benefited from wearing my glasses as it was quite close work. But I persevered and came up with a vellum overlay for a Valentine’s card.

The fruits of my labour - Valentine's Card by Big Blue Bully Bus

I even managed to add a blush of blue to the heart – which ensued in a further bout of handwashing before I grabbed the camera to record my efforts!

Now that I’ve had a go I must say that I’m glad I’ve tried parchment craft; It is a bit of a faff though and I think if I decide to revisit it at a later date I’ll make sure that I dig out my glasses AND sit in a well lit place to do it – But for the moment it’s another craft I can strike off of my 52 week long list!

Next week sees the changeover to the second theme of the year – Jewellery; And I’m looking forward to the challenges that that will present already ๐Ÿ™‚ I’m going to start the proceedings with some bead making so if you want to join in you’ll need to collect some felt scraps, a beading needle, thread, seed beads, a skewer and a pair of scissors.

Happy crafting! xx