Posts Tagged ‘tutorial’

So it’s the second instalment of my weekly dip into all things Pinterest & tutorialwise and this week I fell in love with a batch of heart themed goodies………..

This bunting design won hands down for me!

This bunting design won hands down for me!

There’s oodles of stuff dedicated to Valentine’s Day at the moment but the outright winner for catching my eye and making me want to pick up a crochet hook and get started straight away was this marvellous bunting tutorial from Jam Made Studio – You can find the instructions here: http://jammadestudio.blogspot.com.au/2013/03/crochet_17.html

I’ve decided that I’ve GOT to have some for my shed………. and then maybe a little span in the camper van might look quite nice………… Son 2 mentioned that he might want some to present to his girlfriend as a Valentine’s gift…….. the possibilities for creating string after string may well be endless!

So I’ve made a start; Should keep me quiet for a bit………I’ve chosen shades of brown and grey for the shed and sorted out an appropriate colour palette of yarns to complement the bus interior. Son 2 will be consulted shortly as to what his requirements may be……. Yes! I think I may be very quiet for a day or so 😉

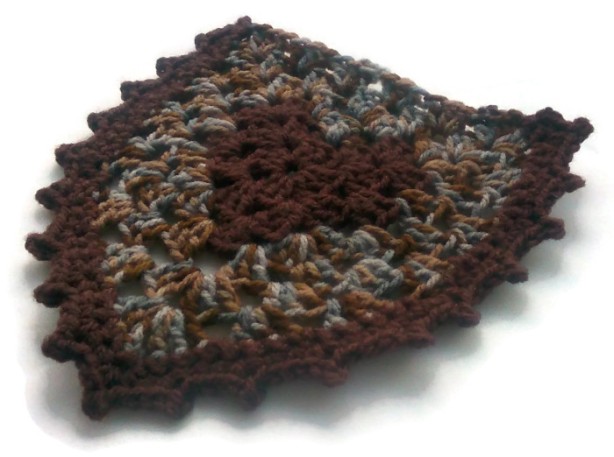
The first pennant for the shed is in the bag - Just another five or six to make and the job's a good 'un!

The first pennant for the shed is in the bag – Just another five or six to make and the job’s a good ‘un!

Oh well! Time to start working on another pennant – Bunting won’t make itself I suppose…….

Happy Crafting Folks!!!!

Whilst my wrist and the dreaded carpal tunnel syndrome continues to be a bit of a problem I’m determined to not let it interfere any longer in my ’52 crafts in 52 weeks’ odyssey. I think a rough tally has revealed that I’m about 7 weeks and nearly two themes behind at the moment; Not good, but I’m sure I will catch up eventually……..

So – a little project tutorial to get me back on track this week which addresses the August theme of ‘Fibre’. Have you got your knitting needles at the ready? Let’s begin……

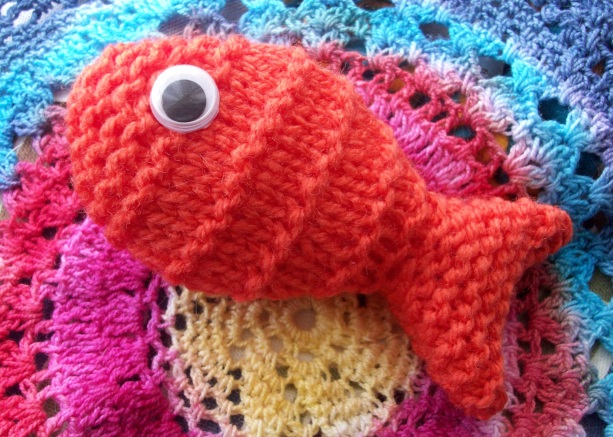
Instructions for making a simple version of my knitted fairground fish – Hurrah!

For this project you’ll need a pair of 4mm needles, some DK weight yarn, a pair of safety google eyes, BS standard toy stuffing and a large darning needle.

Start by casting on 15 stitches and knitting 4 rows of garter stitch (every row is a knit row).

Continuing in garter stitch, decrease at each end of the next and every alternate row until you are left with a total of 7 stitches.

Purl 7 stitches in the next row – from this point we will be continuing in stocking stitch for the main body of the fish (so it’s knit a line, purl a line from here).

Increase at each end of the next, and every alternate row, until you have 15 stitches.

Continue in stocking stitch without any further shaping for the next 9 rows.

Now we’re going to go back to garter stitch – so we’ll be knitting every row from here. Decrease at each end of this, and every alternate row until you have three stitches.

To finish, knit these three stitches together and fasten off. Repeat the whole process again for a second fish shape.

When both pieces are complete, position the safety eyes, sew together inside out, leaving the tail end open ready for turning and stuffing.

Turn the right way round – remember, it can be a bit of a squeeze at the tail as it’s only 7 stitches wide! Stuff lightly – the blunt end of the knitting needle is a great aid in helping to complete this task. Oversew the ends of the tail together and tie off, weaving in any loose ends.

I like to add a little bit of fishing line to the central back of my fish and display them suspended in little plastic bags – just like fairground fish. Ultra cute and very quick and easy to make!

Please feel free to use this tutorial to make your own fairground fish but remember to acknowledge the designer should you choose to do so. My fairground fish design is ACID protected with detailed paperwork and images to support each stage of production – so to avoid legal action please do not attempt to sell the pattern or design as your own 😉

My first appearance in ‘Craftseller’ magazine 🙂

I’ve been celebrating having a few more moments of fame over the last few weeks…….. as I’ve had a quick mention in ‘Craftseller’ magazine; Blink and you’ll miss it though!

Anywhoo, back to Earth and another quick make for this week’s post – Fabric Flower Hair Barrettes.

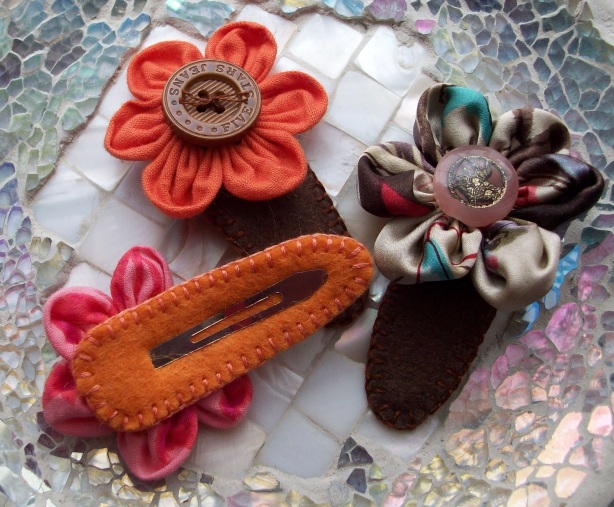
Felt clad flower barrettes by Wulli Bulli (aka The Big Blue Bully Bus).

This is another one of those projects that doesn’t take too long to complete and is great for using up any scraps of fabric and felt that you may have lying around. You will need: a needle and thread, scraps of wool felt, a vintage button, a blank snap fastening hair barrette, 6 small circles of lightweight fabric, sharp scissors and a marker pen.

It’s time to use the Sizzix machine again and blow the dust off that ‘Circles’ die 😉

Start by making your flower; Fold a fabric circle in half and place a running stitch close to the outside edge.

When you pull the thread the fabric will gather in gentle folds to form a petal shape.

Repeat this step another five times in total before gently pulling the thread tight to form each of the flower petals. Secure in a ring with a few stitches.

A few stitches at the end will form the ring centre of your fabric flower.

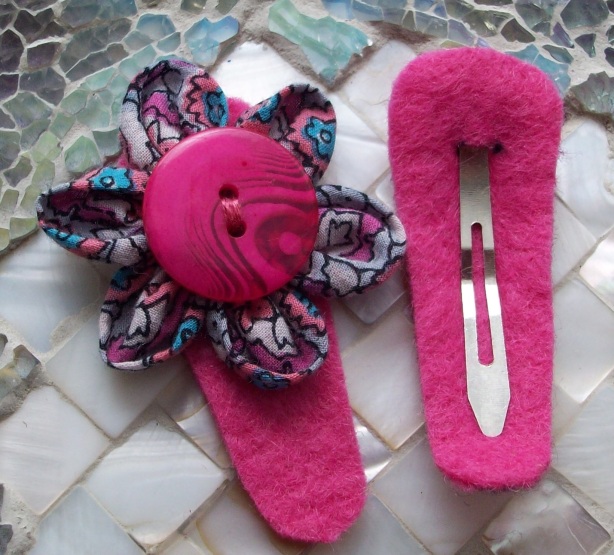
Now we’re going to make the felt cladding……. start by tracing an outline around the blank barrette – make this larger so that you have space to stitch around the outer edge.

Don’t worry about the pen marks – they’ll be hidden on the inside of your work.

Cut out two identical pieces of wool felt; make a little slit in one piece to feed the snap mechanism through.

Mark where to make the hole for the snap mechanism with two little dots – use sharp scissors to make a little slit and then feed the snap through.

Attach your fabric flower to the other piece of felt using a few concealed stitches. Sew a button in the centre to hide away any raw edges.

Nearly there!

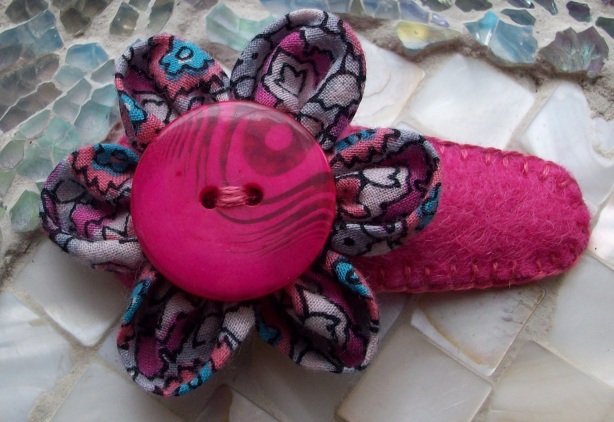
Now all that needs to be done is to sew the two halves together; I use a blanket stitch but, like last week, it’s up to you as to which stitch you ultimately decide to use. Just remember to work all the way around so that the barrette is safely clad in its little felt overcoat. Finish off with a knot hidden under one of the petals.

In just a few hours you can make a garden full of these!

These barrettes are great to use on even the finest hair as the felt cladding offers extra protection from the hard metal edges; And they’re brilliant for babies too!

Happy Crafting Folks! 😉

Biff – Bully of the Bus – All dressed up to celebrate May 4th in his very own ‘Yoda’ costume!

It’s Star Wars Day! It’s also the start of another month and a new theme of ‘Sewing’.

Just a fairly quick blog post this week I’m afraid……… With a quick idea for a keyring/bag charm with a nice floral theme ……..

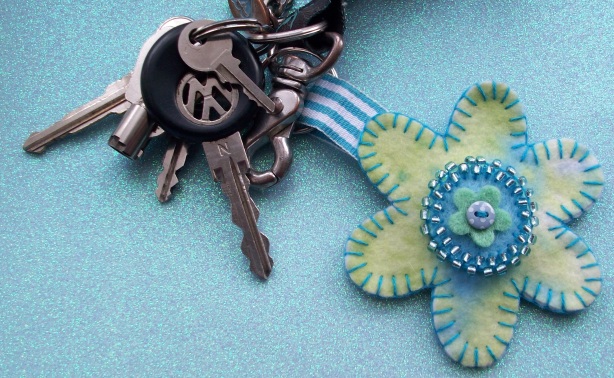
The Bully Bus Keyring – With the usual over the top beading and extra floral details!

So, armed with a few bits and pieces and my trusty Sizzix machine, here’s how to make that quick keyring/bag charm……

You’ll need something sharp to cut the thread with too – a light sabre might be a suitable weapon of choice today 😉

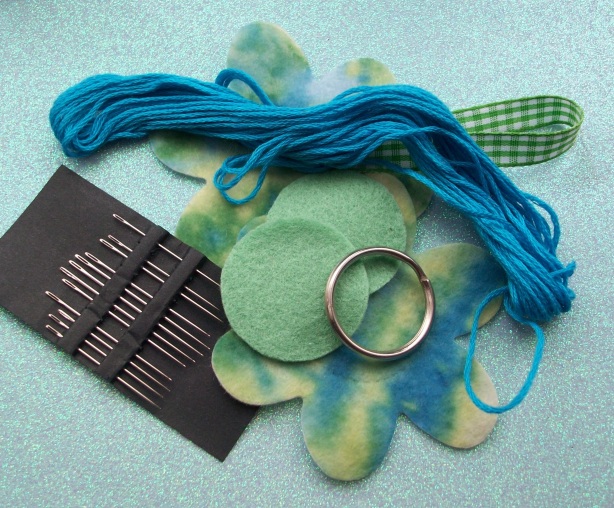
You will need:

Pieces of wool felt in two contrasting colours to make a couple of diecut flowers and centre circles – I’ve used the standard Sizzix ‘Large Daisies’ and ‘Circles’ dies to make mine;

Embroidery silk – two strands used together seems to work best for me but I’ve used three for clarity in the photographs;

A sewing needle;

Coordinating ribbon;

Keyring finding.

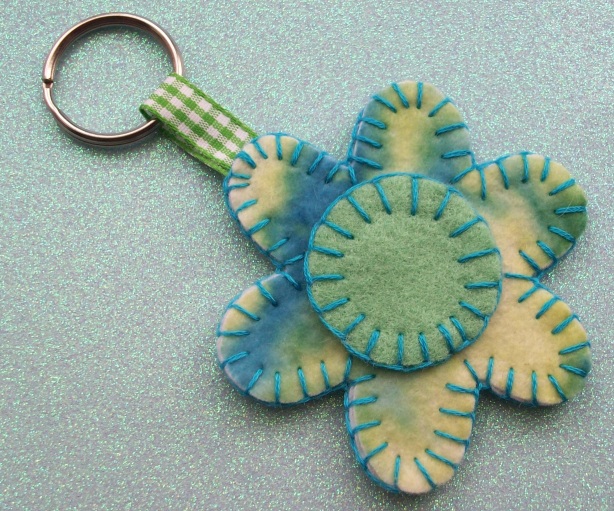
Firstly, start by sewing your centre circle in to place – I prefer to use a blanket stitch for this but you could try experimenting with either running stitches, back stitches, chain or whip stitching. It’s kind of up to you and your personal preference or level of sewing expertise really. Whatever you decide upon, you’ll need to repeat it once more for the second flower too.

Use a simple blanket stitch to attach the flower centres.

Here’s a quick link to an easy tutorial on YouTube if you’re unsure about blanket stitch – a quick search will reveal similar tutorials for the other methods I’ve mentioned too: http://www.youtube.com/watch?v=eXkSE2TTF4s

Next, take a short length of ribbon – about 15 cms is fine. Thread through the base of you keyring finding, fold in half and secure with a few stitches.

Make a couple of quick stitches to secure the ribbon…… before sandwiching in between the two flower pieces.

Place your ribbon in between the two, back to back, flower pieces and sew together using your desired method of stitching. Top Tip: If you find that your embroidery floss starts to tangle or knot, rub your thumb and forefinger up and down either side of your nose a few times and then slide them down the thread once or twice – it’s an old wives trick that’s guaranteed to work wonders but possibly not advisable if you’re wearing copious amounts of make-up!

Finish by making a little knot and then ‘burying’ the end of your thread in between the layers of felt.

Join the two sandwiched flower pieces together using a blanket stitch.

Voila! A finished item that’s been hand sewn by your very good self; How easy was that?

May the 4th be with you in your crafty sewing adventures this week and be careful with those light sabres!  😉

A mega quick offering this week I’m afraid, as things have got very busy again at Bully Bus HQ 😉

And this time I’m going to show you a quick way to make perfect pom poms with another gadget from my crafting arsenal. It beats cutting out little cardboard circles like folks used to do back in the Seventies and can also be very therapeutic!

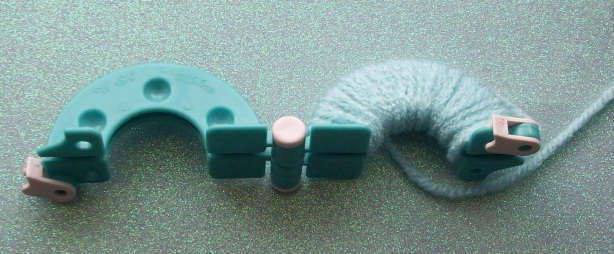
First you’ll need a pom-pom maker and some wool.

My pom-pom makers come in two identical hinged pieces – one half with holes and the other with knobbly bits. Line them up as shown with opposite sides facing each other.

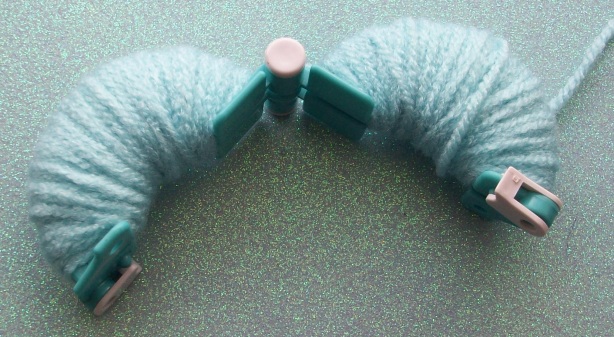
Start wrapping the wool round.

Keep going until both sides are well wrapped.

Trim the end of wool to leave a short tail. Close the hinged pieces together and use the little white clips to fasten everything in place.

There’s a little ‘channel’ running between each half of the pom pom makers – Use this as a guideline for cutting through the wrapped wool.

Work all the way round. Cut a length of yarn to secure everything in place – use the cutting channel as a guideline again for where to bind and tie this.

Release the little white clips and ease the pom pom out by opening each hinged piece and removing.

Give the pom pom a little shake to help fluff it up. You may find that there are a few uneven ends – You’ll need some sharp scissors to give it a little haircut and even it up if it needs it 😉

My pom pom still needs a bit of trimming to make it perfectly spherical – then I need to make a further eight exactly the same, plus one that’s slightly larger.

Why? You may ask. Well, this month’s theme is all about retro crafts and I did say at the beginning that I wanted to make something nice for my home and something equally stunning for my camper van. So…….. a crocheted loom flower throw for the bus (which I’m tackling as and when I get any spare time), and something stunning from my little ‘Bazaar Time’ booklet (circa 1960’s) for my home.

Something stunning with pom-poms? Take a closer look at the cover and you’ll see it 🙂

No?

A pom-pom poodle toilet roll cover! The epitomy of retro style and taste; I’m going to have the best looking bathroom in the UK when it’s finished! Now it’s just a matter of finding the time to get it done as I’m currently busy crocheting chicken egg cozies and amigurumi bunnies for Easter. Maybe I should have plumped for the pom-pom chicken design that’s also featured in my ancient crafting booklet instead ……. a cool idea for something to do with the kids methinks. Oh well………Happy Crafting!

Continuing with my retro crafts theme, this week I thought I’d introduce you to a few more cool crafting gizmos and show you how to make quick and easy Suffolk puffs.

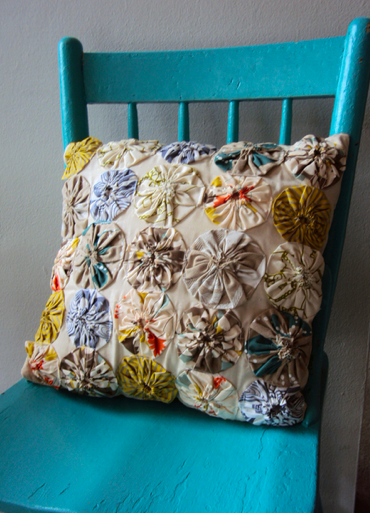
Classic Puff Patchwork Cushion

Sometimes referred to as ‘yo-yos’, a Suffolk puff is a little gathered circle made from a scrap of fabric and as such can be a brilliant stash buster when you need to use up excess resources. Traditionally, they were used in patchwork and quilting where they were joined together, edge to edge, and were incredibly popular in the thirties, forties and fifties, when out of thrift and the necessity brought about by hard times, people would use up every last scrap of fabric and recycle all their clothing in the ‘make do and mend’ culture.

Patchwork and puff perfection.

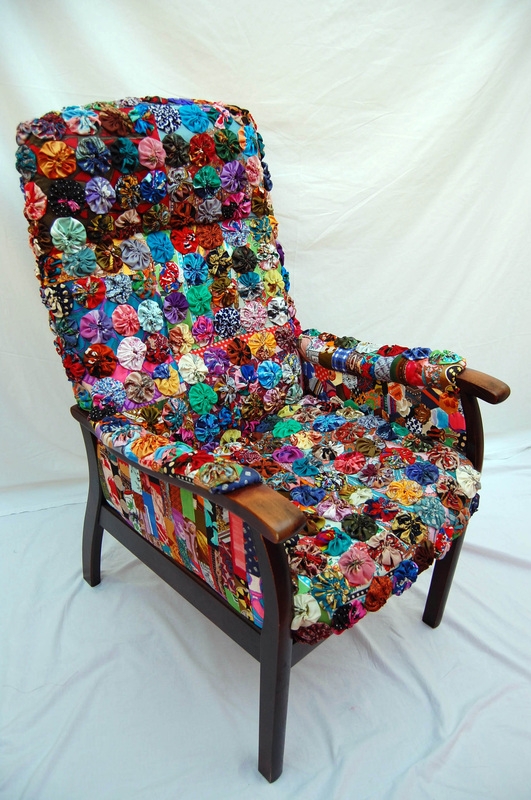
These days, with a resurgence in the popularity of all things patchwork, Suffolk puffs are once again in vogue and are often used  as embellishments, but also feature strongly as decorative elements in homewares, soft furnishings and even clothing.

Bjork sporting a coat made entirely of Suffolk Puffs.

They’re incredibly easy to make – particularly with a yo-yo maker or two to hand, and are also fairly portable which is why I often end up taking a stash of fabric circles, needle and thread on the road with me during the summer.

This week’s collection of gizmos and gadgets.

So let’s get down to the knitty gritty of how to make some…

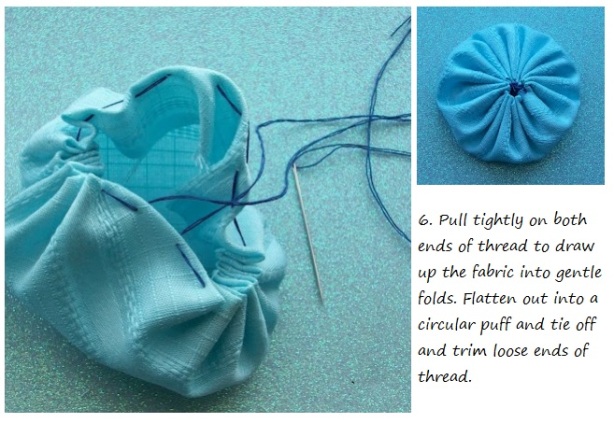
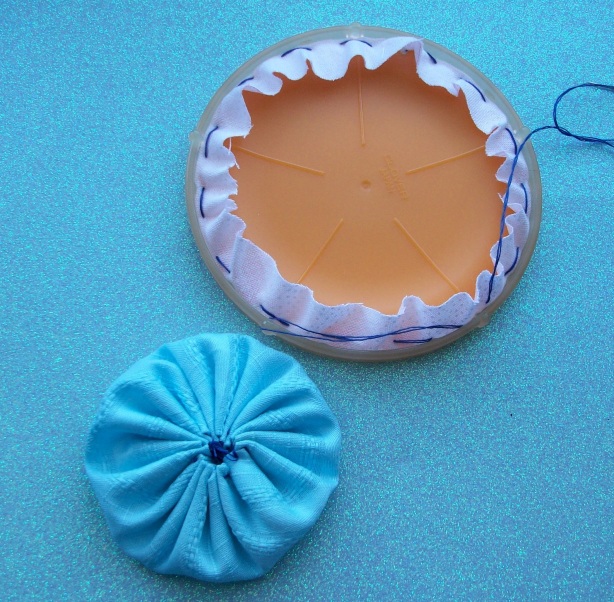
We’ll start by using a couple of yo-yo makers which are basically circular discs with sewing guidelines. I’m using two different sizes with diameters of 45 and 60 millimetres and my fabric of choice is a selection of lightweight cottons.

7. Repeat the whole process again, using contrasting fabric and a smaller yo-yo maker.

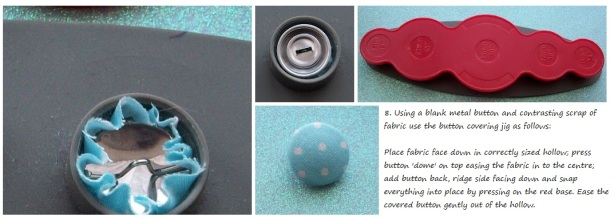
Now it’s time to make a covered button before finally assembling each element.

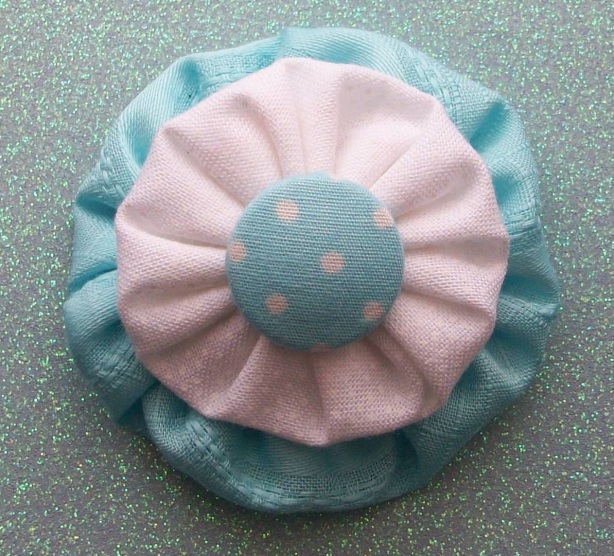
9. Stack the two puffs and use a few stitches to join them together; add the fabric covered button as a finishing touch before stitching on a brooch back and Voila! A lovely brooch that would make a pretty gift for Mother’s Day 🙂

A really pretty, hand crafted gift for Mum!

Suffolk Puffs are great to use as embellishments. Why not invest in a couple of yo-yo makers and have a go at making some yourself? You’ll soon become hooked!

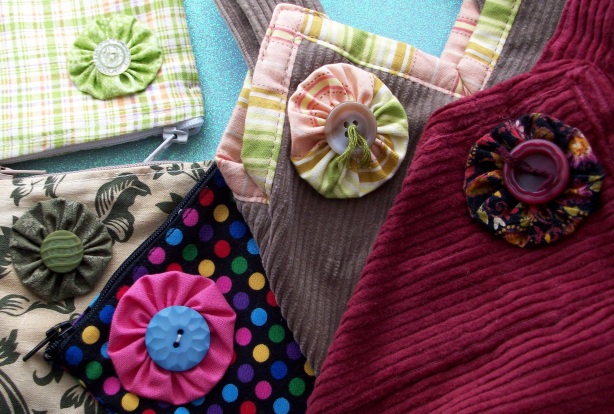
Puffs a’plenty on bags and purses – great little gifts to give to family and friends 😉

If you want to join in with my crafting adventures next week it might be wise to start sorting through your wool stash now. Until then, Happy Crafting!

It’s March! A new month and a new theme; Retro crafts will be my focus for the next few weeks where I’ll hopefully introduce a few cool gizmos that’ll make your crafting life much easier as well as creating at least one really nice accessory for my camper van and the odd, gorgeous household item in the process!

Let’s kick the proceedings off with something steeped in 70’s nostalgia – Flower Looms.
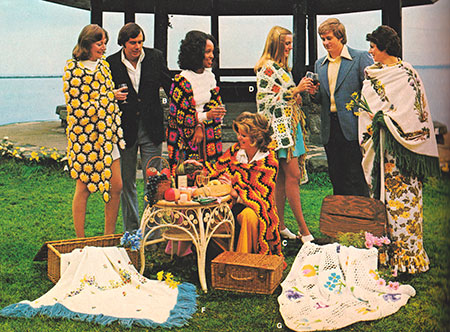
All the rage in 1974!

For the best dressed gal in town – A Flower Loom Stole

How positively delightful! Floral, feminine and flouncy – I’m sure you’ve probably come up with a few f-words yourself already 😉 Let’s look at a few more examples and really get to grips with this whole flower thing……
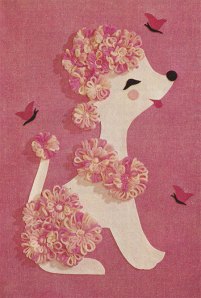
This screams out to be made and take pride of place in my house somewhere.

I’m taking bets that something like this ends up in Kath Kidston!

I could actually see this sort of thing coming back in a big way in 2012! I feel a summer collection coming on…!

RONCO – Bringing gizmos and gadgets to the crafting world. May the Lord bless ’em and keep ’em safe!

Right! That’s enough of that – Here’s a tutorial…..

First of all you’ll need a flower loom; I’m using one with movable pegs as my weapon of choice where different configurations will yield different styles and sizes of flowers.
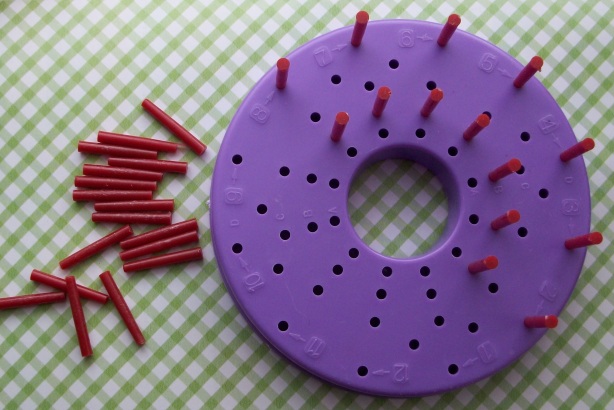
Loom with movable pegs – Set up in a kind of Stonehenge configuration.

Look closely and you’ll see that it’s numbered at the edge – This shows you where to start and which direction to take.

Now are you ready?

1. Take a ball of DK weight yarn in the colour of your choice and grip the end firmly between your fingers. Pull the yarn out to arms length, and measure a tail that reaches from your extended arm to your nose. It’s important to remember to do this – Your going to use this ‘tail’ to secure everything in place when we reach stage 4.

2. Starting at the peg nearest position one of the outer edge of the loom, wrap the yarn in a figure of eight loop between this and the corresponding outer edge peg on the other side. Do this about four times before moving on to the next set of pegs, repeating the process all the way round until you arrive back at the beginning.

So far, so good? Here’s a tip – Once you’ve started wrapping your yarn, pull that long tail through to the other side of the loom so that it doesn’t get in the way

3. Using a second ball of DK yarn in a contrasting colour, virtually the same process is repeated all over again with the inner ring of pegs. Please note that you don’t have to measure out an arm to nose length of yarn in this step – 6 inches of excess yarn is ample at this stage.

4. Now we’re going to secure everything in place. Thread the end of your tail of yarn through a nice big darning needle. Starting at peg one, bring the needle through from the back of the loom and in between the outer ‘petals’ of your flower and stitch in to the centre. Following the direction of the arrows, use a simple backstitch to secure all the wrapped yarn in to place.

5. Bringing the yarn through from the back of your work again we’re going to work one more round of stitches to make everything look pretty. But still using a backstitch, we’ll work over a span of three petals each time until we get back to the beginning.

6. The flower is pretty much complete – Just remove the pegs to release it from the loom.

7. Give your flower a little ‘fluff’ to release the petals. Thread any loose tails of yarn through to the back of your work and secure. Bury any ends in the centre of your flower.
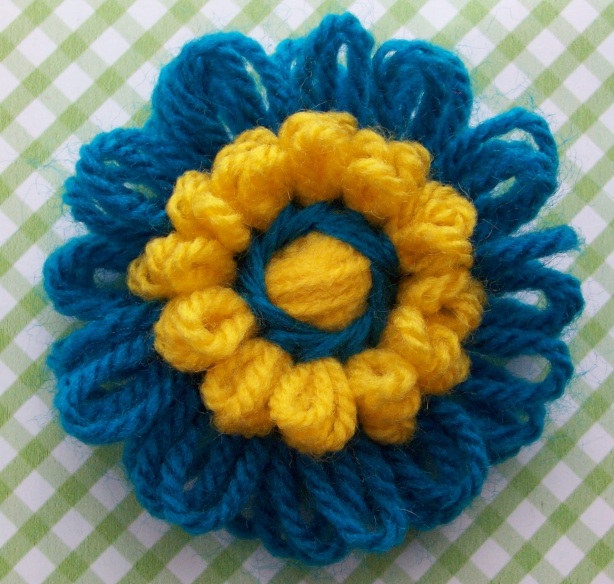
All done and dusted – Now I just need to make a small mountain of these to join together for my latest bed throw in the camper van!

Ain’t they lovely!

I’ve usually made them into quick brooches; Here’s one of my lovely nieces modelling a few from late 2010:

Poor Sash! Dragged all over the place to model for the Big Blue Bully Bus – This time it was just down the road from me at Kirkstall Abbey, Leeds. She’s a trooper, bless ‘er!

But this time, I’m going to make a huge stack of them to turn into a new bedspread for the bus! All thanks to the lovely lady behind knitting-and.com – http://www.knitting-and.com/small-looms/index.html and the oodles of hints, tips and inspirations she’s gathered together. She lives around and about the environs of Wollongong, Australia – possibly just round the corner from my lovely sister in law and her husband who love our Dak Dak (1963 splitty) to bits. Please take a few moments to visit her website if you can – it’s just brilliant!

Next week I’ll be introducing another gizmo that I think every crafter should have in their arsenal and also hopefully be giving you an idea for an ultra quick and easy to make Mother’s Day present – You’ll need a needle and thread and some scraps of fabric…… amongst other things. I’ll say no more,  I’m planning a trip out with the dogs and Mr Other Half in the bus before I spill the beans……. until then, Happy Crafting!
Wow! It’s already February and this week see’s the move into the second month’s theme of  ‘Jewellery’. And a very busy start to the month at Bully Bus HQ it has been what with early Spring cleaning and all; I was fearful that at one point I might not be able to squeeze this week’s offering in at all, but here it is – my adventures in beaded felt jewellery….

I love playing with embroidery silks and beads!

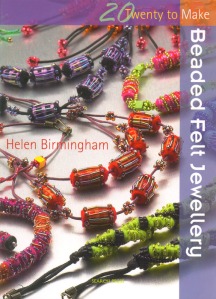
First of all, I have to say that I LOVE making little felt beads! The resulting treasures look great when incorporated into jewellery designs and are always a really big talking point when people spot me wearing them. They’re incredibly easy to make and there’s also a brilliant little book bursting with all the inspiration and instructions you’ll need to get producing them for yourself.

Beaded Felt Jewellery – Helen Birmingham

If  you haven’t got a copy of this inexpensive little book, and you feel after reading this blog that you’d like to include beaded felt jewellery in your own crafting repetoire, I would highly recommend popping along to your local bookshop, craft store or online at Amazon and make sure that you pick one up – ISBN-13: 978-1844483150.

Make sure you gather everything you need!

So…….. How to make some felt beads of your own. Hopefully you’ve gathered together some scraps of felt (the thin crafting type is easier to work with), some embroidery silks (although normal sewing thread is fine), a selection of seed and bugle beads, a sewing needle, some scissors and a bamboo skewer – make sure that you either cut the sharp end off, or cover it with a blob of  Blutack or piece of cork though; From painful experience I can’t tell you the number of times I’ve impaled myself with the air turning blue as a result 😉

Step 1: Cut yourself some strips of felt roughly 2.5 cms wide by about 8 cms long. Select some thread to match the colour of your felt – it doesn’t matter too much if it’s not exact.

Step 2: Take the bamboo skewer and wrap the felt strip tightly around it. Use a few stitches to secure the edges in place. I’ve used a contrasting colour to demonstrate – And don’t worry about being too precious at this stage as you won’t actually see this join when you’ve finished.

Wrap tightly then stitch to secure.

Step 3: This is where the fun begins! Choose some contrasting thread and using your needle, sew into the felt tube at one end to secure in place. Carefully wrap around the tube with the thread, making sure that both ends are tightly bound – otherwise the ends will flare out over time and the beads may look mis-shapen. Finish off with a little knot and bury this, along with the tail of you thread, inside the bead.

Bind well at each end to stop ‘flaring’.

Step 4: Securing fresh thread in your felt tube bead (back to the same colour you used in Step 1) you can now add your embellishments. I tend to start at one end and work randomly, stitching through from one side to the other each time to secure your seed or bugle beads in place. This will add strength to the structure of your bead and ensures maximum life expectancy when incorporated into jewellery pieces that are sure to be worn again, and again, and again….

To make life easy I’ve used size 8/0 beads; Size 11/0 will require more patience as not all will slip over the eye of the needle!

I like to add the beads in a random pattern – but neat freaks may differ in approach 😉

Step 5: Believe it or not that’s pretty much it! Repeat each step until you’ve got yourself a nice little selection of beads which you can then use in your own jewellery making projects. I tend to keep the beads on the skewer until I’m ready to use them and you’ll find that you can easily fit about six or seven beads to a skewer – just the right number to use for a bracelet!

So easy! And gorgeous when incorporated into your own designs 🙂

Yay! The finished product; Very nice – even if I do say so myself 😉

Next week I’m going to be having a go at more bead making – but this time with Polymer Clay. Wish me luck!