Posts Tagged ‘quality’

Biff – Bully of the Bus – All dressed up to celebrate May 4th in his very own ‘Yoda’ costume!

It’s Star Wars Day! It’s also the start of another month and a new theme of ‘Sewing’.

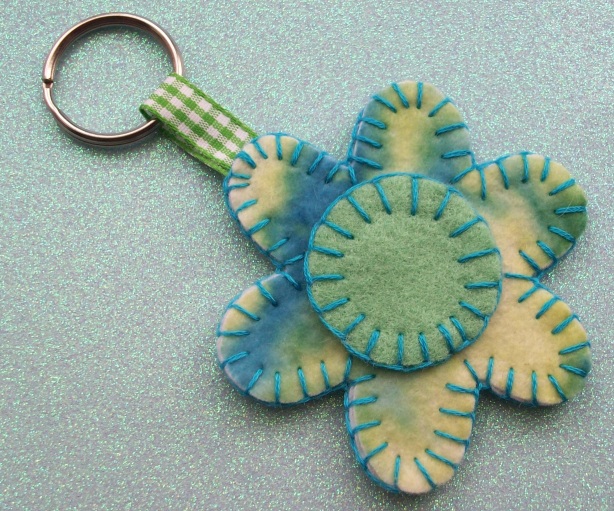
Just a fairly quick blog post this week I’m afraid……… With a quick idea for a keyring/bag charm with a nice floral theme ……..

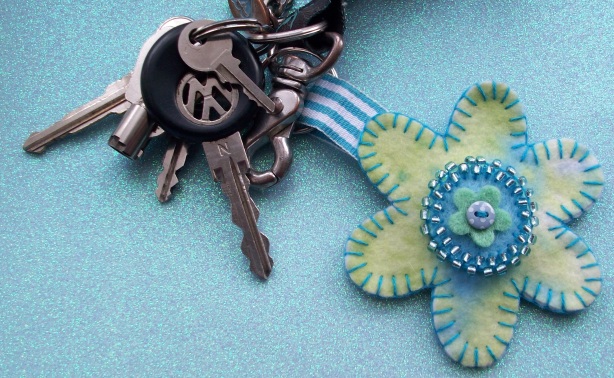
The Bully Bus Keyring – With the usual over the top beading and extra floral details!

So, armed with a few bits and pieces and my trusty Sizzix machine, here’s how to make that quick keyring/bag charm……
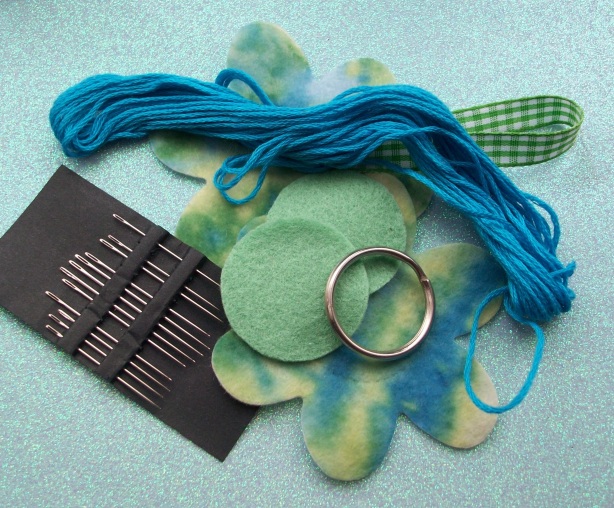
You’ll need something sharp to cut the thread with too – a light sabre might be a suitable weapon of choice today 😉

You will need:

Pieces of wool felt in two contrasting colours to make a couple of diecut flowers and centre circles – I’ve used the standard Sizzix ‘Large Daisies’ and ‘Circles’ dies to make mine;

Embroidery silk – two strands used together seems to work best for me but I’ve used three for clarity in the photographs;

A sewing needle;

Coordinating ribbon;

Keyring finding.

Firstly, start by sewing your centre circle in to place – I prefer to use a blanket stitch for this but you could try experimenting with either running stitches, back stitches, chain or whip stitching. It’s kind of up to you and your personal preference or level of sewing expertise really. Whatever you decide upon, you’ll need to repeat it once more for the second flower too.

Use a simple blanket stitch to attach the flower centres.

Here’s a quick link to an easy tutorial on YouTube if you’re unsure about blanket stitch – a quick search will reveal similar tutorials for the other methods I’ve mentioned too: http://www.youtube.com/watch?v=eXkSE2TTF4s

Next, take a short length of ribbon – about 15 cms is fine. Thread through the base of you keyring finding, fold in half and secure with a few stitches.

Make a couple of quick stitches to secure the ribbon…… before sandwiching in between the two flower pieces.

Place your ribbon in between the two, back to back, flower pieces and sew together using your desired method of stitching. Top Tip: If you find that your embroidery floss starts to tangle or knot, rub your thumb and forefinger up and down either side of your nose a few times and then slide them down the thread once or twice – it’s an old wives trick that’s guaranteed to work wonders but possibly not advisable if you’re wearing copious amounts of make-up!

Finish by making a little knot and then ‘burying’ the end of your thread in between the layers of felt.

Join the two sandwiched flower pieces together using a blanket stitch.

Voila! A finished item that’s been hand sewn by your very good self; How easy was that?

May the 4th be with you in your crafty sewing adventures this week and be careful with those light sabres!  😉

There’s something very soothing and lovely about a nice cup of tea; Particularly one that’s made using a teapot and some proper loose leaf as opposed to a couple of teabags.

A good cup of Rosey Lee is one of my vices, and whether I’m at home or on the road, a teapot is an absolute necessity; That, and an accompanying cozy of course – as it helps to keep the pot warm and prolongs the whole tea guzzling experience just that little bit longer 😉

I spotted this rather lovely example on the telly the other week……

How marvellous!

………And tracked it down as available to purchase from Debenhams; It looked like a must-have buy……….

However, on closer inspection I found that it’s part of a larger range of patriotic themed wares that go by the name of ‘Street Party’ and has been made to fit one particular teapot that’s shaped differently to mine. The label also reveals that it’s been made in China and imported in to the country – therefore not really flying the British flag and supporting the UK economy 😦 It was with a heavy heart that I kept my money in my pocket and walked away empty handed.

Never fear, thought I………I’ll make my own version – based on classic English design and using locally produced materials that boast bonafide British credentials.

So I dug out an old crafting pamphlet that had been produced in the seventies by a local company just up the road from me called ‘Robin’s’ (based in Guiseley, Leeds) and also selected a few balls of DK weight acrylic yarn made by Woolcraft (spun by Yorkshire craftsmen based over the valley in nearby Bradford). Game on!

21 classic knitting and crochet patterns using odd ounces of wool

The pattern I chose produces a fairly easy and quick to make piece of crochet – it’s pictured at the bottom of the front cover in a striped pink colourway with four matching egg cozies. I adapted it slightly to suit my own tension and also to fit my teapot properly; And I made further changes by choosing to continue the striped pattern from beginning to end, using just double crochet stitches throughout as opposed to a mix of double and half double stitches as indicated in the original pattern.

Quick to make and an easy to follow pattern using single crochet stitches.

The adapted pattern is as follows:
STRIPED TEA COZY
Materials:
3 balls double knitting yarn in Red, White & Blue
3.75 mm crochet hook
Make two pieces:
With 3.75mm hook and Blue make 37 ch. Work 1 dc into 2nd ch from hook, 1 dc into each ch to end, turn with 1 ch.
Work in dc to end, turn, break the Blue and join in White, 1 ch then work in dc to end, turn with 1 ch.
Work in dc to end. Turn, break White join in Red, 1 ch then work in dc to end, turn with 1 ch.
Work in dc to end, turn, break Red and join Blue, 1 ch then work in dc to end, turn with 1 ch.
Continue with striped pattern to 5 ins from beg.
Next row, working in dc, and continuing with striped pattern, dec 7 sts evenly over the next and each of the following 3 alternate rows.
Work 1 row. Take 2tog to end of row, fasten off.
Join both pieces together leaving openings for the handle and spout.
Press lightly on wrong side using a warm iron over a damp cloth.
PLEASE NOTE that permission has been granted to share this pattern and no copyright has been breached.

A BBBB design originally intended for use with a bead loom but also works well for cross stitch.

For a special finishing touch I used the Union Jack chart I published in ‘Adventures with an Indian Bead Loom‘ to create a small piece of cross stitch that I layered up with a few squares of felt and then hand stitched in place with a double edge of clear seed beads. And it’s all finished off with a coordinating pom pom (please see last week’s blog for instructions on how to make one).
I think it looks lovely! And a perfect fit for my teapot; a fine example of retro kitsch.
Must be time for a well deserved cuppa now…………
Next week sees my final delve into retro crafts before entering a new theme and a new month – time for a look at one more gadget methinks. Until then, Happy Crafting!

Wow! It’s already February and this week see’s the move into the second month’s theme of  ‘Jewellery’. And a very busy start to the month at Bully Bus HQ it has been what with early Spring cleaning and all; I was fearful that at one point I might not be able to squeeze this week’s offering in at all, but here it is – my adventures in beaded felt jewellery….

I love playing with embroidery silks and beads!

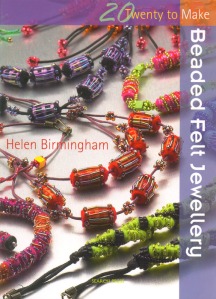
First of all, I have to say that I LOVE making little felt beads! The resulting treasures look great when incorporated into jewellery designs and are always a really big talking point when people spot me wearing them. They’re incredibly easy to make and there’s also a brilliant little book bursting with all the inspiration and instructions you’ll need to get producing them for yourself.

Beaded Felt Jewellery – Helen Birmingham

If  you haven’t got a copy of this inexpensive little book, and you feel after reading this blog that you’d like to include beaded felt jewellery in your own crafting repetoire, I would highly recommend popping along to your local bookshop, craft store or online at Amazon and make sure that you pick one up – ISBN-13: 978-1844483150.

Make sure you gather everything you need!

So…….. How to make some felt beads of your own. Hopefully you’ve gathered together some scraps of felt (the thin crafting type is easier to work with), some embroidery silks (although normal sewing thread is fine), a selection of seed and bugle beads, a sewing needle, some scissors and a bamboo skewer – make sure that you either cut the sharp end off, or cover it with a blob of  Blutack or piece of cork though; From painful experience I can’t tell you the number of times I’ve impaled myself with the air turning blue as a result 😉

Step 1: Cut yourself some strips of felt roughly 2.5 cms wide by about 8 cms long. Select some thread to match the colour of your felt – it doesn’t matter too much if it’s not exact.

Step 2: Take the bamboo skewer and wrap the felt strip tightly around it. Use a few stitches to secure the edges in place. I’ve used a contrasting colour to demonstrate – And don’t worry about being too precious at this stage as you won’t actually see this join when you’ve finished.

Wrap tightly then stitch to secure.

Step 3: This is where the fun begins! Choose some contrasting thread and using your needle, sew into the felt tube at one end to secure in place. Carefully wrap around the tube with the thread, making sure that both ends are tightly bound – otherwise the ends will flare out over time and the beads may look mis-shapen. Finish off with a little knot and bury this, along with the tail of you thread, inside the bead.

Bind well at each end to stop ‘flaring’.

Step 4: Securing fresh thread in your felt tube bead (back to the same colour you used in Step 1) you can now add your embellishments. I tend to start at one end and work randomly, stitching through from one side to the other each time to secure your seed or bugle beads in place. This will add strength to the structure of your bead and ensures maximum life expectancy when incorporated into jewellery pieces that are sure to be worn again, and again, and again….

To make life easy I’ve used size 8/0 beads; Size 11/0 will require more patience as not all will slip over the eye of the needle!

I like to add the beads in a random pattern – but neat freaks may differ in approach 😉

Step 5: Believe it or not that’s pretty much it! Repeat each step until you’ve got yourself a nice little selection of beads which you can then use in your own jewellery making projects. I tend to keep the beads on the skewer until I’m ready to use them and you’ll find that you can easily fit about six or seven beads to a skewer – just the right number to use for a bracelet!

So easy! And gorgeous when incorporated into your own designs 🙂

Yay! The finished product; Very nice – even if I do say so myself 😉

Next week I’m going to be having a go at more bead making – but this time with Polymer Clay. Wish me luck!

OK. It’s week one of my take on the ’52 crafts in 52 weeks’ project and I’ve chosen to start with something I’m fairly familiar with; albeit a bit rusty at the moment.

This month’s theme is of course ‘Paper’, so I’m setting the ball rolling with a spot of decoupage. For those of you who may never have heard of this before, it’s basically centred around the creative art of cutting out, assembling, pasting and (sometimes) varnishing paper to make decorative objects. With it, you can give furniture a new boost of life, create fabulous greetings cards, 3D pictures etc and generally make all sorts of wonderful stuff for your home .

Fantastic results can be obtained fairly easily and it’s also a great activity to carry out with children when the weather’s vile outside and they’re climbing the walls inside 😉

Here’s a few examples of it in it’s simplest form, but you can make it as complex as you wish.

Bangles courtesy of Becky Decoupage 

Mickey Mouse Side Table by Bombus

In the past, when I’ve had a go at decoupage, I’ve tended to use it to make 3D pictures and greetings cards. This involves using multiple repeat images to build up layers which are then stuck one on top of the other. In each layer, you focus on different elements of the image and cut them out to build up the final piece – Silicone glue, or foam sticky pads also help to give depth to the image and this really helps to make it ‘pop out’ from the page once everything is stuck in place.

Sound difficult? Opt for a technique such as pyramage and it’s simplicity itself!

Here I’ve cut a series of graded rectangular pieces from repeat images of a gorgeous flower powered bug and used sticky pads to hold everything in place and give a raised pyramid effect.

Flower Power Beetle by Big Blue Bully Bus

And here, I’ve used graded squares which gently twist round to create a slightly different effect.

Twisted Pyramage VW Beetle by Big Blue Bully Bus

Here’s an example of a more traditional piece of decoupage that I’ve just created – you can buy ready printed, pre-cut sheets if you want but I prefer to make my own. Only thing is I still need to find time to cut the pieces out and stick it all together!

Email me at bigbluebullybus@yahoo.co.uk and I’ll mail the full PDF to you if you’d like to have a go at making it too 😉

VW Bug PDF by The Big Blue Bully Bus

Phew! Blog post and first craft nearly over – just another 51 to go!!!!

Finally, here’s a little list of things that I’ve copied from Wikipedia that you might find useful if you want to have a go at decoupage for yourself:

  • Something to decoupage onto. Examples include: furniturephotograph albums, plates, ceramics, shelving, frames, mirrors.
  • Pictures to decoupage with. These can come from myriad sources: newspapersmagazinescatalogues, books, printed clip art, wrapping paper, greeting cardsfabrictissue paperlace.
  • Cutting utensil. Scissors, craft knife (X-Acto) or razor blades can be used.
  • Glue. Standard white glue works best if it is diluted with a little water. Specialty glues can be found in most crafting stores.
  • Smoother. Popsicle sticks work well. A brayer is a specialized tool like a miniature rolling pin designed to help remove wrinkles, remove excess glue and smooth pictures.
  • Glue spreader. Many things around the house can be use for this: cotton swabspaint brushes, sponges.
  • Rags, sponges, tissue paper to help wipe up glue and other clean up.
  • Sealer. Glue or other decoupage medium can be used as a sealer. Alternatively, polyurethane, spray acrylic or other lacquers are usually used.

Why not have a go yourself? It’s fairly inexpensive and great fun!